Version 5.0.1 - CSP 6.43.0 - UE 5.7
This article will guide you through a Reflection Capture workflow that uses Scene Capture Cubes. Alternatively, you can follow this guide, which demonstrates how to create an Entity with OKO Reflection Component directly.
Reflection Captures are an important part of creating a level in OKO that supports materials that have the appearance of being reflective. By creating a Reflection Capture from a corresponding level in Unreal, the visual fidelity of the reflective appearance of materials in an OKO space is increased, compared to using a generic Reflection Capture.
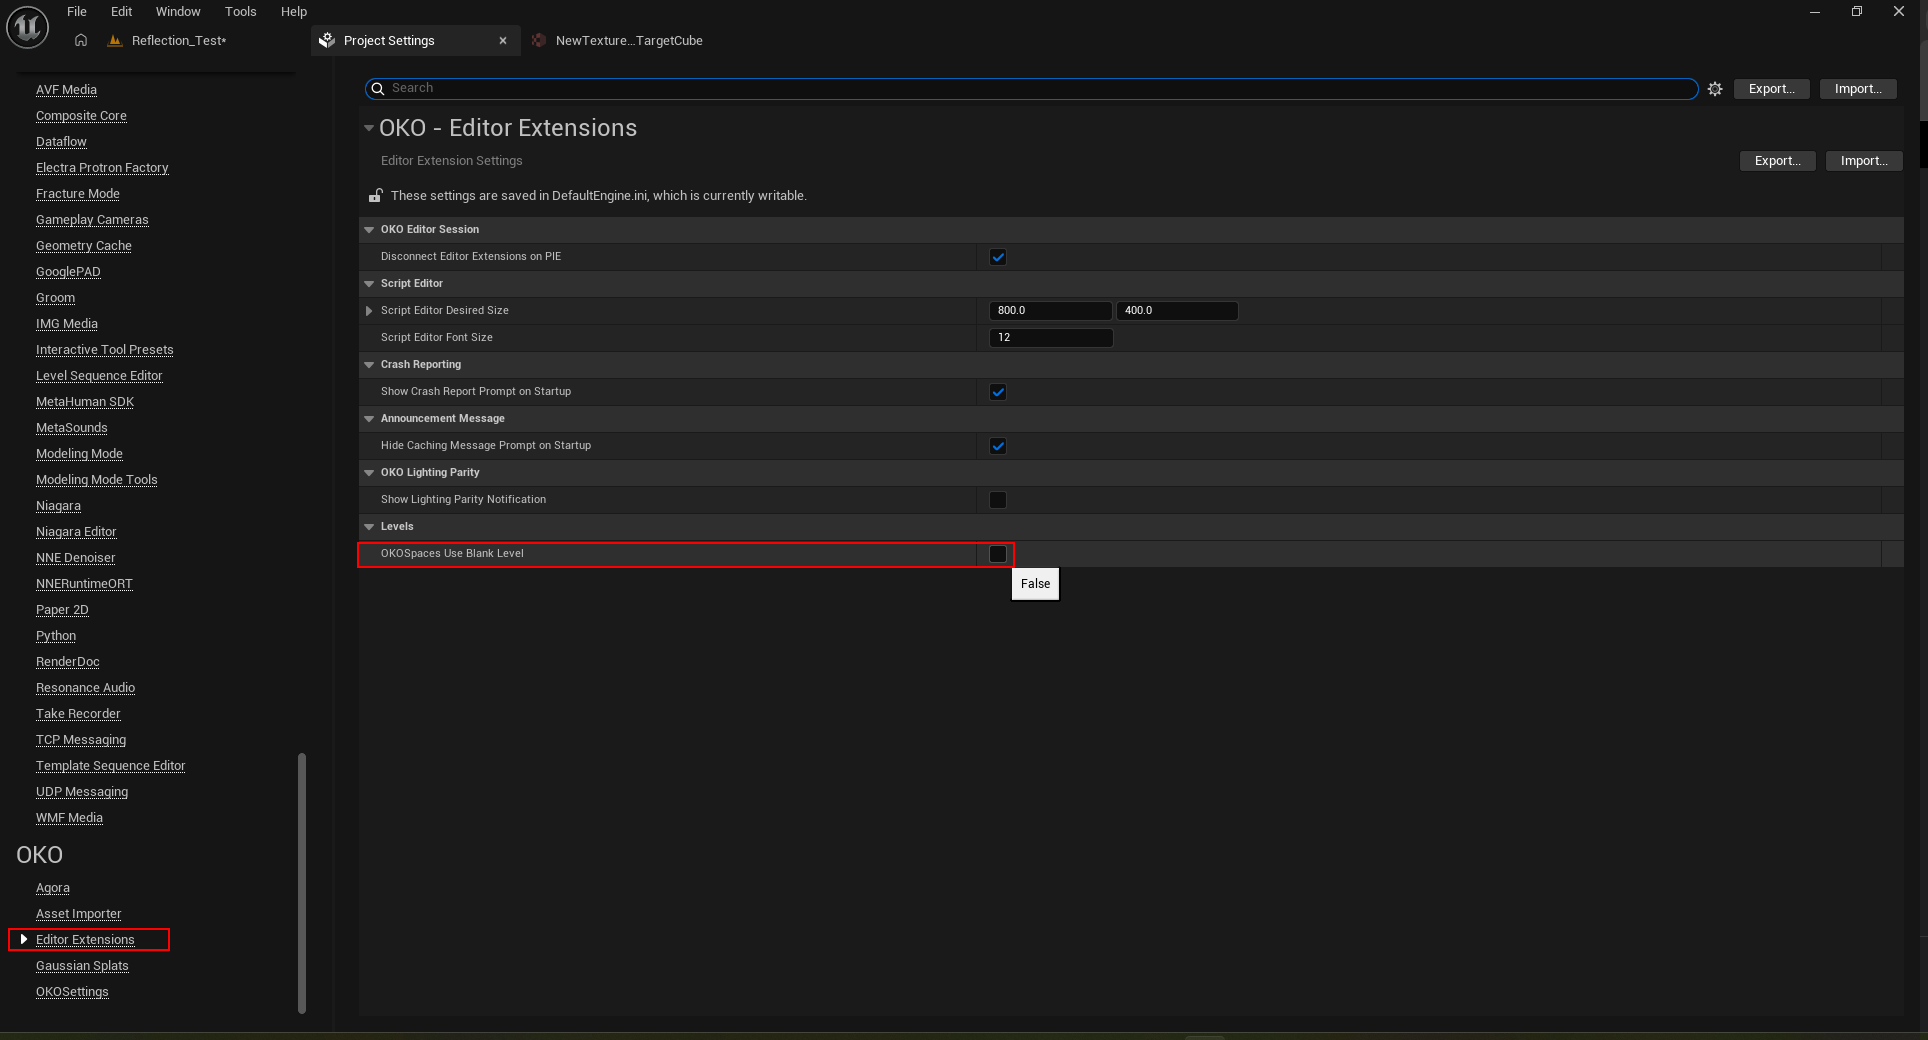
Note that, by default, the OKO plugin now keeps unreal actors and OKO space entities separate. This means that to follow this workflow you will need to disable this setting in the “Project Settings” in the Unreal Editor.
Instructions
The Unreal documentation states that “Scene Capture Cubes capture a fully dynamic cube map from their location…This requires a Cubemap Render Target to actually capture to, and then that Render Target can be used as a texture within any Material.”
The Cubemap generated by using this Scene Capture Cube workflow can be used for reflections or 360 screenshots in general.
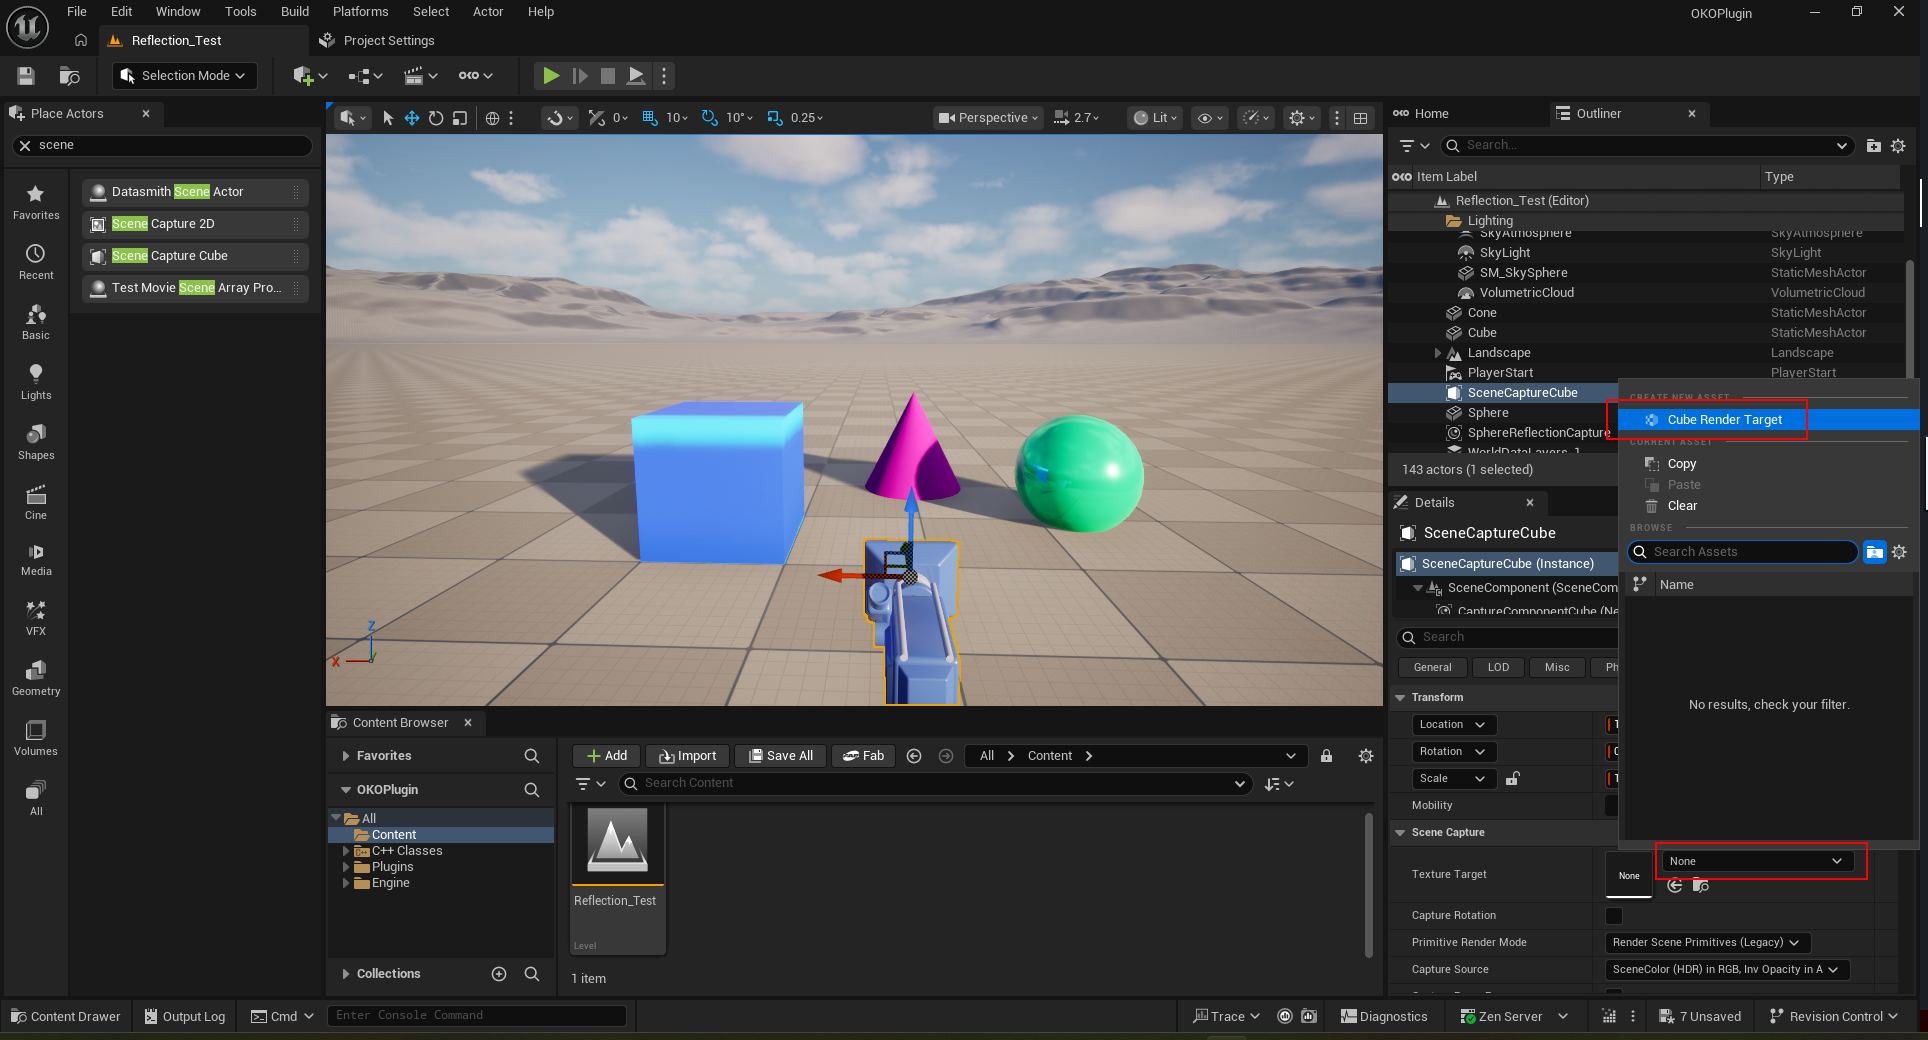
In the Place Actors Tab, look for “Scene Capture Cube”.
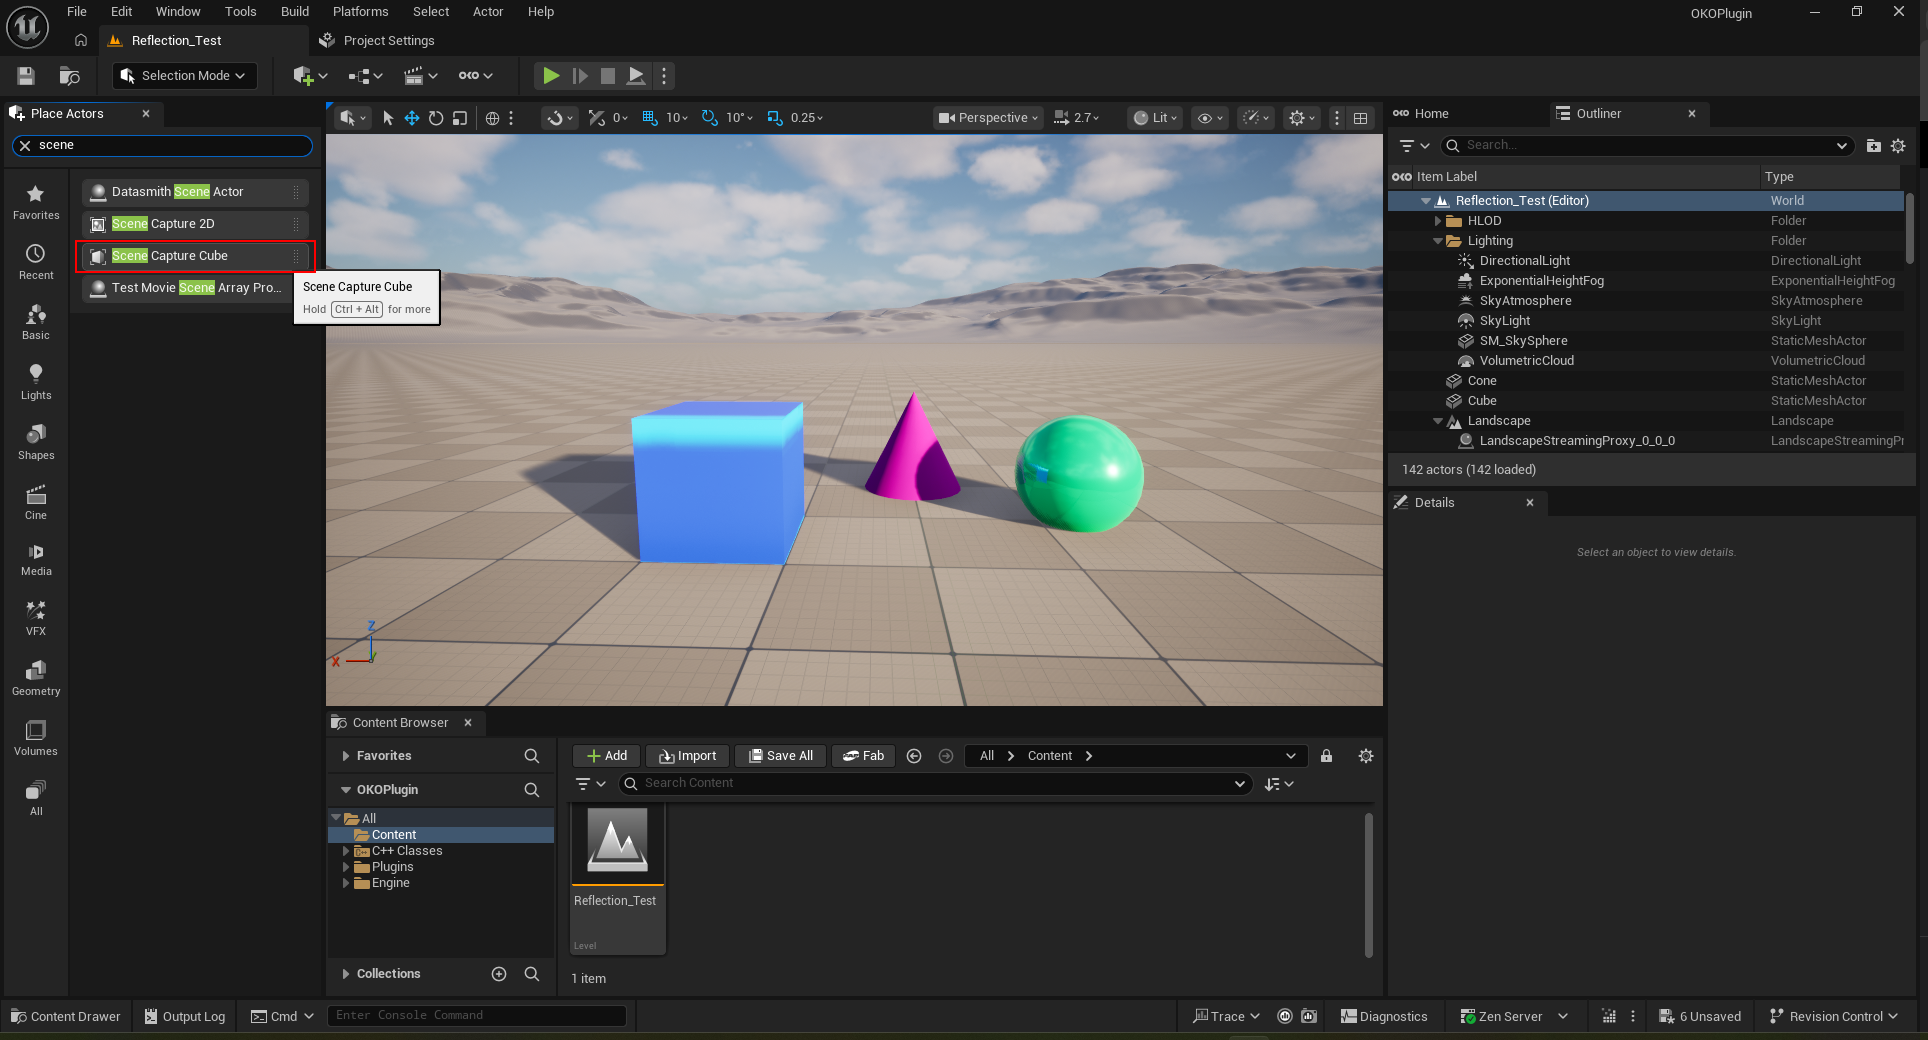
Drag and drop the Scene Capture Cube into the level.
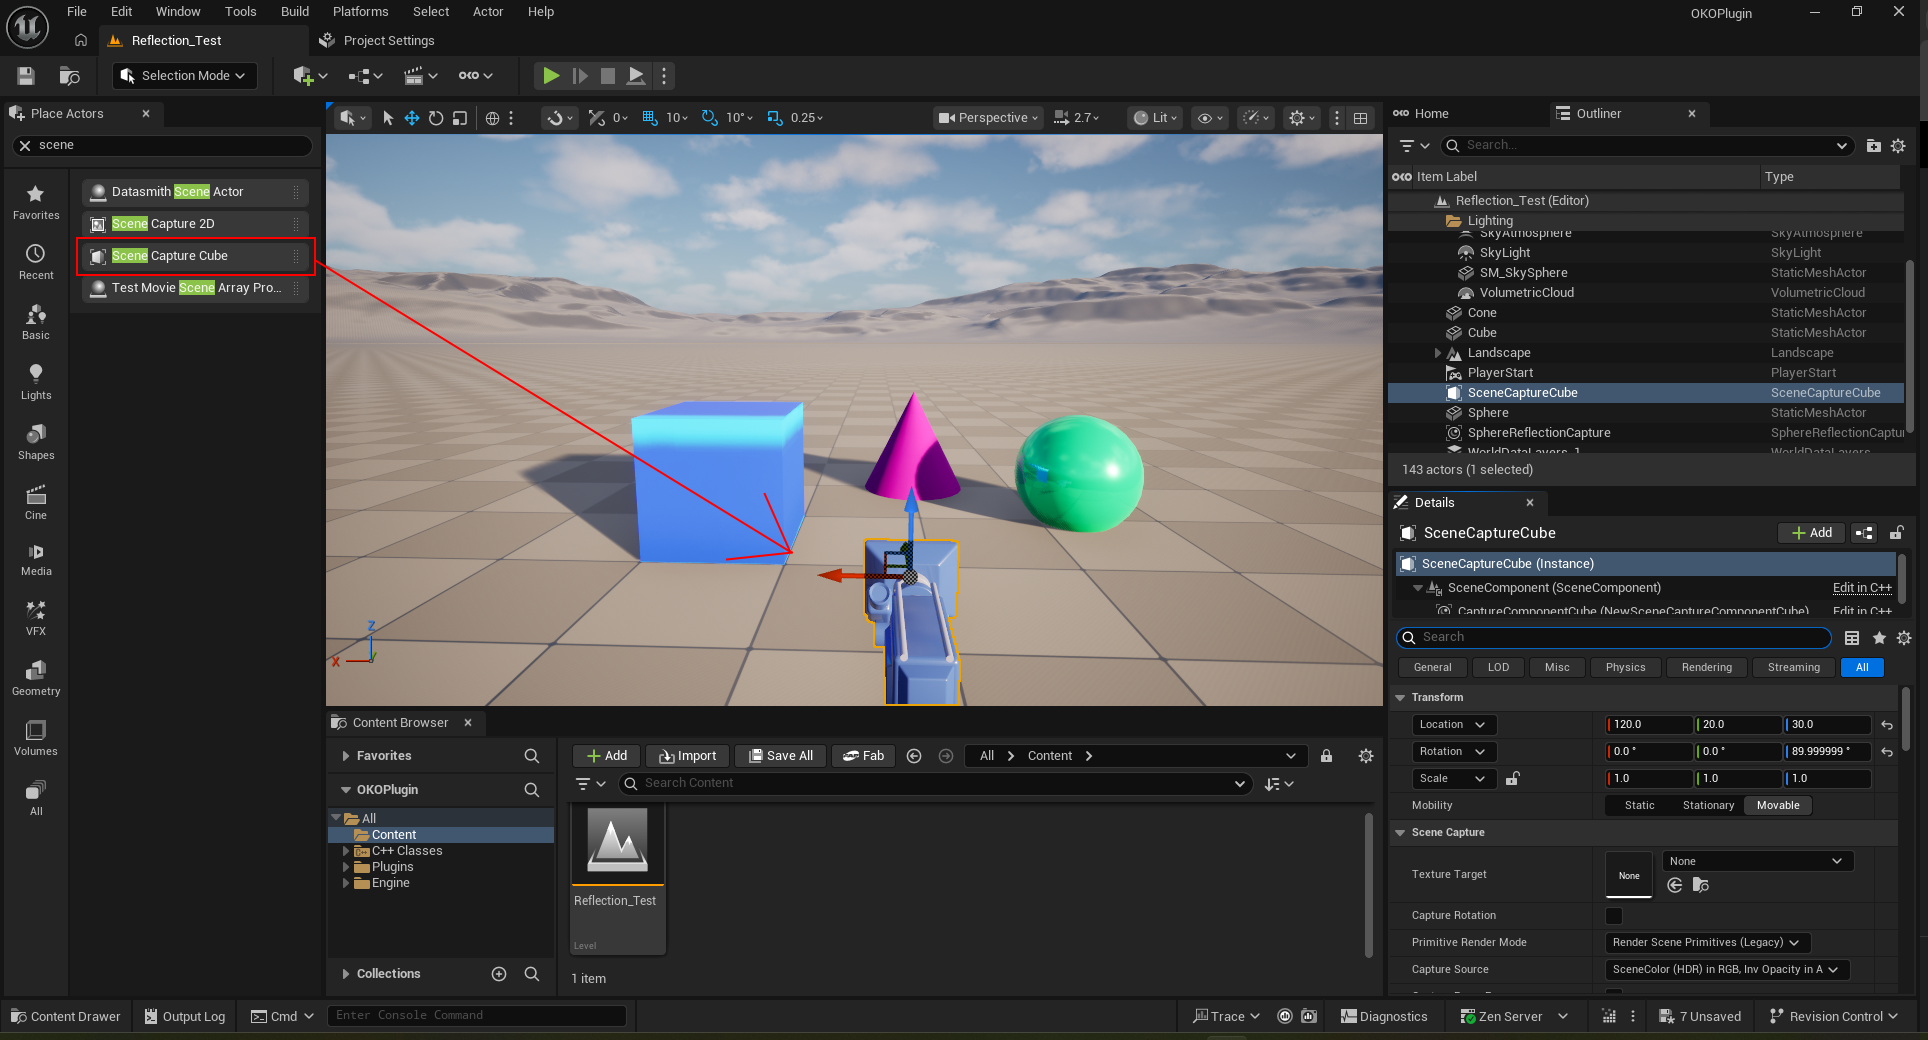
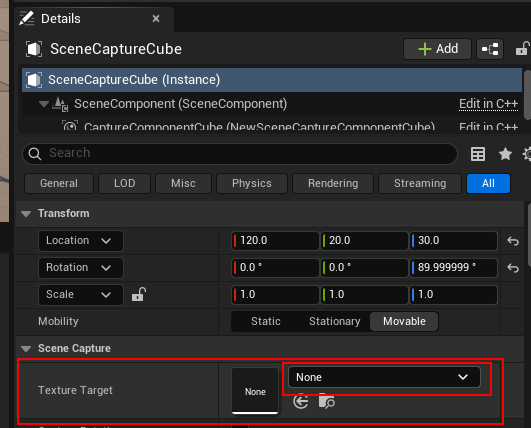
Create a Cube Render Target for the Scene Capture Cube. This can be found be selecting the Texture Target drop down list box.
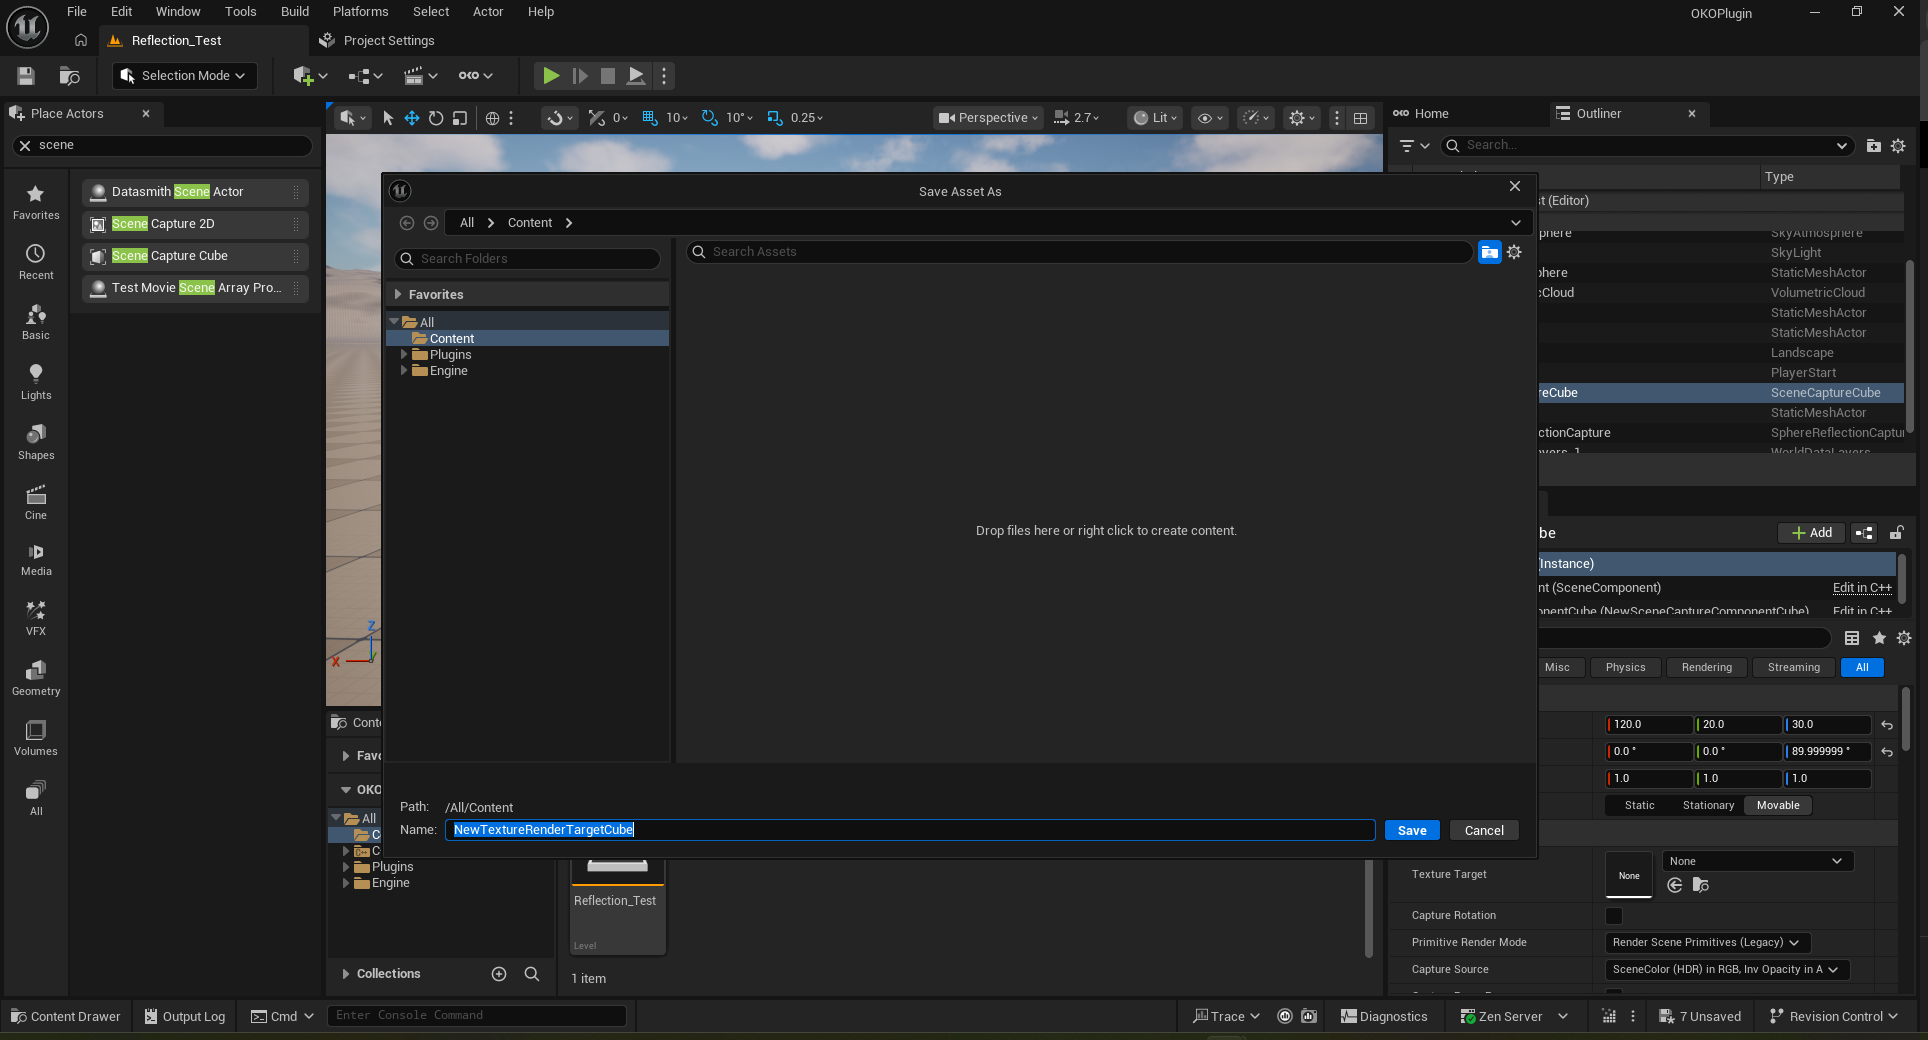
Save Cube Render Target.
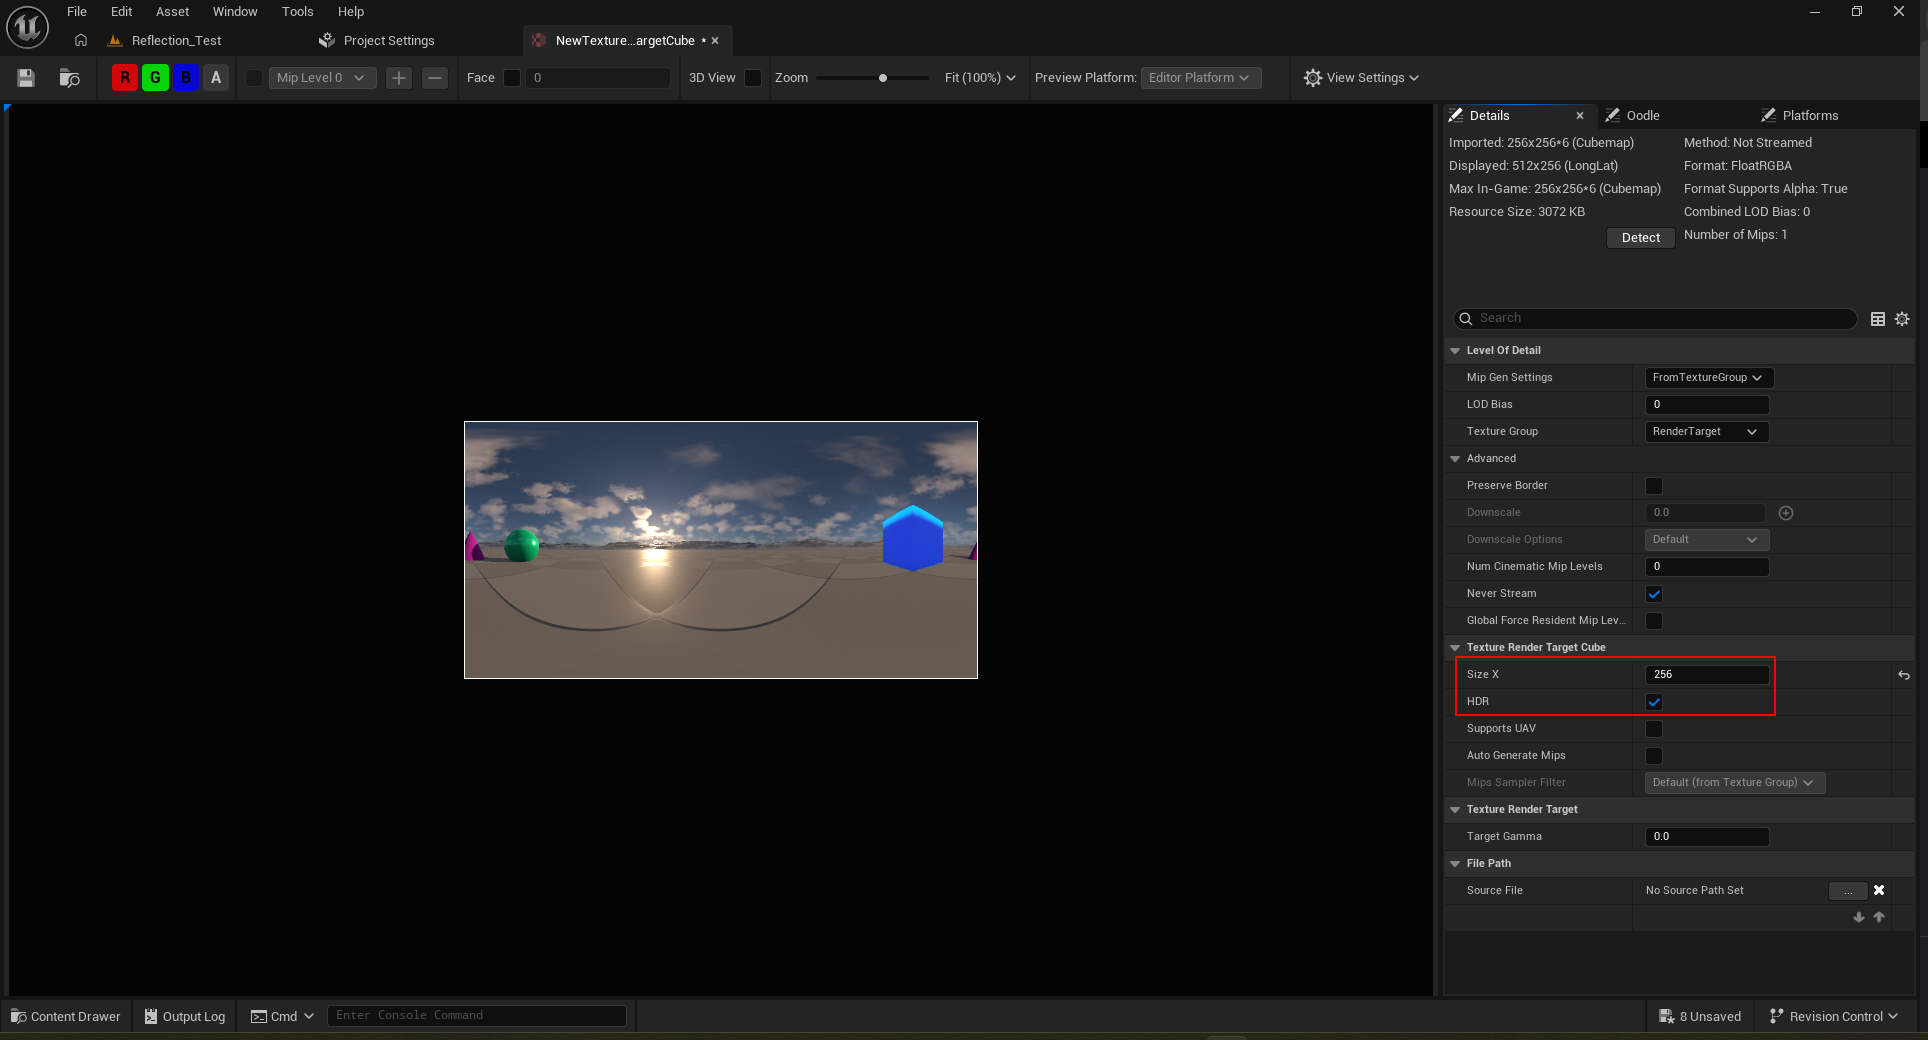
Double-click Cube Render Target.

This is what your Cube Render Target currently looks like.
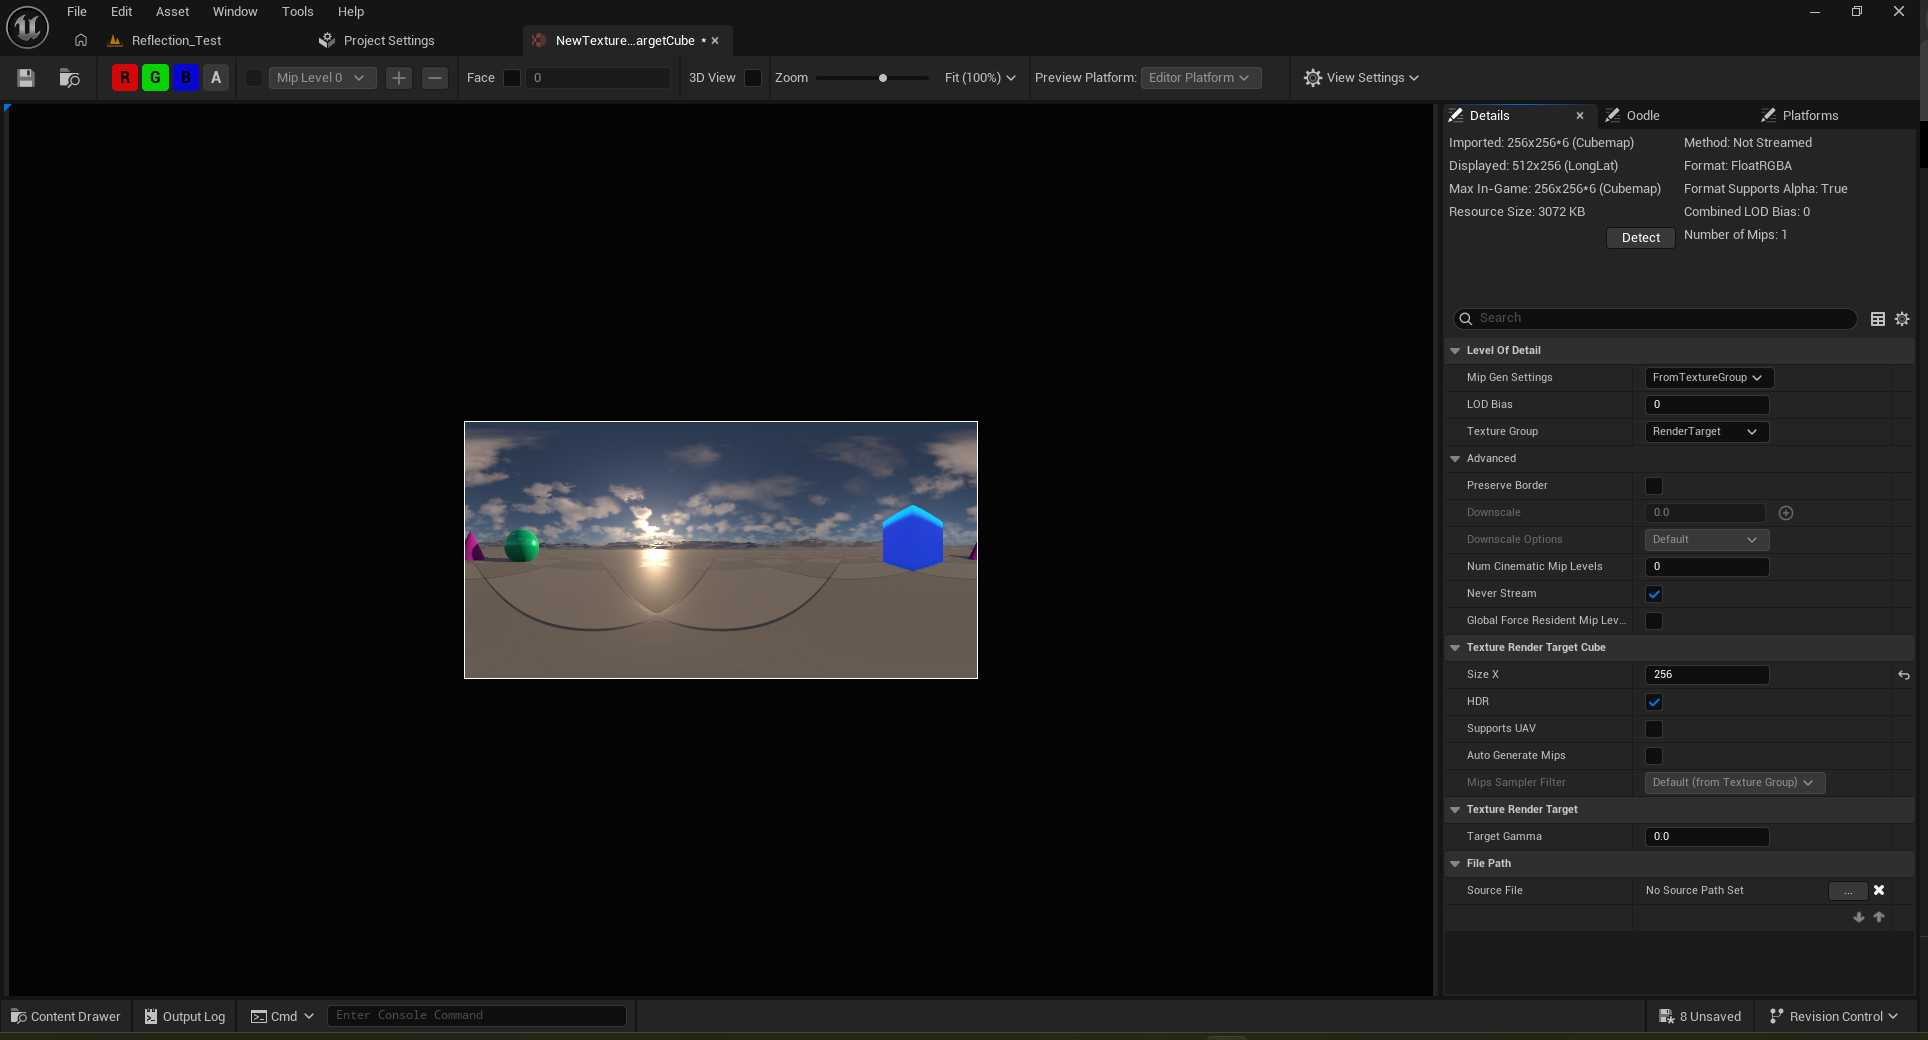
Make sure the “HDR” checkbox is ticked, also consider setting Set “Size X” to 2048 (or whatever resolution is best for your project).
Right-click on the cube render target you created in the content browser and from the context menu select Create Static Texture.
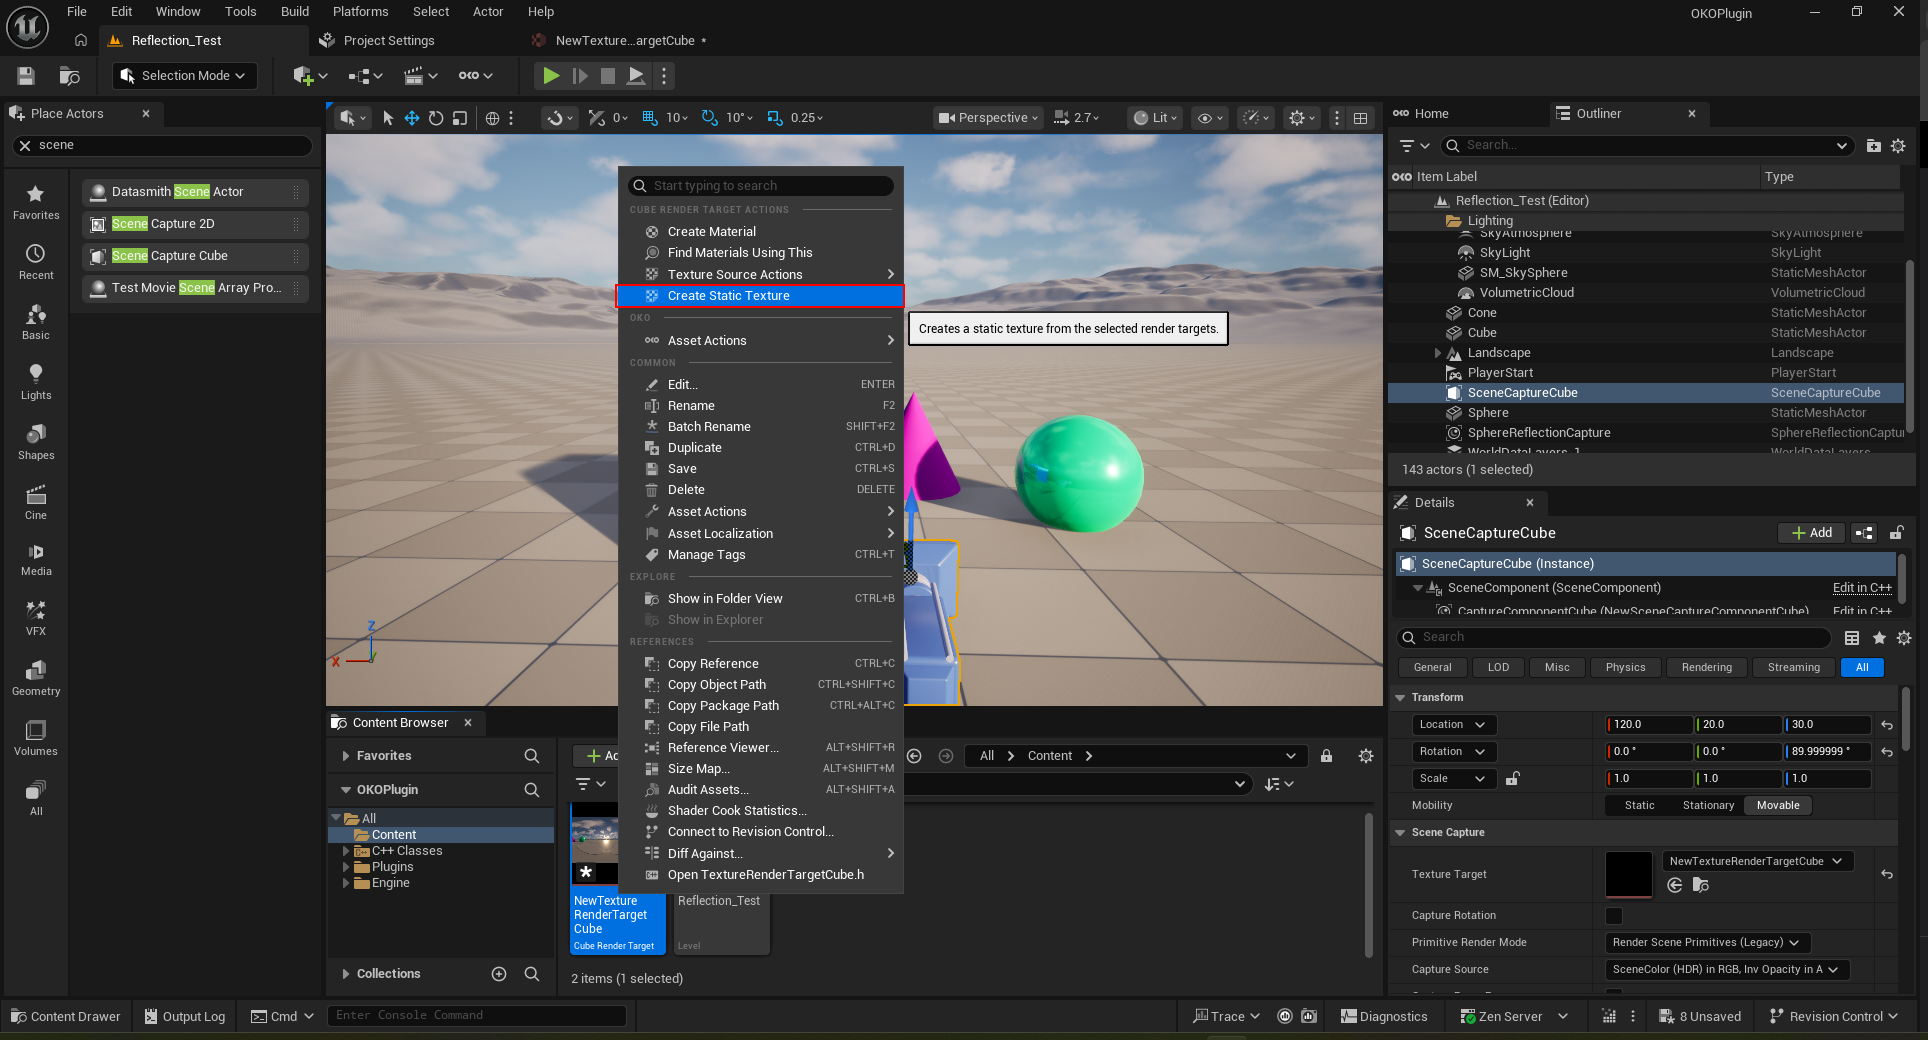
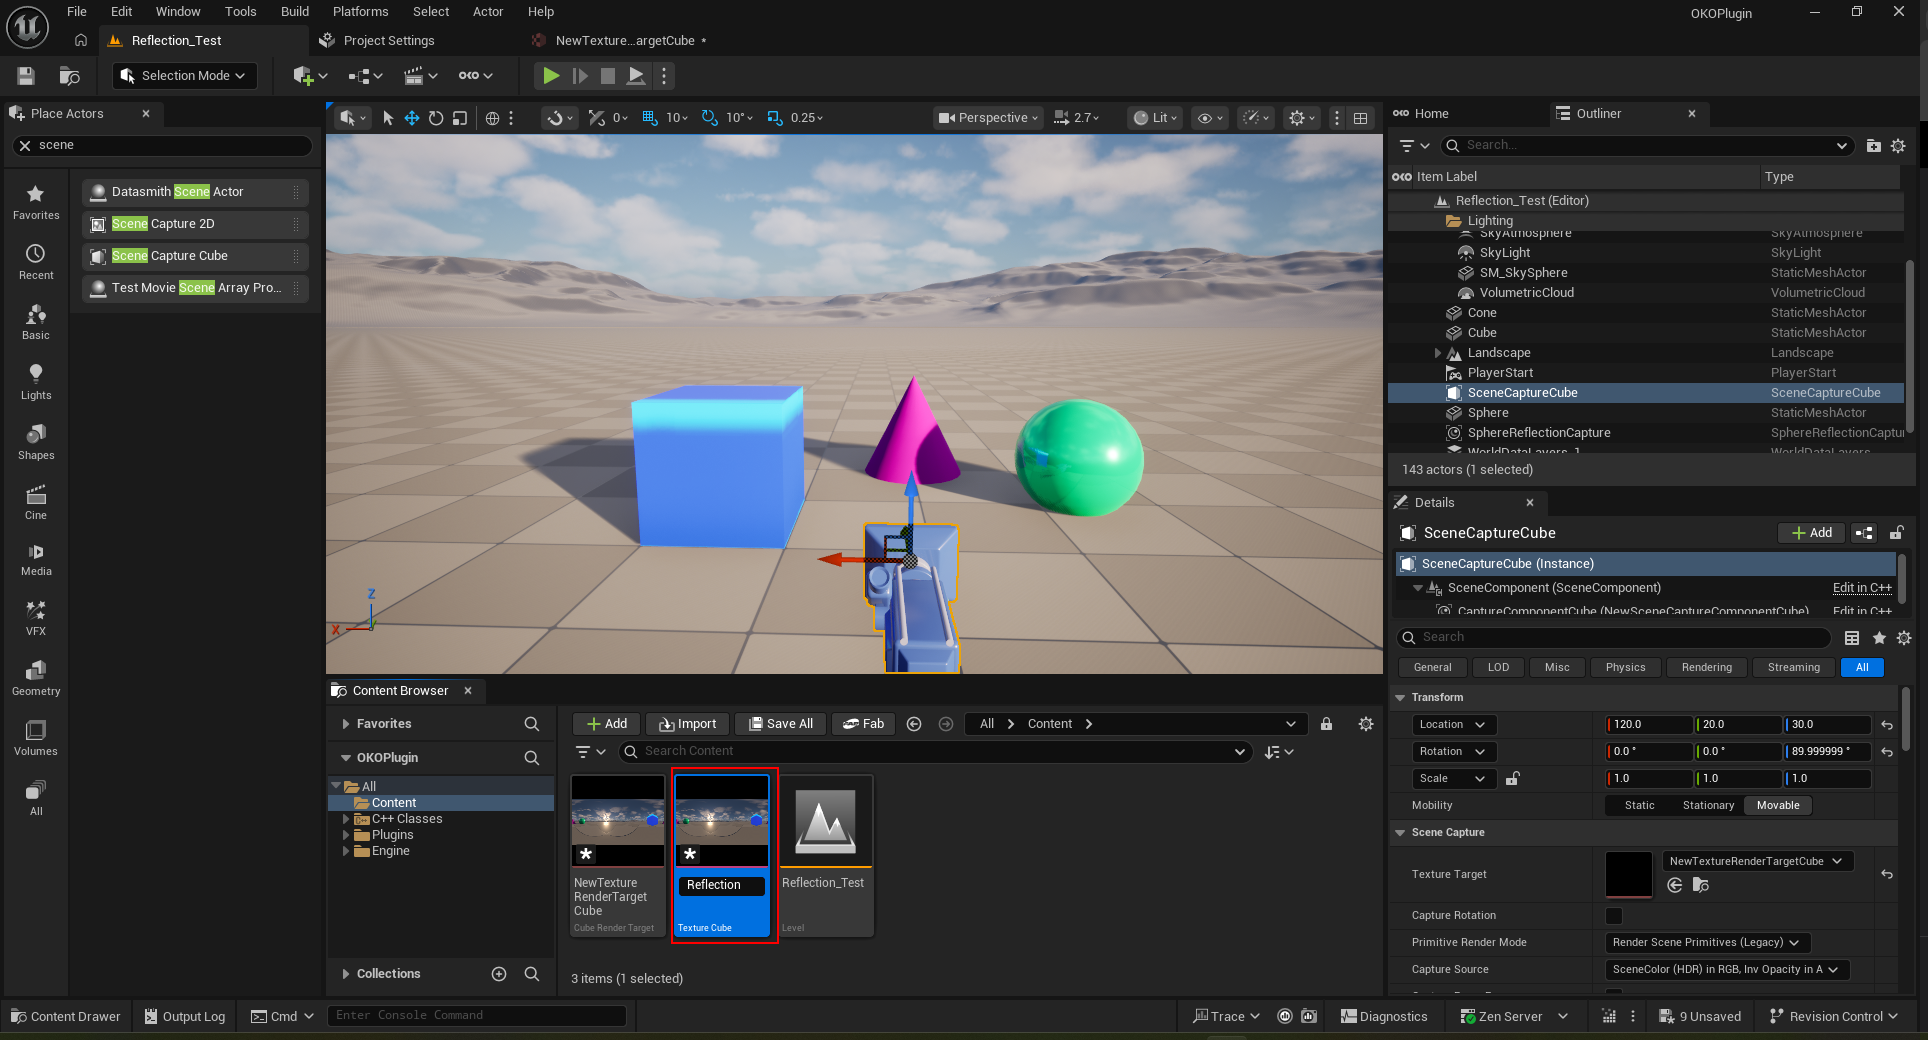
Here’s the created Static Texture.

Rename the Static Texture to something that better conveys its purpose. Here we have called it “Reflection”.
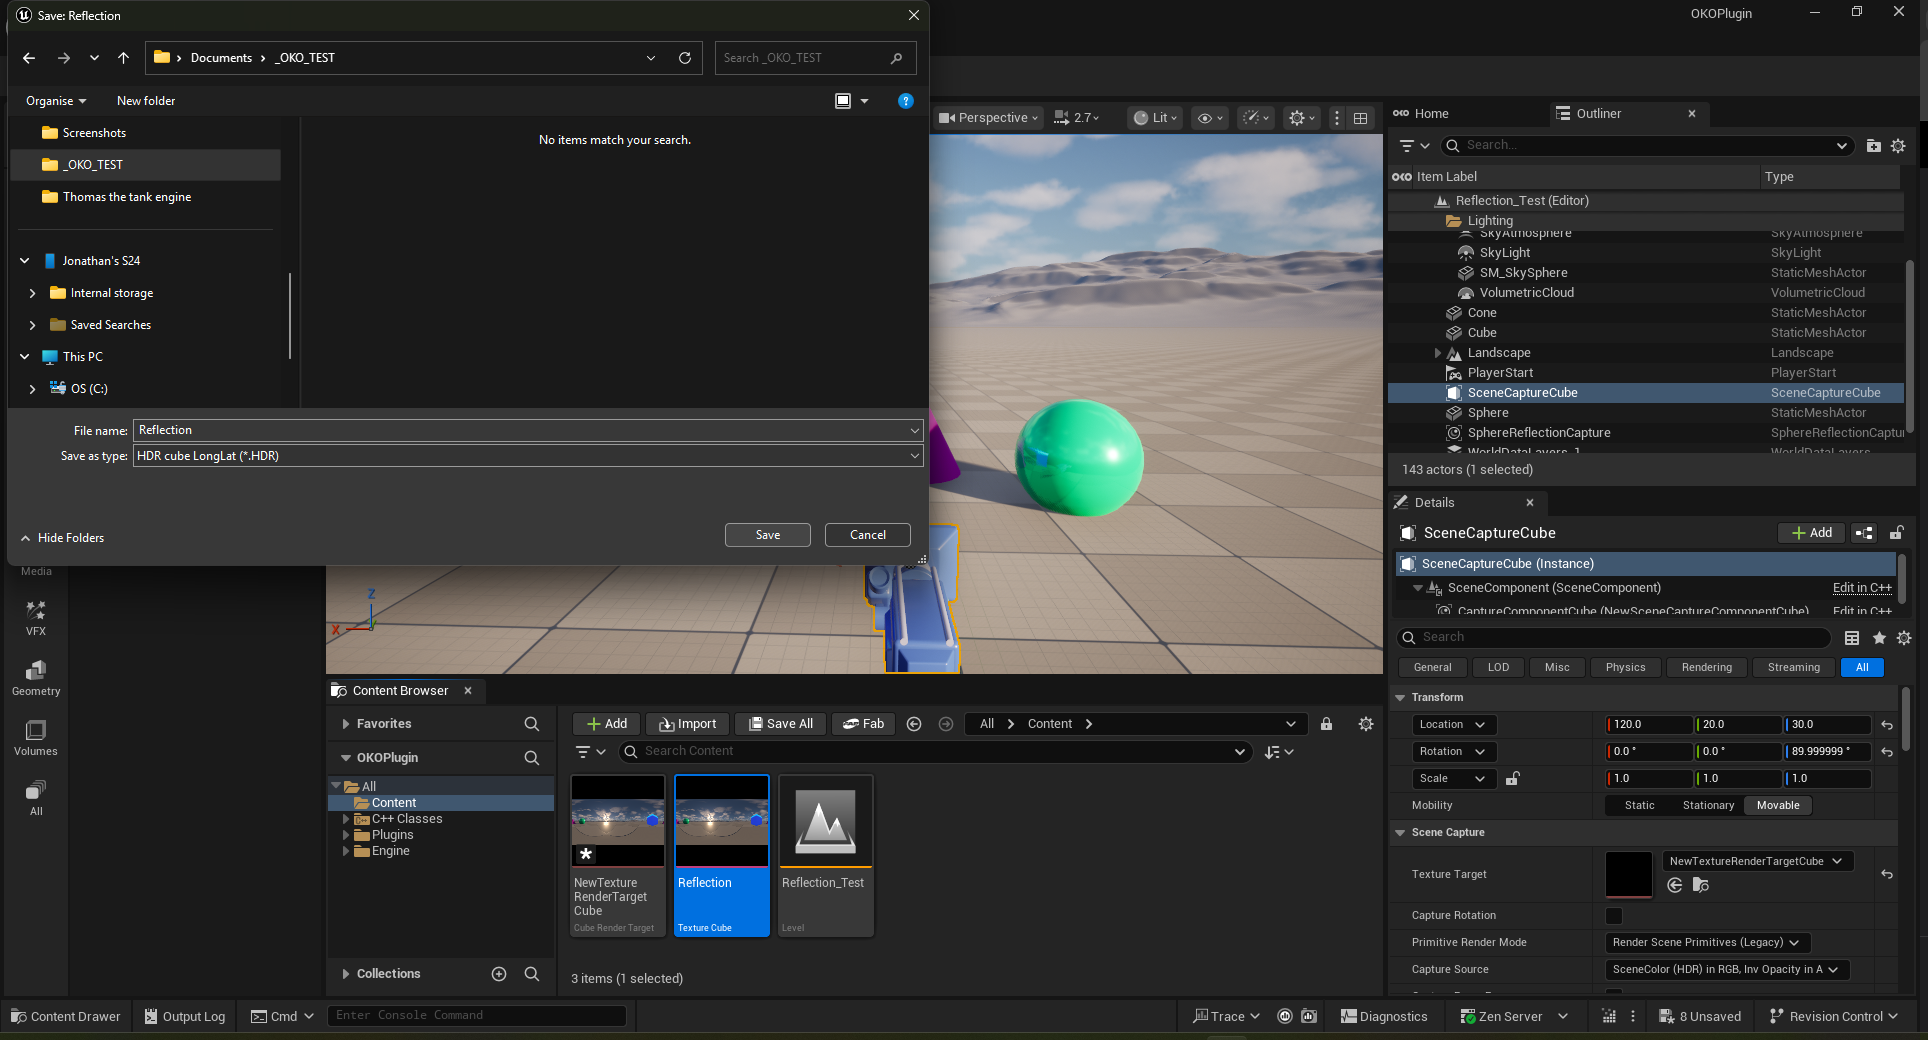
Right-click to access the menu, and then perform Asset Actions → Export.
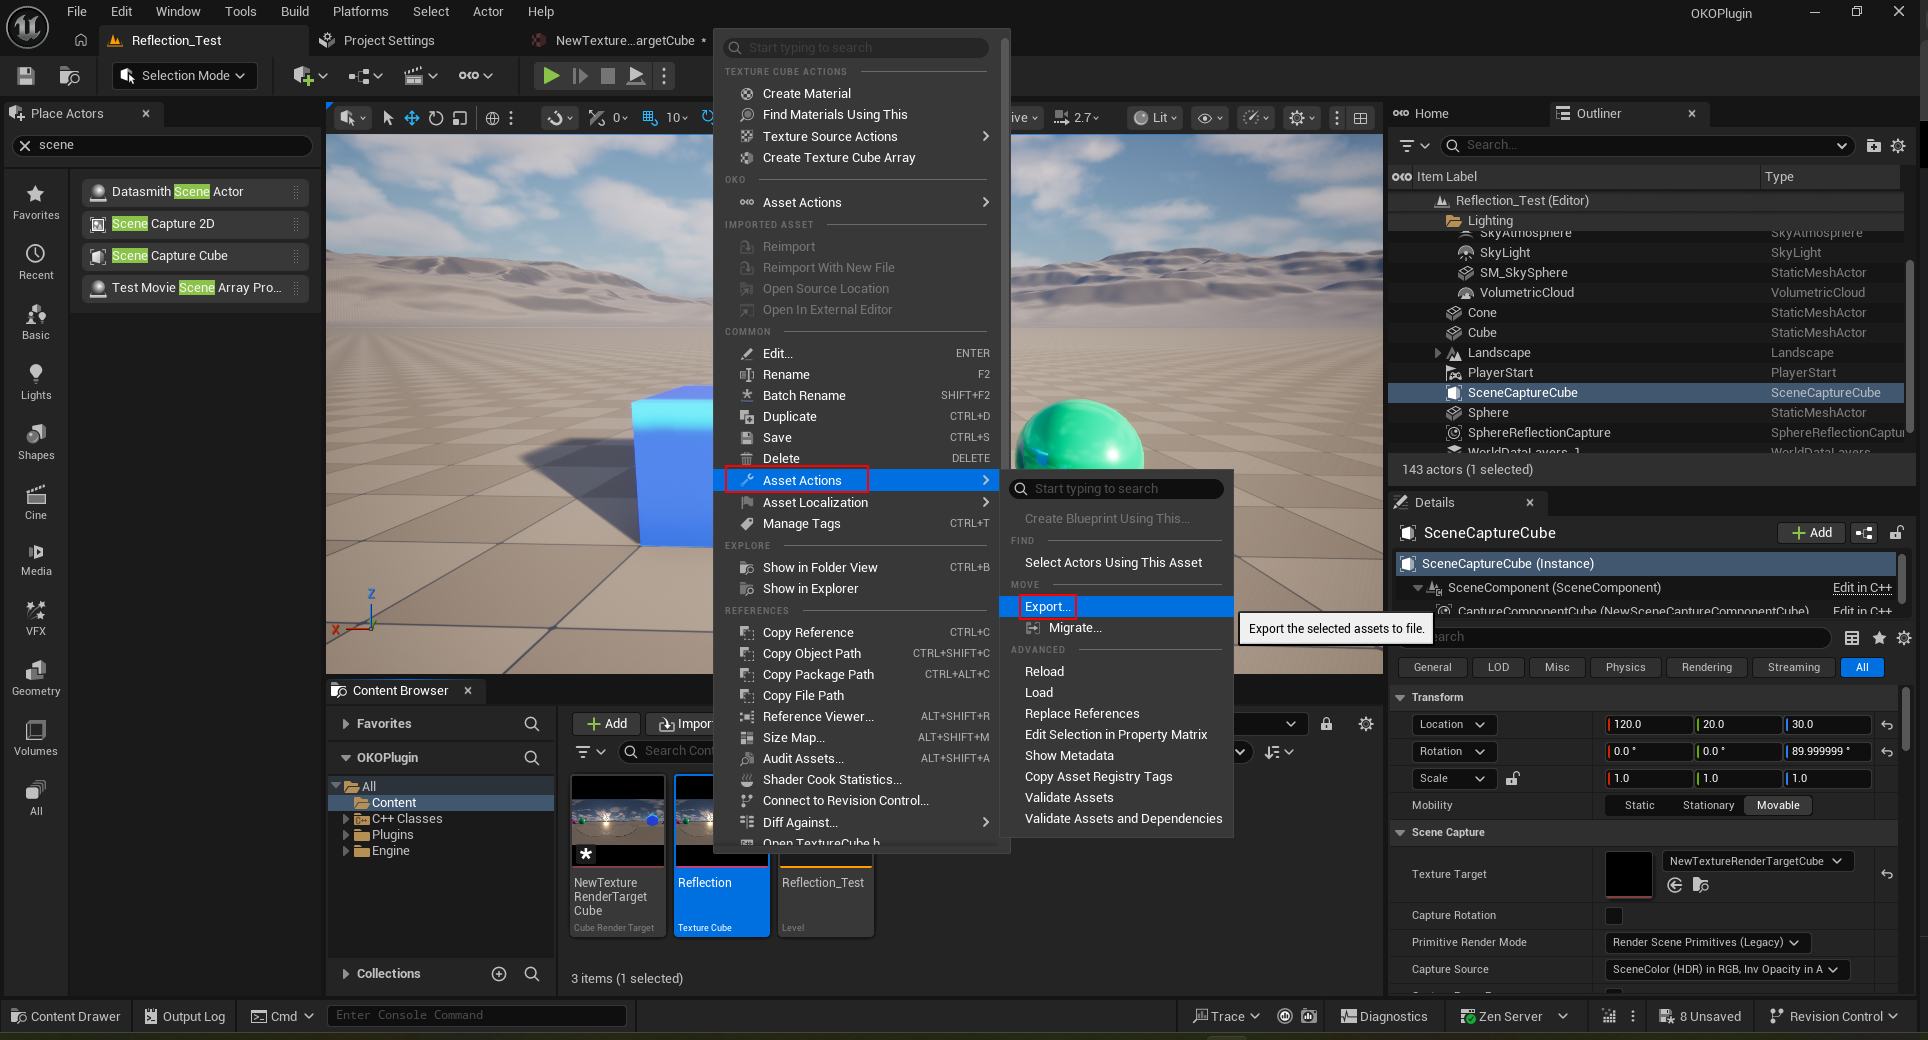
Save it as HDR if you want to use it in another OKO space or load it into OKO Web.
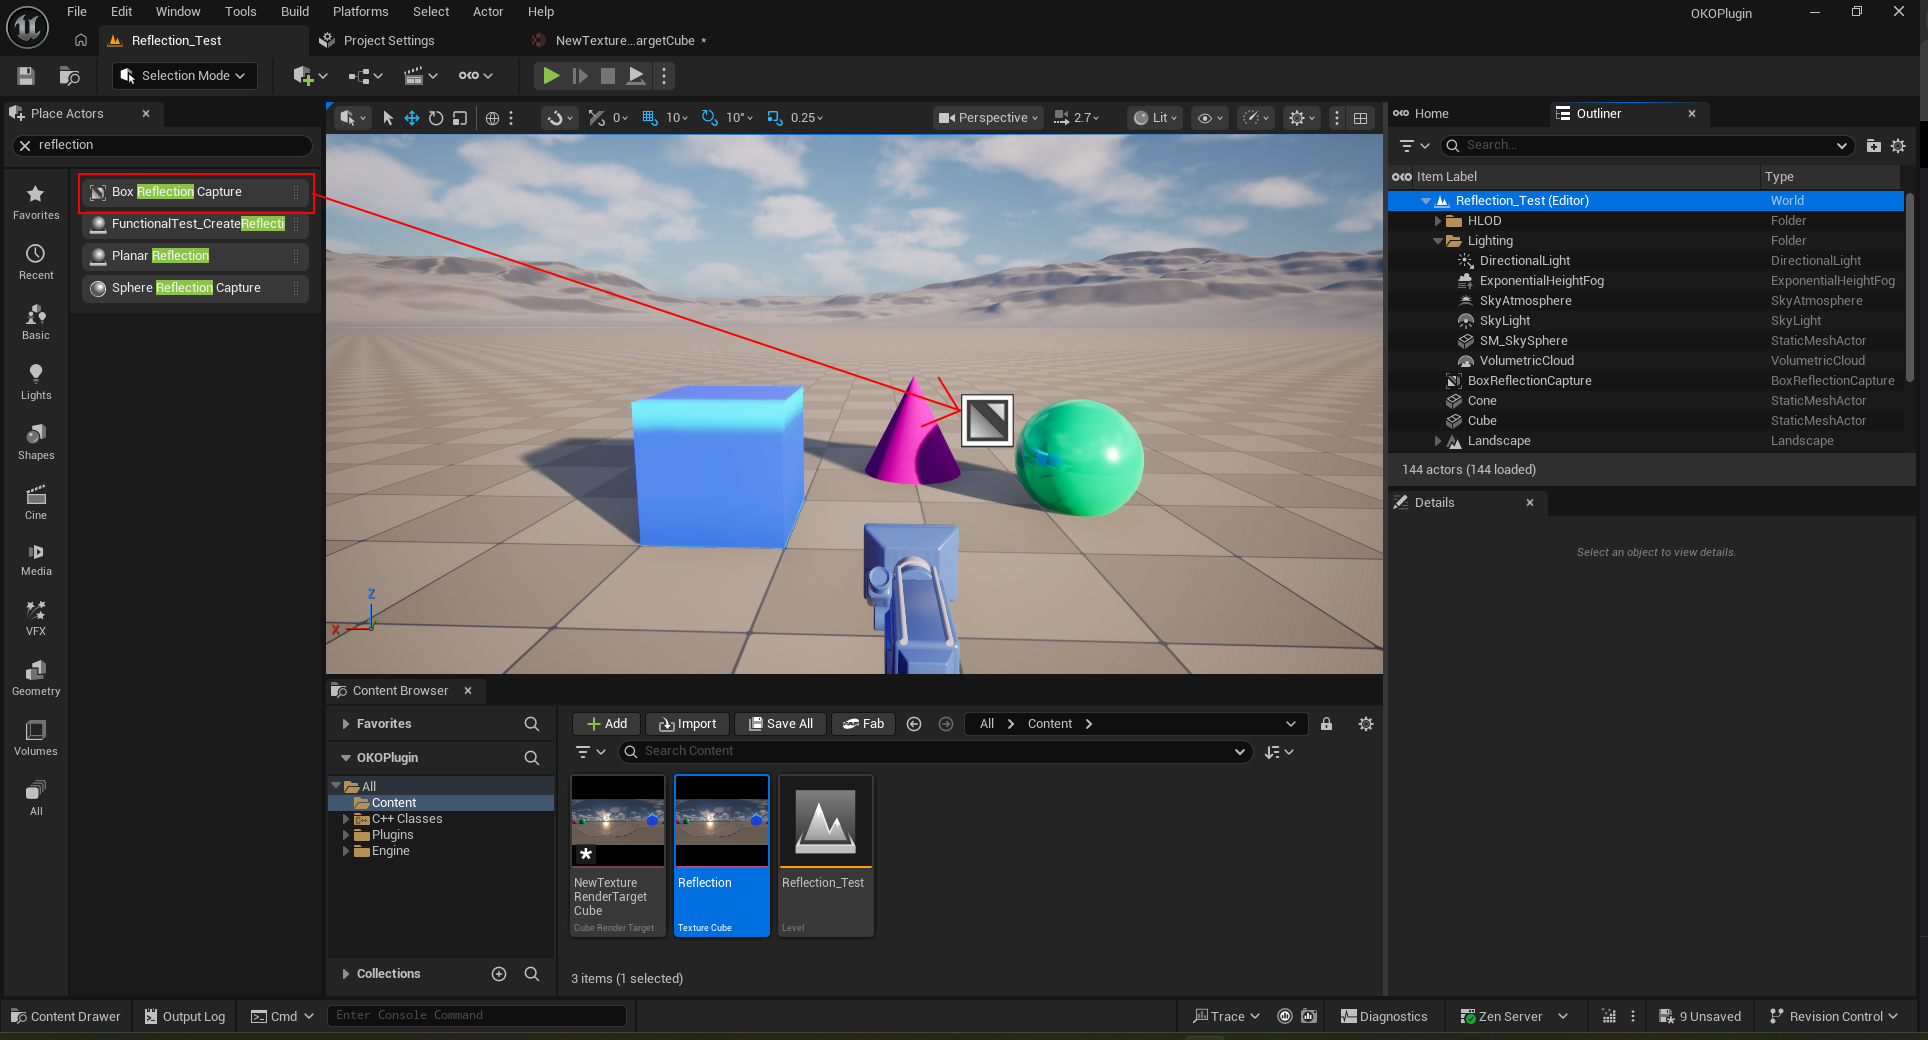
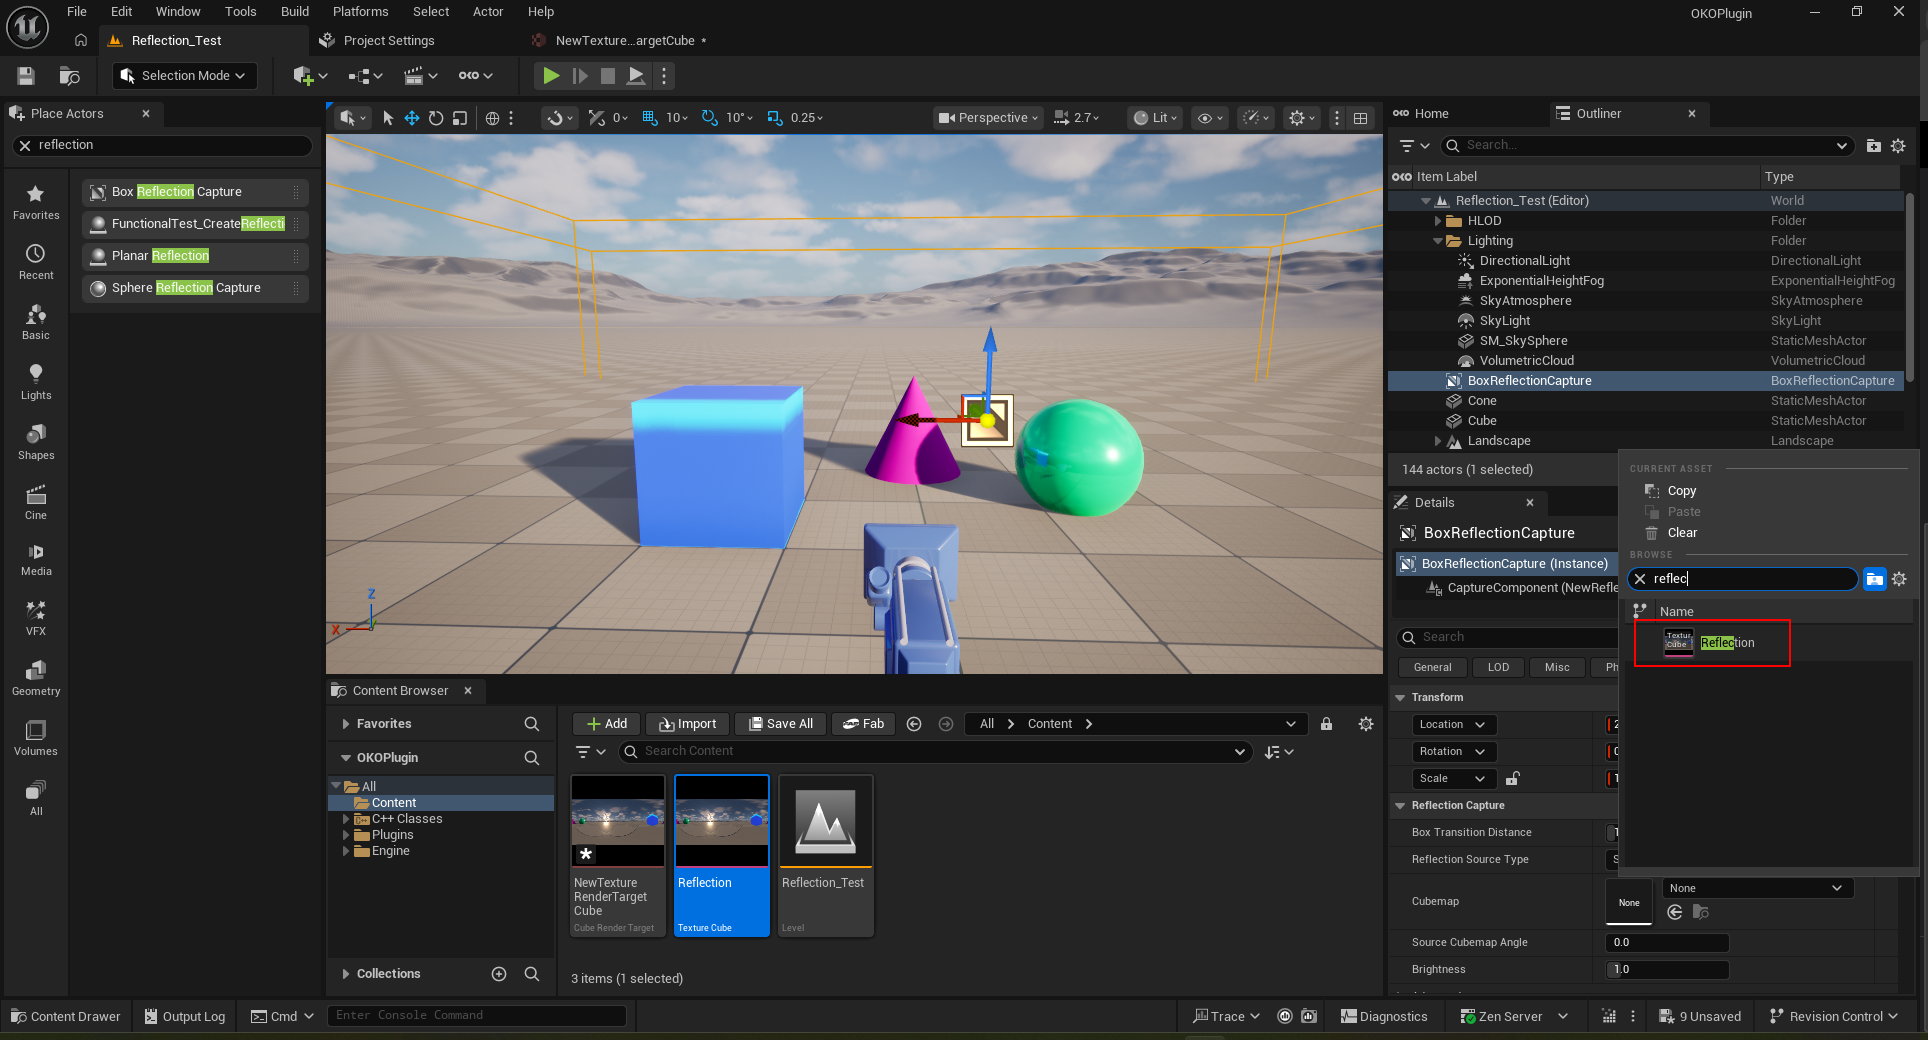
Search for “Reflection” in Place Actors.
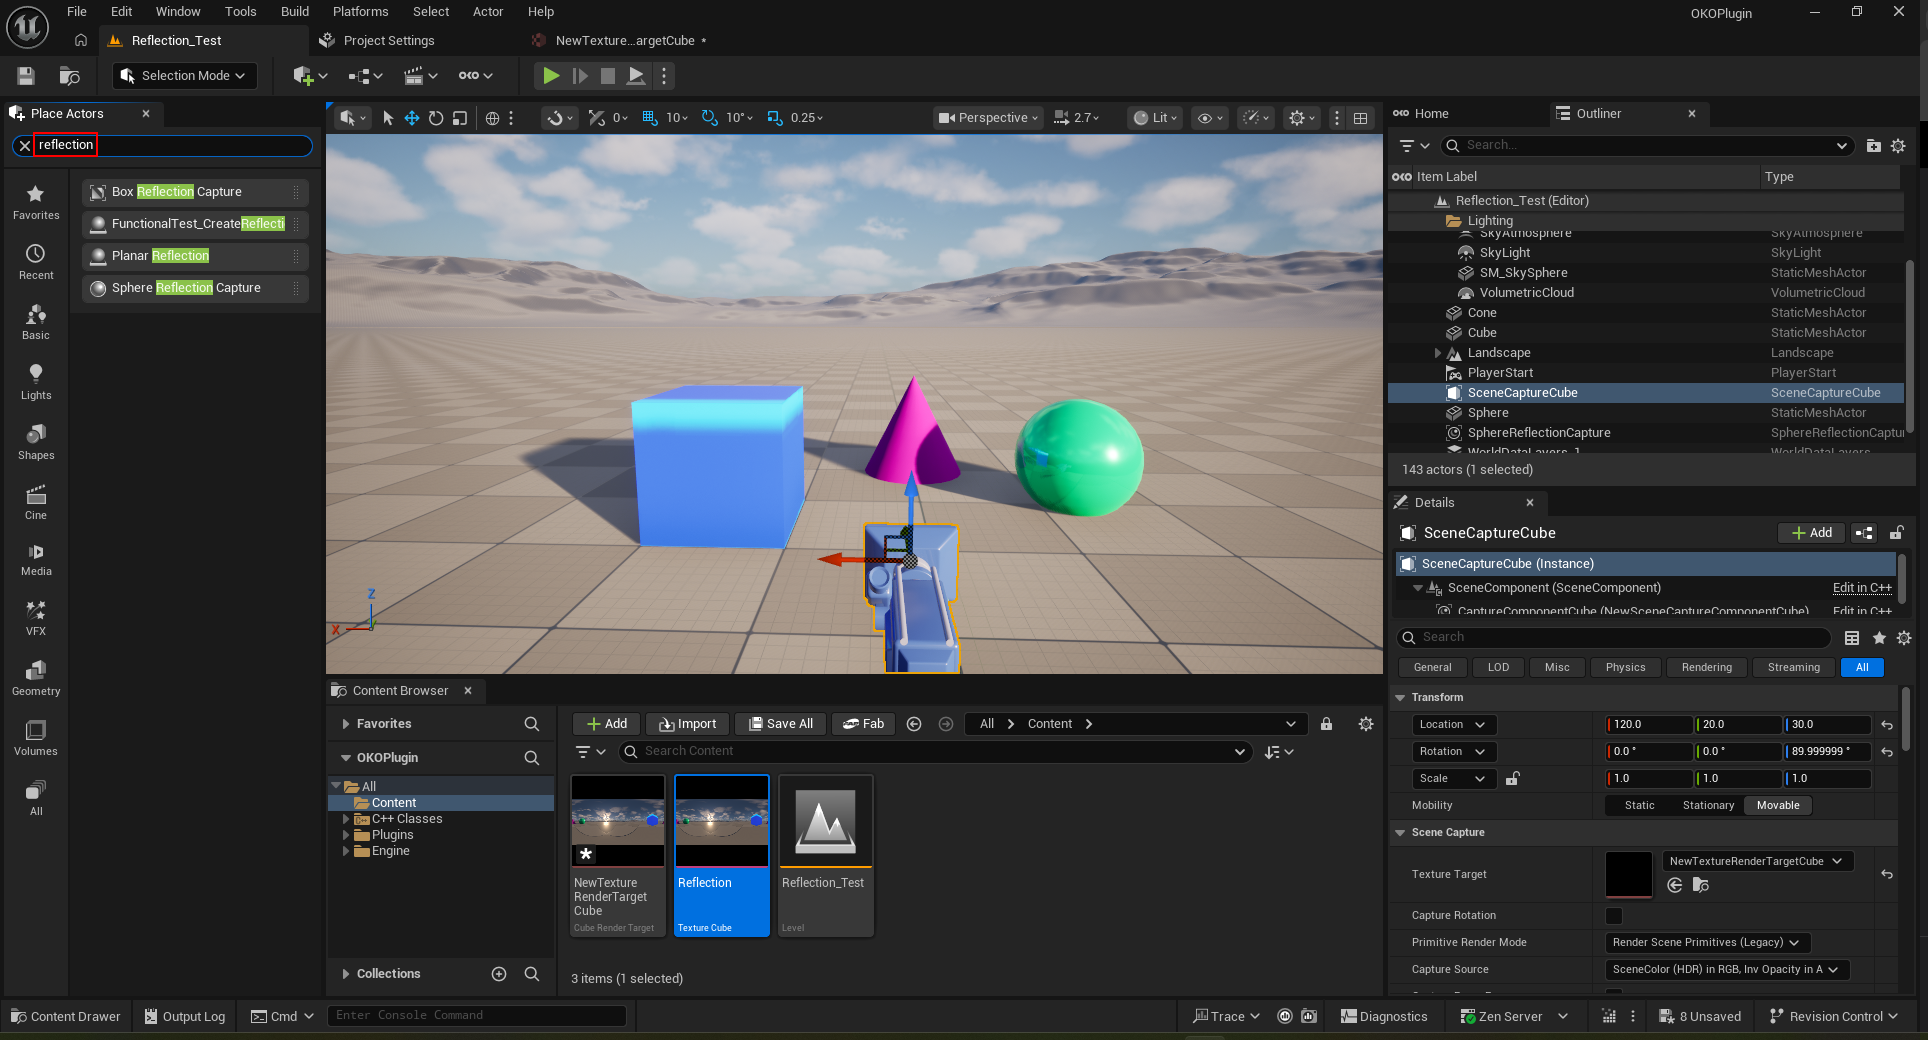
Drag and drop the Box Reflection Capture into the 3D scene. Set the scale of the Box Reflection Capture as needed.
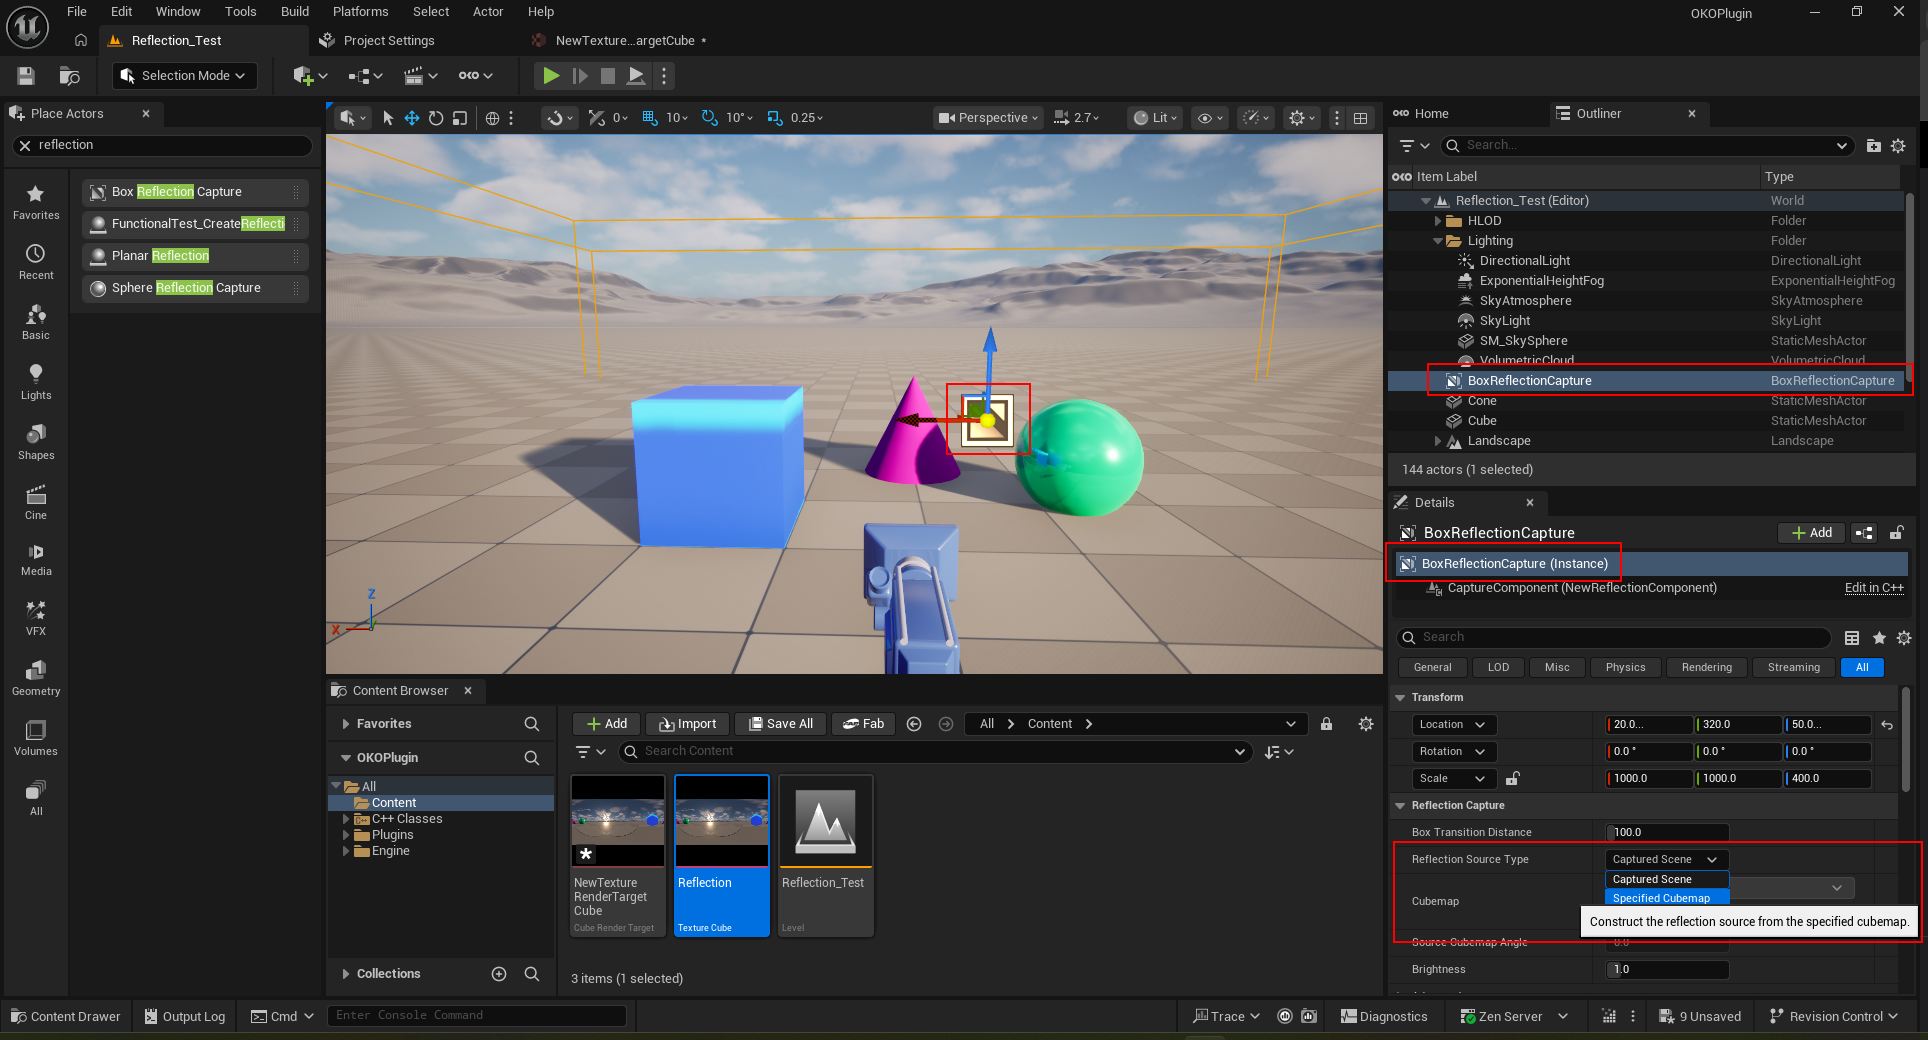
Set the Reflection Source Type to “Specified Cubemap” and choose the Cubemap called “Reflection” that we created earlier.
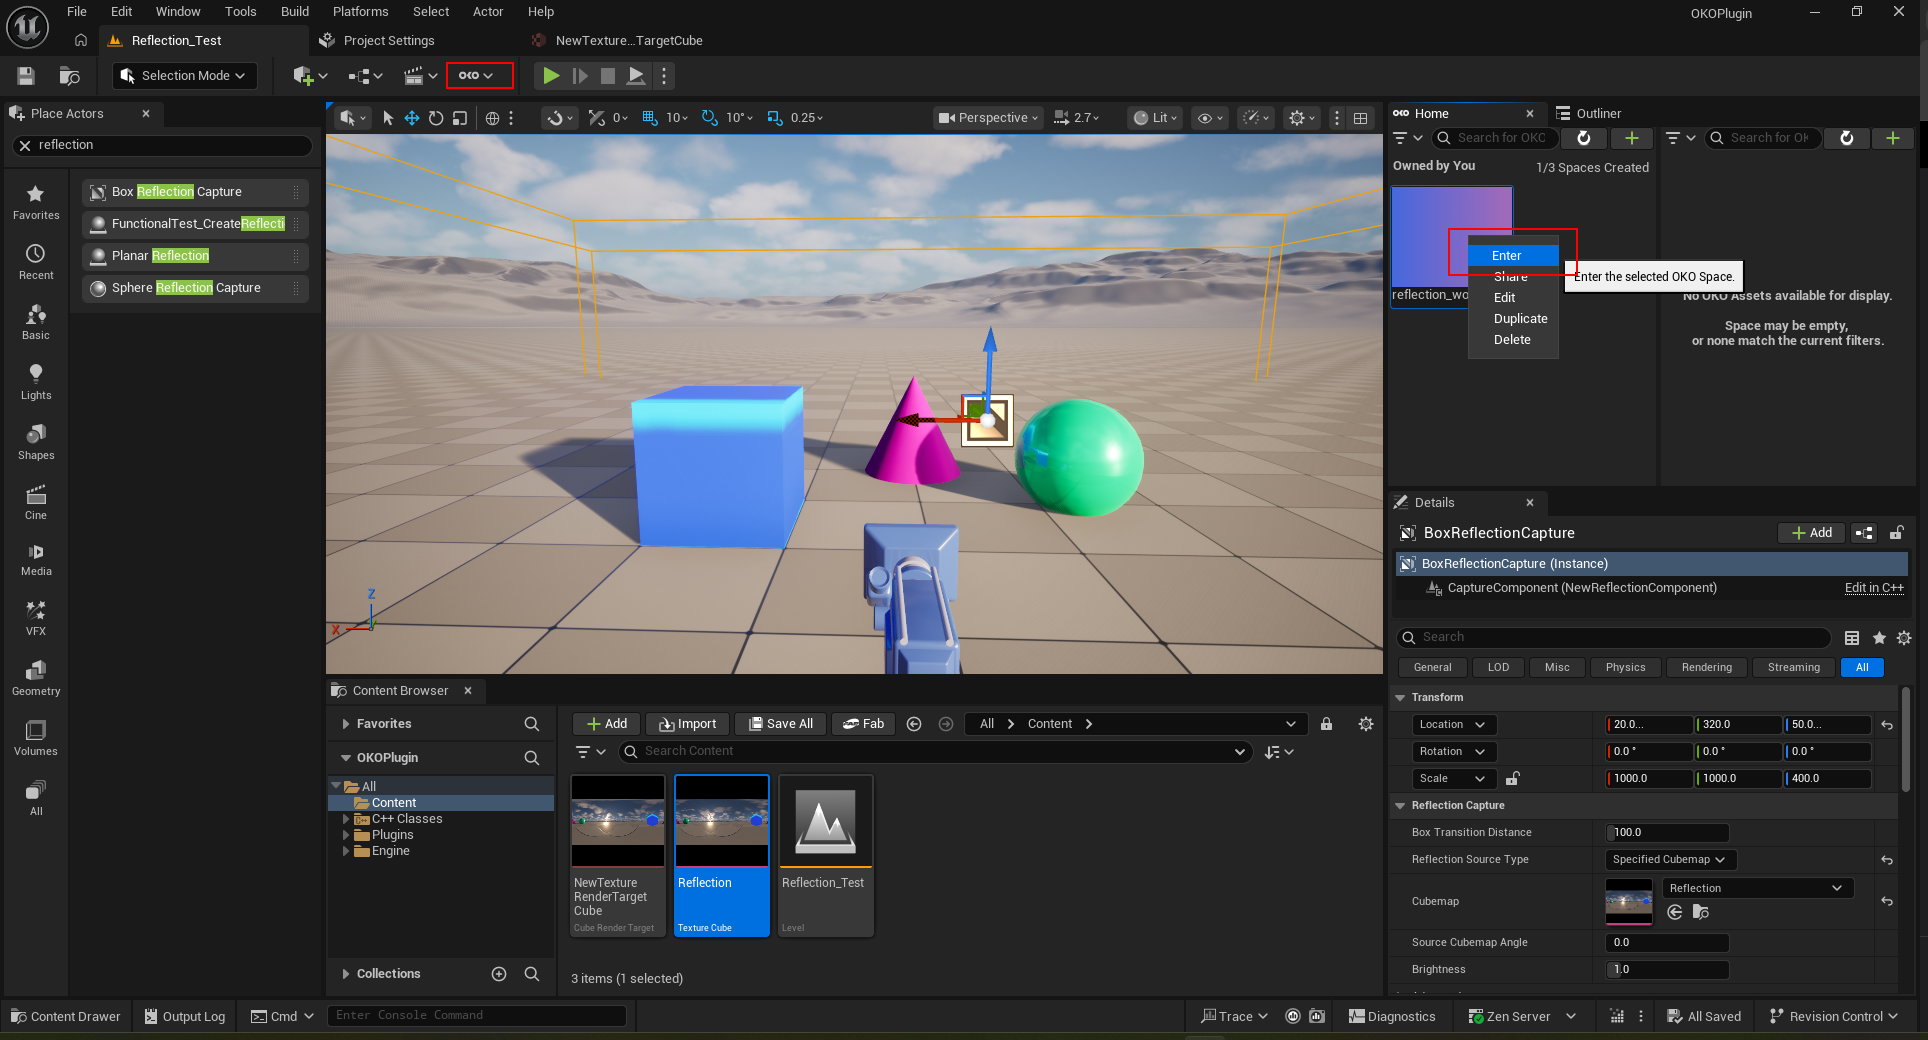
Log into OKO and enter a space.
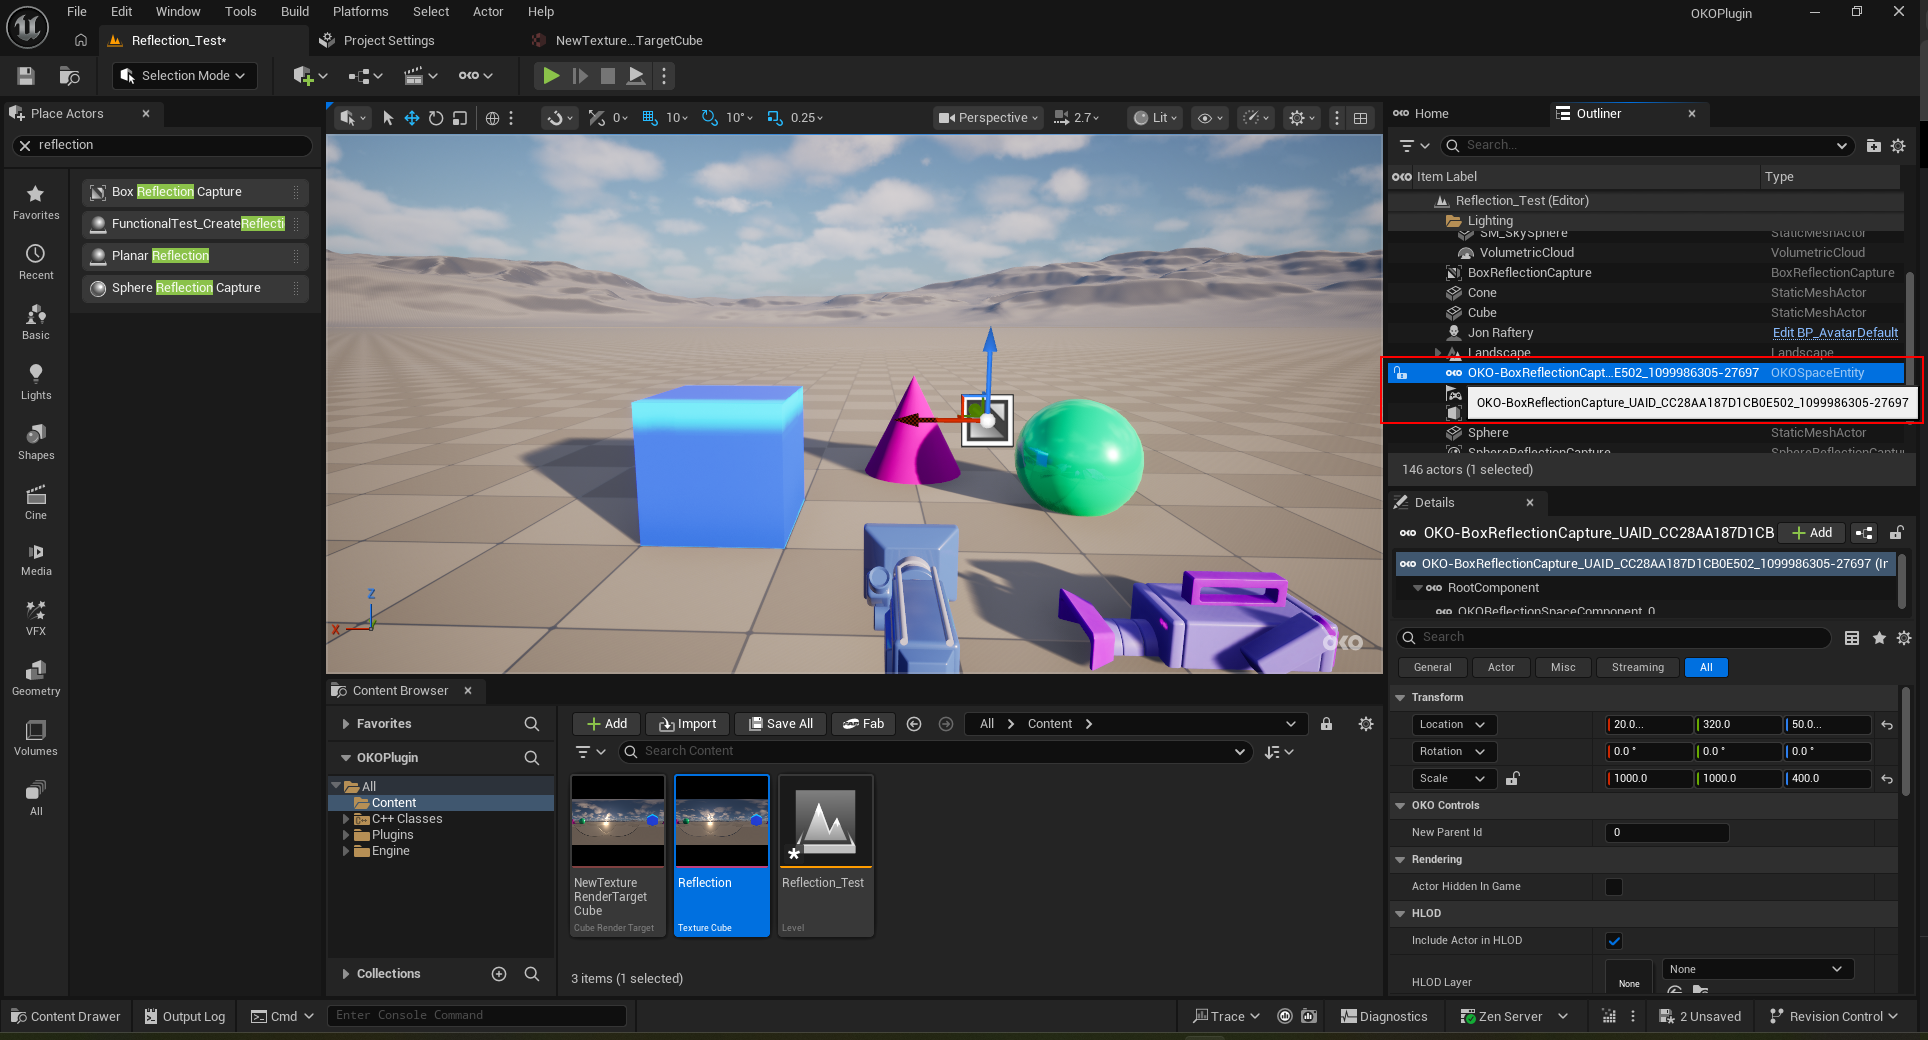
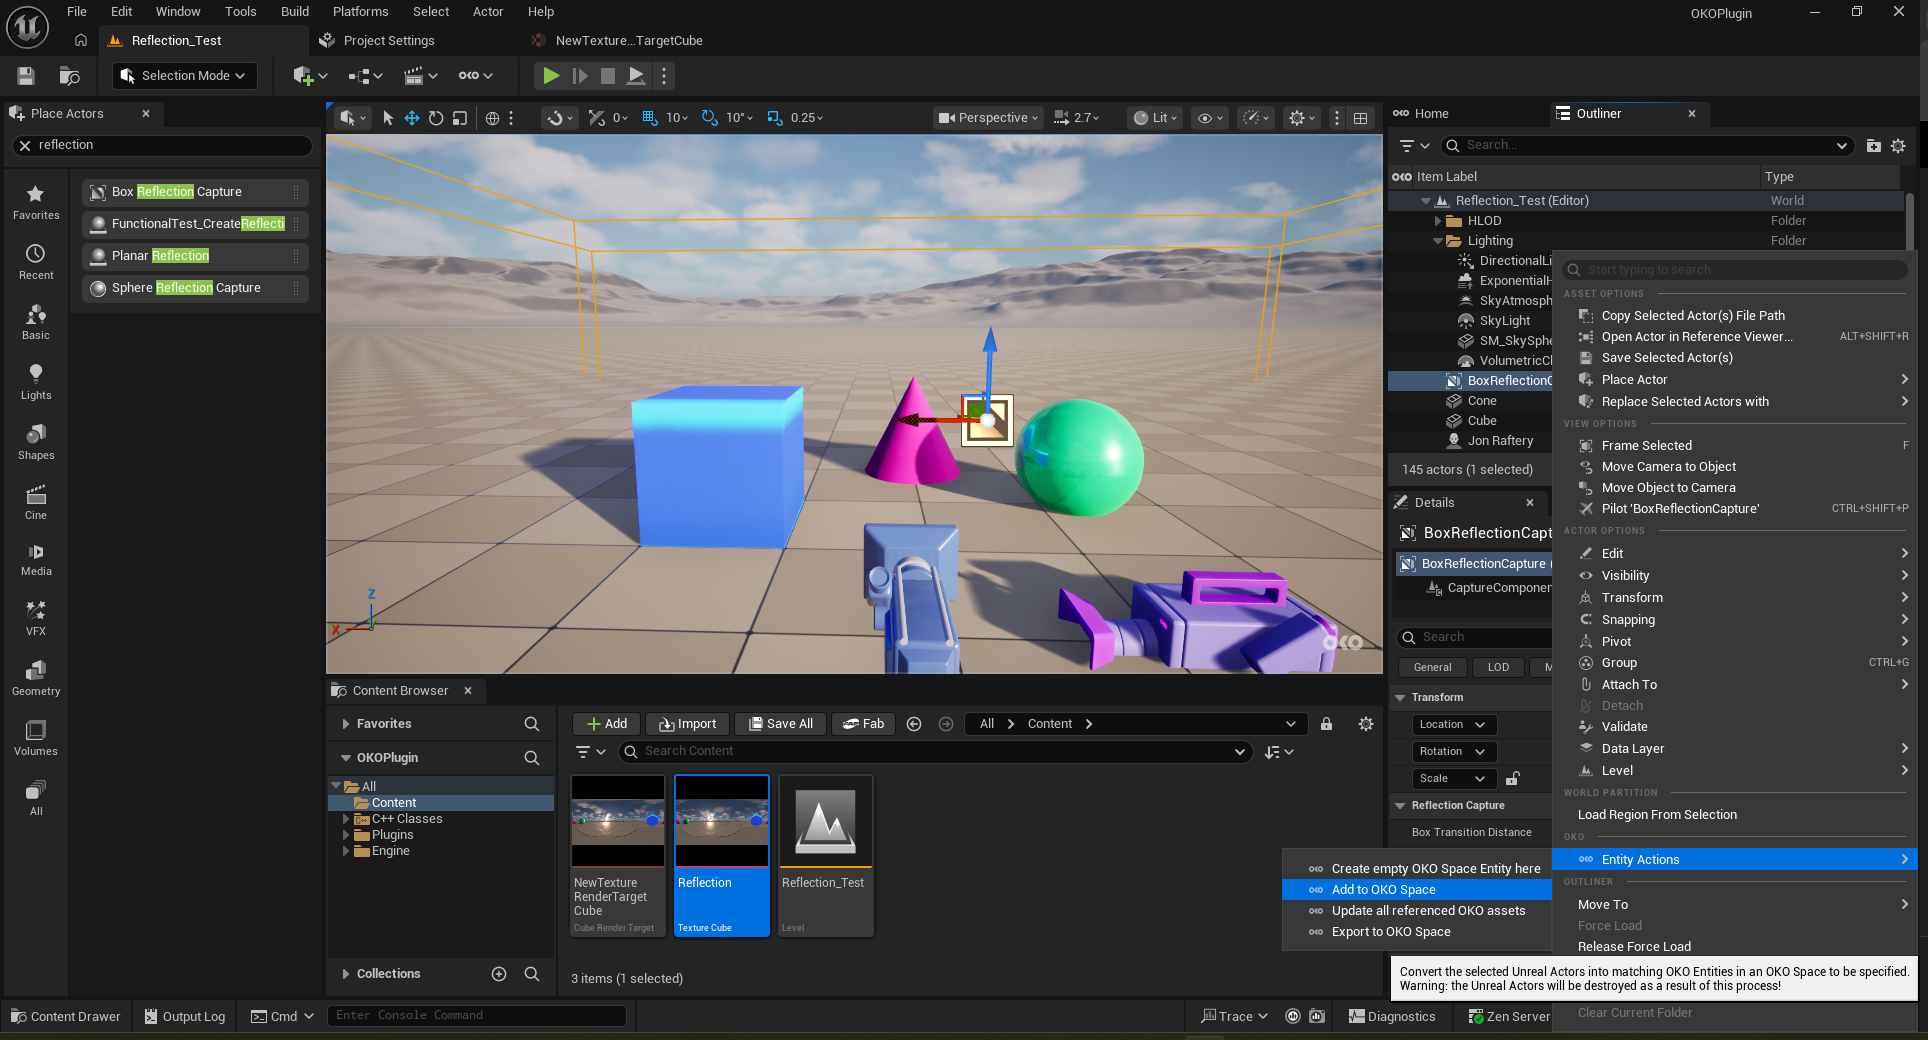
Right-click on “BoxReflectionCapture” and select “Add to OKO Space”.
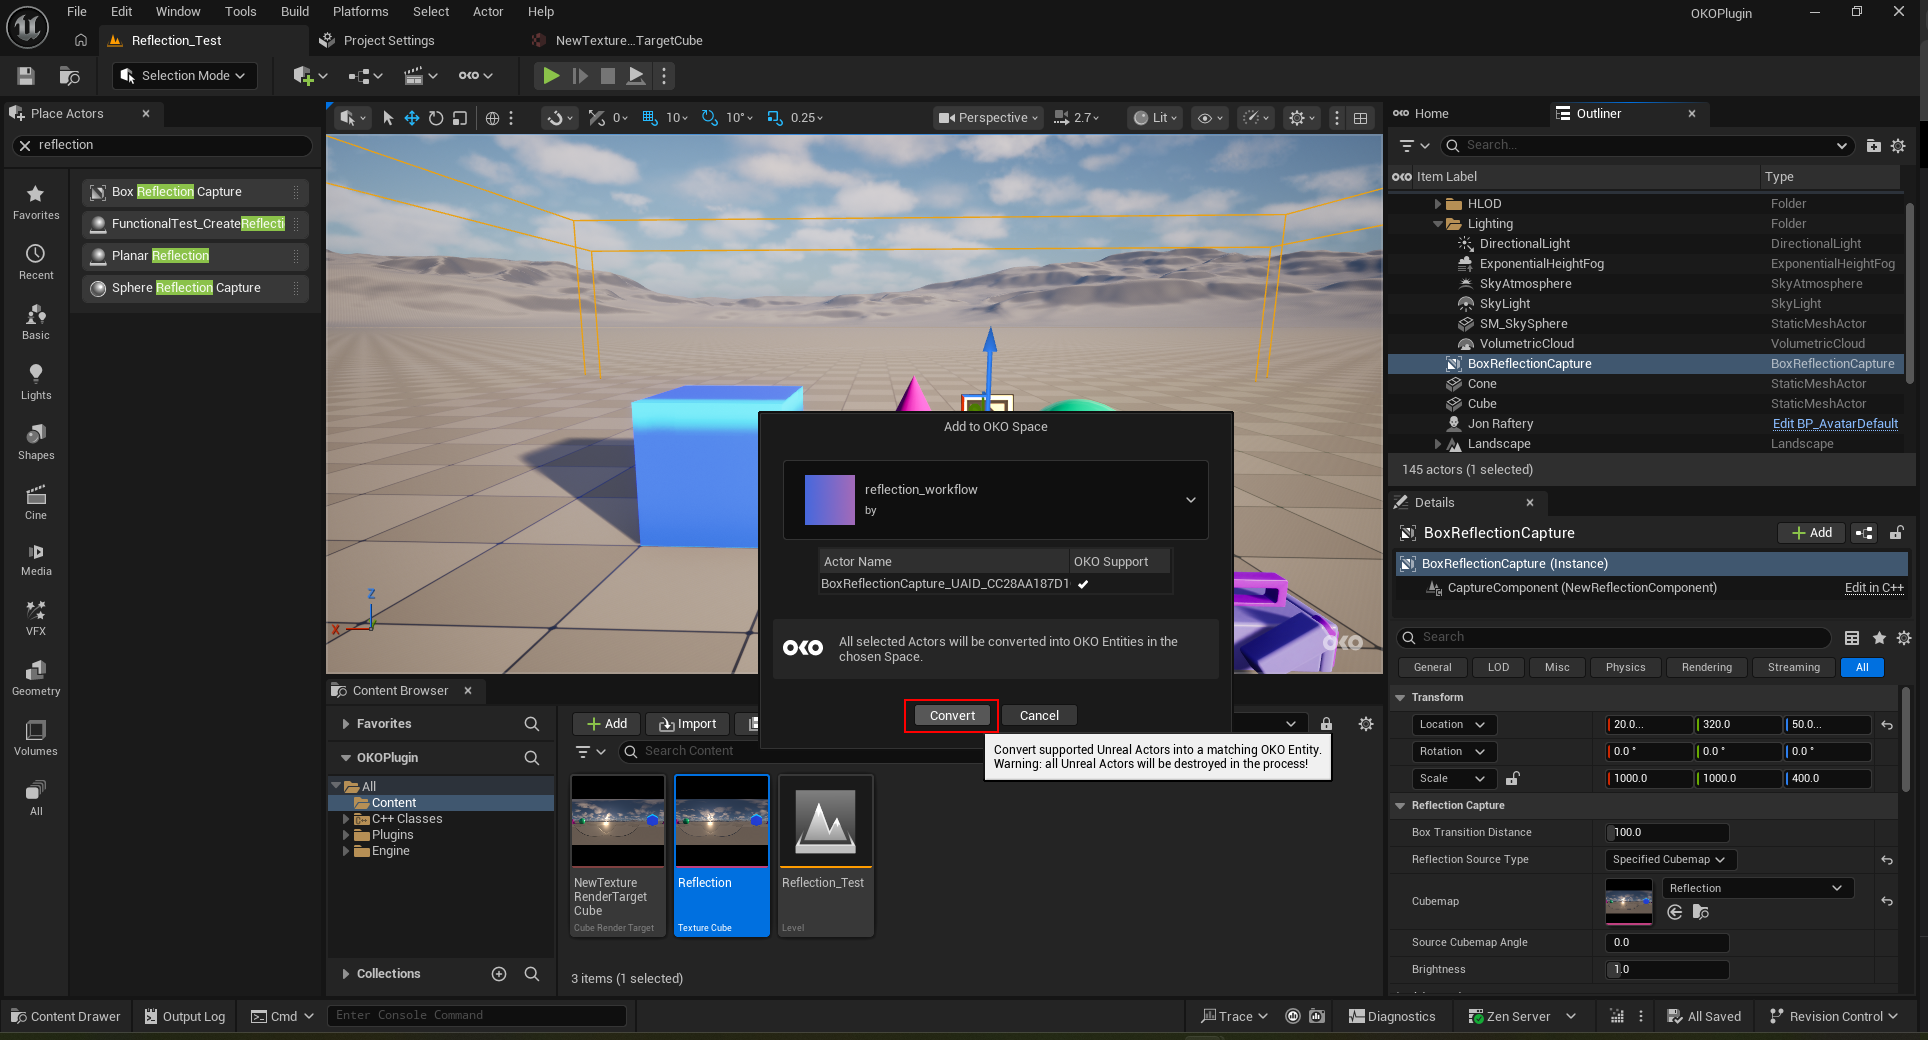
Click on “Convert” to Convert to an OKO Space Entity.
Observe that the “BoxReflectionCapture” now exists as an “OKOSpaceEntity”.