
Annotations
This guide will show you how to work with annotations, which builds on the comments functionality by allowing creators to markup their view of a space and post the final result for async feedback. Annotations help creators to collaborate more effectively by visually highlighting changes or feedback.
As annotations are closely related to comments, it is recommended to be familiar with the comments functionality before reading this guide (see comments guide here).
Note: As with comments, annotations are a creator-only features. Annotations are not visible to viewers of a space.
Instructions
Creating Annotations
Each annotation is associated with either a comment or a comment reply. As such, an annotation can be created when adding a new comment, editing an existing comment, or posting a reply to a comment.
To create an annotation when creating a new comment, click the "Add Annotation" button in the “New Comment” panel.
Similarly, to add an annotation to an existing comment, edit the comment and click the "Add Annotation" button in the “Edit Comment” panel.
To add an annotation to a comment reply, click the “Annotation Icon” button in the comment reply input form.
After clicking the annotation button, the process of authoring the annotation itself will begin.
Authoring the annotation
As mentioned previously, an annotation is a view of the space with additional 2D markup applied on top.
As such, authoring an annotation consists of two steps:
Capturing the view to annotate. This is done by positioning and orienting the camera in the space.
Adding markup to the captured view.
The view of the space is fixed and cannot be changed once selected.
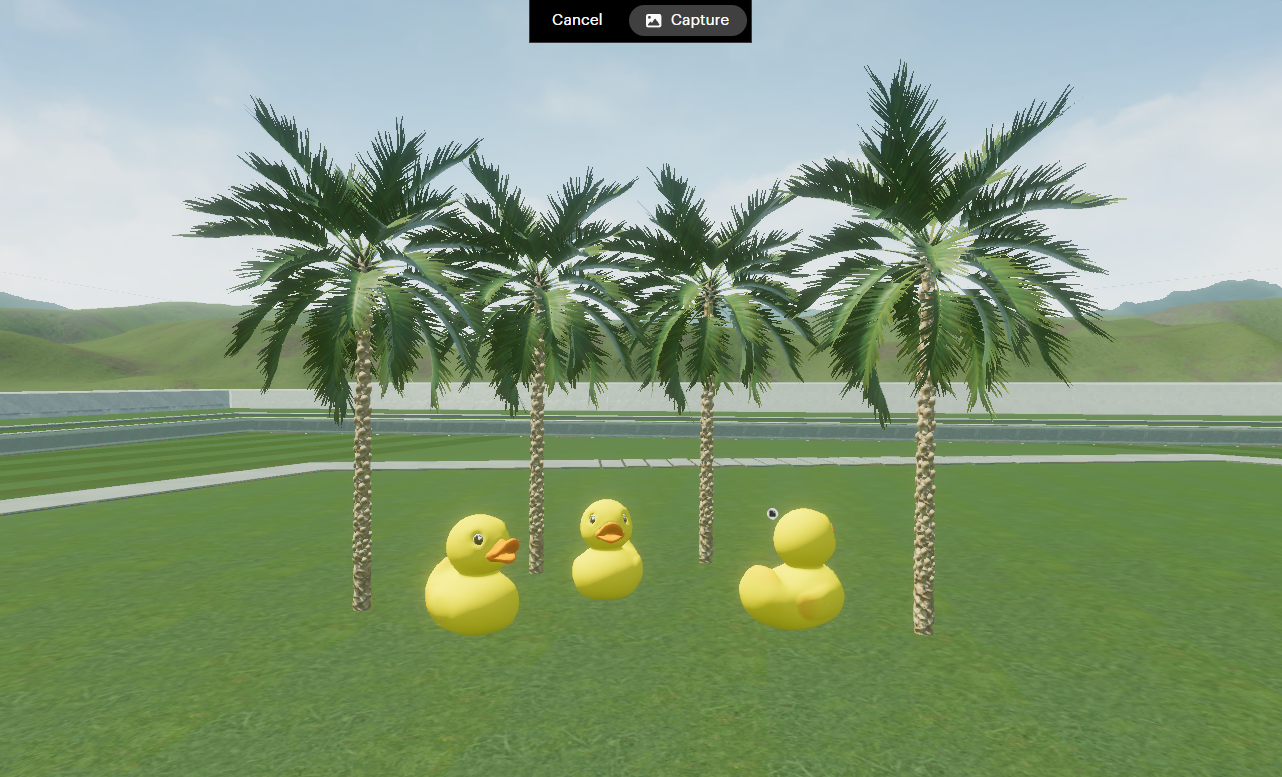
Immediately after clicking the "Add Annotation" button for a comment or comment reply, the annotation view capture interface will open. To select the view you wish to annotate:
Move and rotate the camera to the desired viewpoint.
Click the "Capture" button. The current viewpoint will be selected for the annotation.
Clicking the "Cancel" button will discard any progress and return to the previously active comment panel.
After the view of the space is selected, the annotation authoring interface will open, allowing you to add the markup for the annotation. At this stage, the camera will be locked – it will no longer be possible to change the viewpoint.
Add markup to the space view using the tools available in the toolbar.
When finished, click the "Done" button.
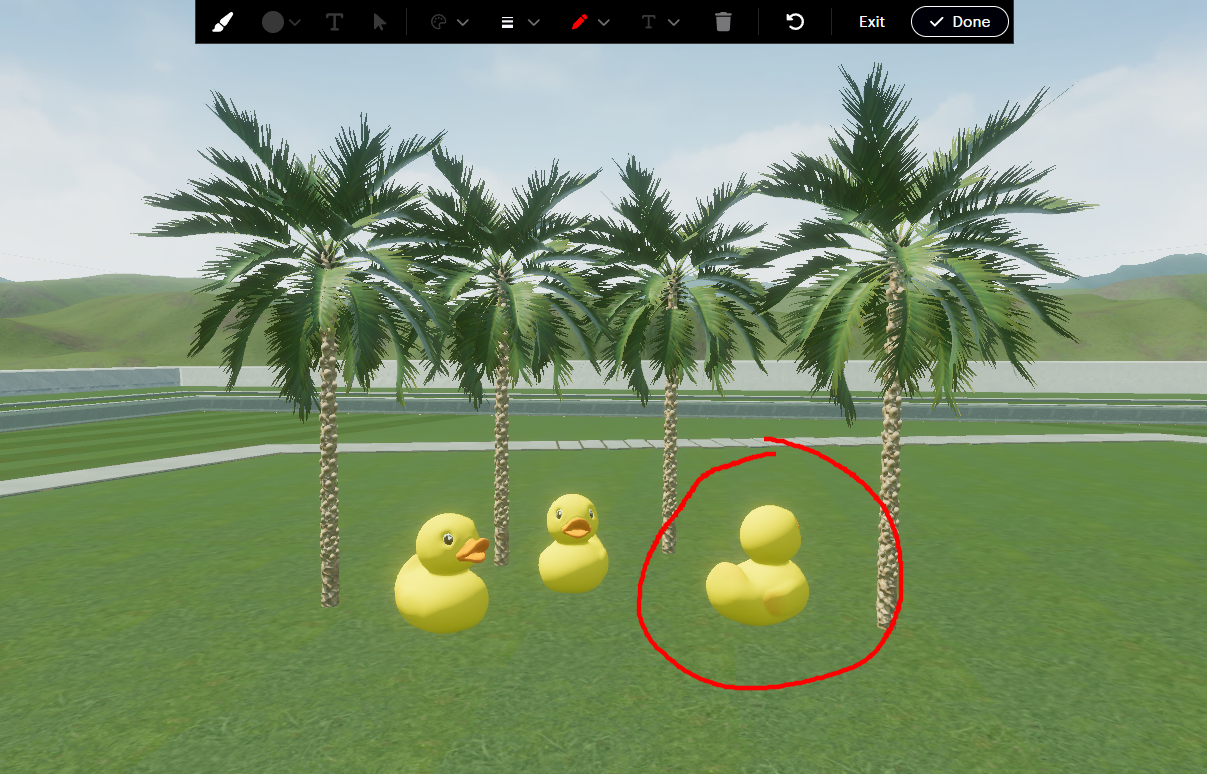
Clicking the "Exit" button will discard the annotation data and return to the previously active comment panel.
On clicking "Done", the annotation authoring process will complete, and the annotation data will be associated with the in-progress comment or comment reply. The annotation authoring interface will be closed, and the previously active comment panel will be shown again. A thumbnail image of the created annotation will be displayed in the comments panel.
After adding an annotation to a comment, it will not be saved until you either create or save the comment itself. In the same way, when adding an annotation to a comment reply, it will not be saved until the reply is posted.
Annotation markup tools
The annotation authoring interface offers several tools to enable you to add and edit markup for the annotation.
Once the annotation authoring interface has closed, it’s no longer possible to edit the mark for the annotation. In this case, to modify an annotation, you must replace it with a new one.
On the very left of the toolbar are the markup creation tools. There are:
Freehand drawing
Primitive shapes, which include:
Ellipse
Rectangle
Polygon
Line
Arrow
Text

The select tool allows you to select an existing markup object to edit or delete it.

The visual properties of a markup object are defined by the format properties in the centre section of the toolbar. When a markup creation tool is active, the format properties will be applied to the new markup object. If an existing markup object is selected, the properties will reflect the current properties of the object. Modifying any of the format properties in this case will update the object.
The available format properties are:
Fill color
Line thickness
Line color
Text size
The enabled properties will differ based on the selected markup tool or object.

The delete tool allows you to delete the currently selected markup object.

Finally, the undo button allows you to revert the last change made to the annotation. This applies to the creation, editing and deletion of markup objects.

Viewing annotations
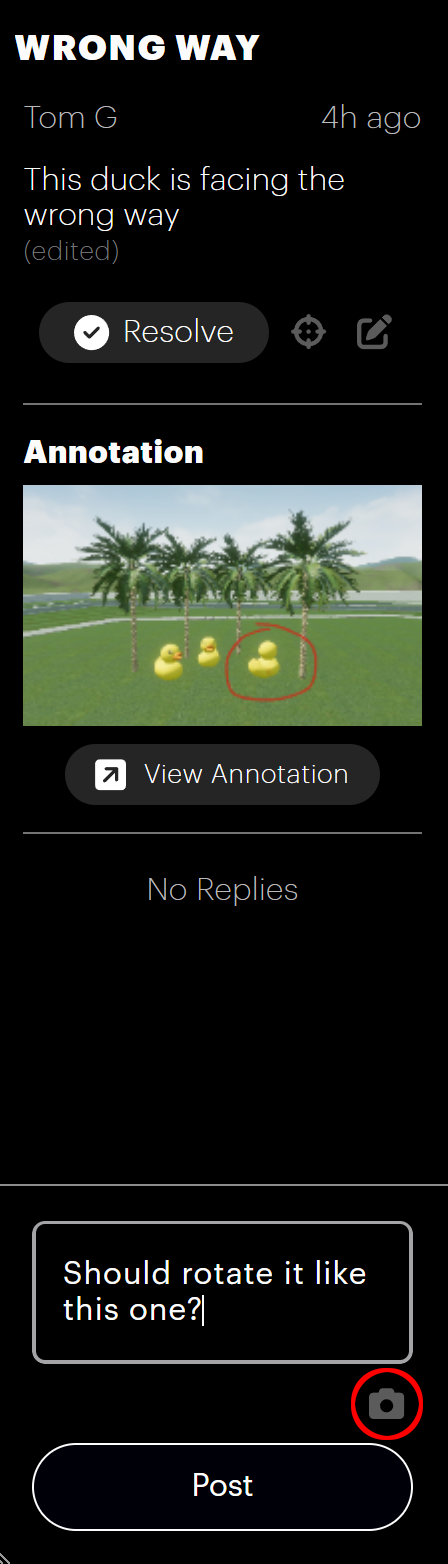
An annotation belonging to a comment can be viewed via the “Comment Properties” panel. If a comment or comment reply has an annotation associated with it, the annotation thumbnail will be displayed in the panel. When an annotation is viewed, the current viewpoint will update to match that of the annotation, and the markup will be displayed over the view.
To view an annotation:
Select the comment in the “Comments List” panel. The “Comment Properties” panel will open on the right of the screen.
Click the "View Annotation" button. The annotation will be displayed on screen and the camera will update to the view saved as part of the annotation.
When finished, click "Close Annotation". The previous camera viewpoint will be restored.
To view an annotation for a comment reply, select the comment and click the "View Annotation" button displayed within the annotation thumbnail.
When viewing an annotation, a live view of the space is displayed under the markup, so some things may have changed since the annotation was created.
Replacing an existing annotation
If a comment has an annotation, it is possible to replace the existing annotation with a new one. To do this:
Select the comment in the “Comment List” panel. The “Comment Properties” panel will open on the right of the screen.
Click the "Edit" button in this panel.
Click the "Redo Annotation" button. This will take you through the annotation authoring process and return to the edited comment when complete.
When finished editing the comment, click the "Save" button to save the changes with the new annotation.
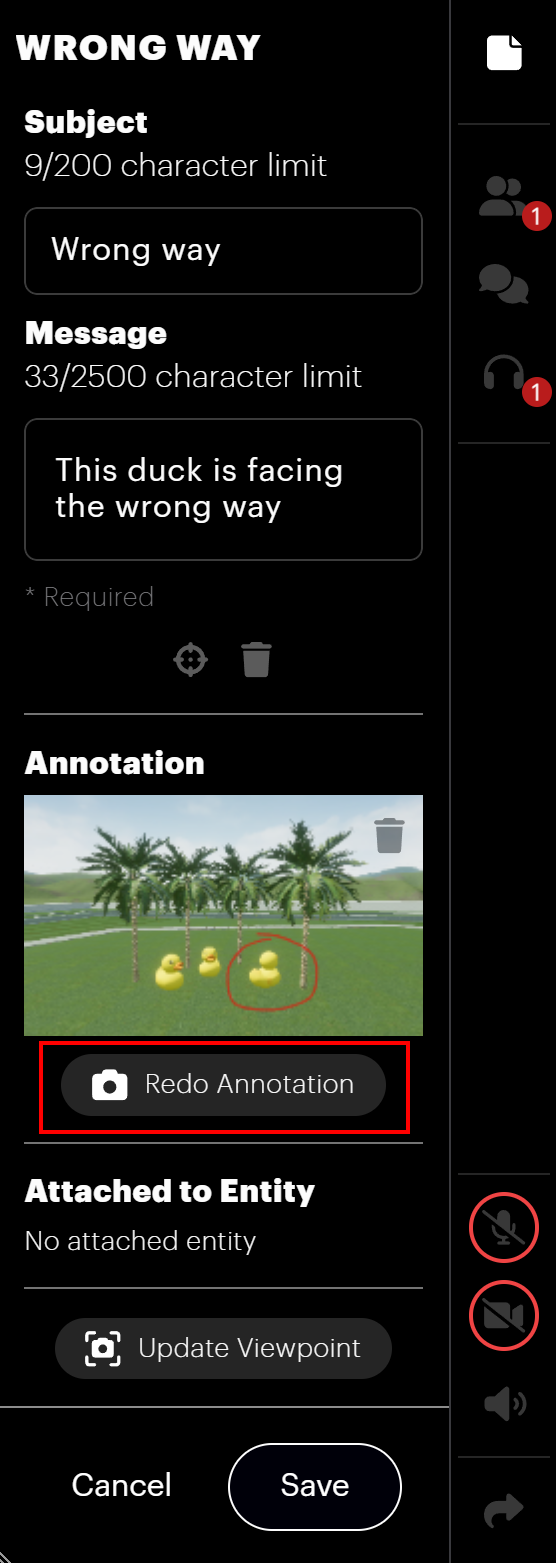
Note that when an annotation is replaced, the previous annotation will be deleted.
Comment replies are not editable. Therefore, it’s not possible to replace an annotation associated with a comment reply.
Deleting an annotation
Annotations may also be deleted from comments. To do this:
Select the comment in the “Comment List” panel. The “Comment Properties” panel will open on the right of the screen.
Click the "Edit" button in this panel.
Click the "Delete" button on the annotation thumbnail. The annotation will be deleted.
Comment replies are not editable. Therefore, it's not possible to delete an annotation from a comment reply.