
Stereo video
OKO Web Client 4.8.0 - CSP 6.42.0
This guide details how to use stereo video in your OKO space.
There are two approaches – both methods require setting up a video component.
Preliminary: setting up a video component
Add a video asset to your space by dragging a video to the Assets tab in the bottom panel.
Add a video component to your space.
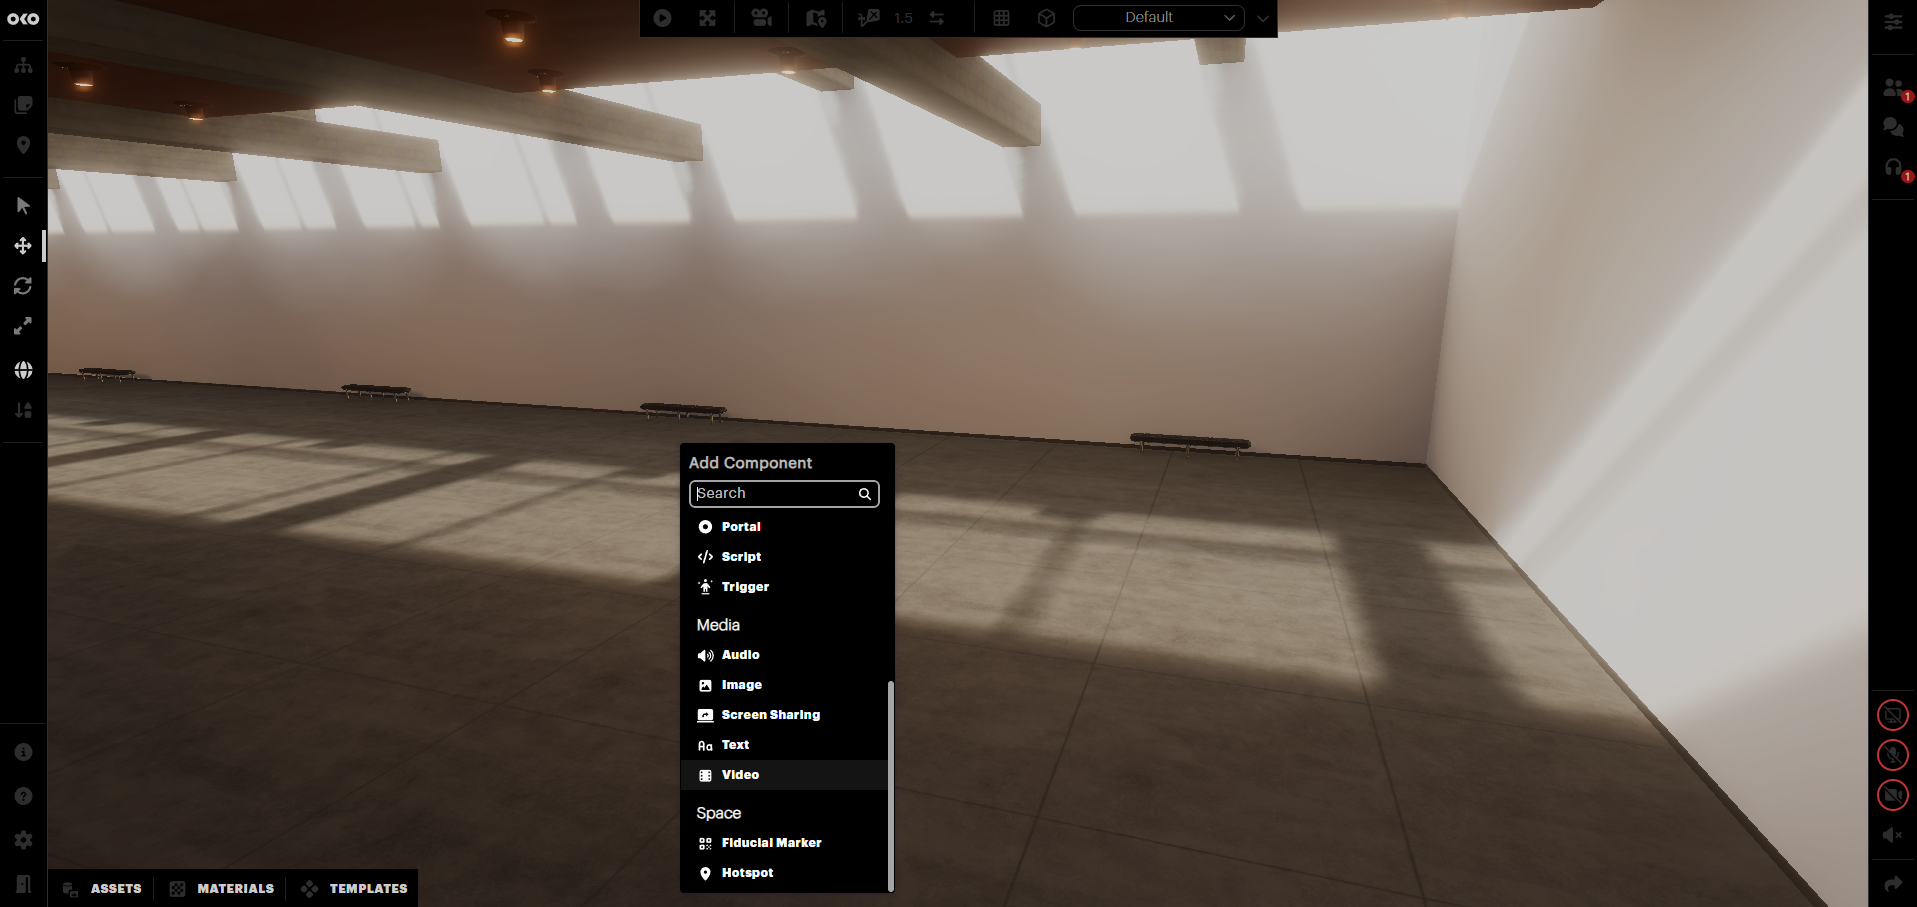
With your video component selected, open the Properties panel (on the right-hand side of the screen) and open the video component by selecting “Video” from the hierarchy on that side.
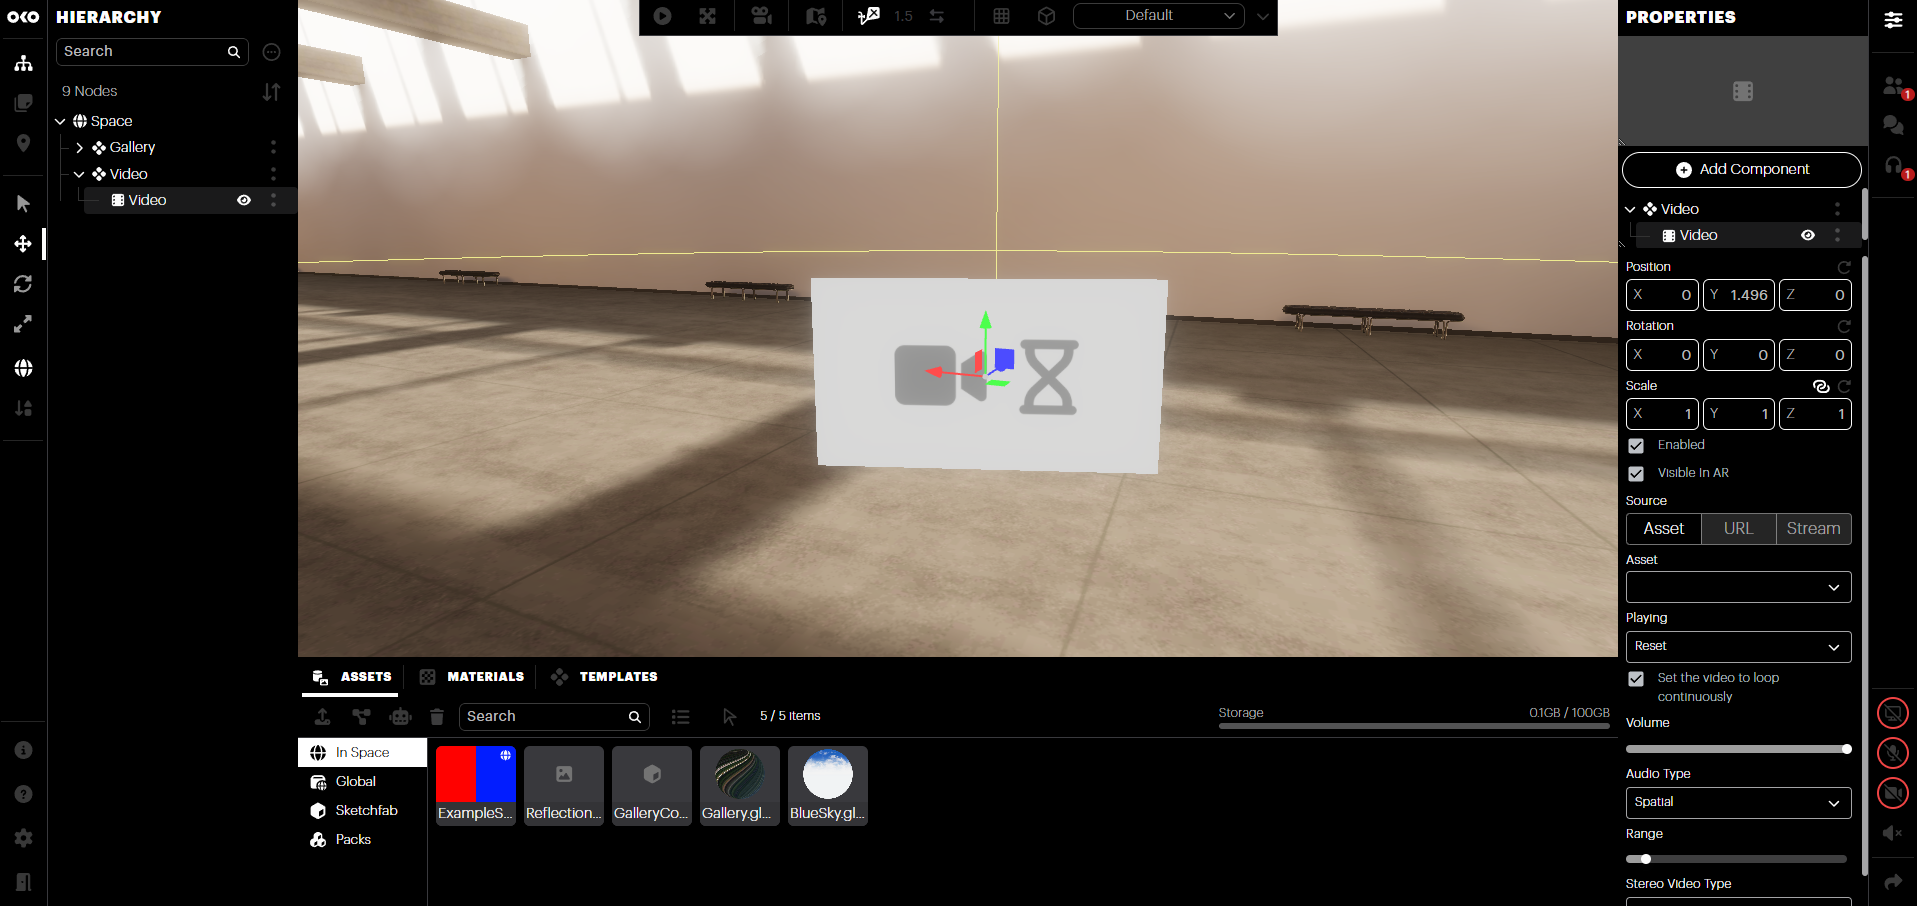
You will see various properties, including transformations and video sources. For “Asset”, select the video asset you want to use.

At this stage, your video component will show the first frame without any stereo handling.
Using a video component
This approach is recommended if you need to display a video in your scene. The video component itself will display the video.
Select the video component you added in “Preliminary: Setting up a video component”.
For “Stereo video type”, select the option that best represents how your stereo video is laid out.
Top/Bottom: Use this for videos which appear as two frames, one above the other.
Side-by-side: Use this for videos which appear as two frames, one beside the other.
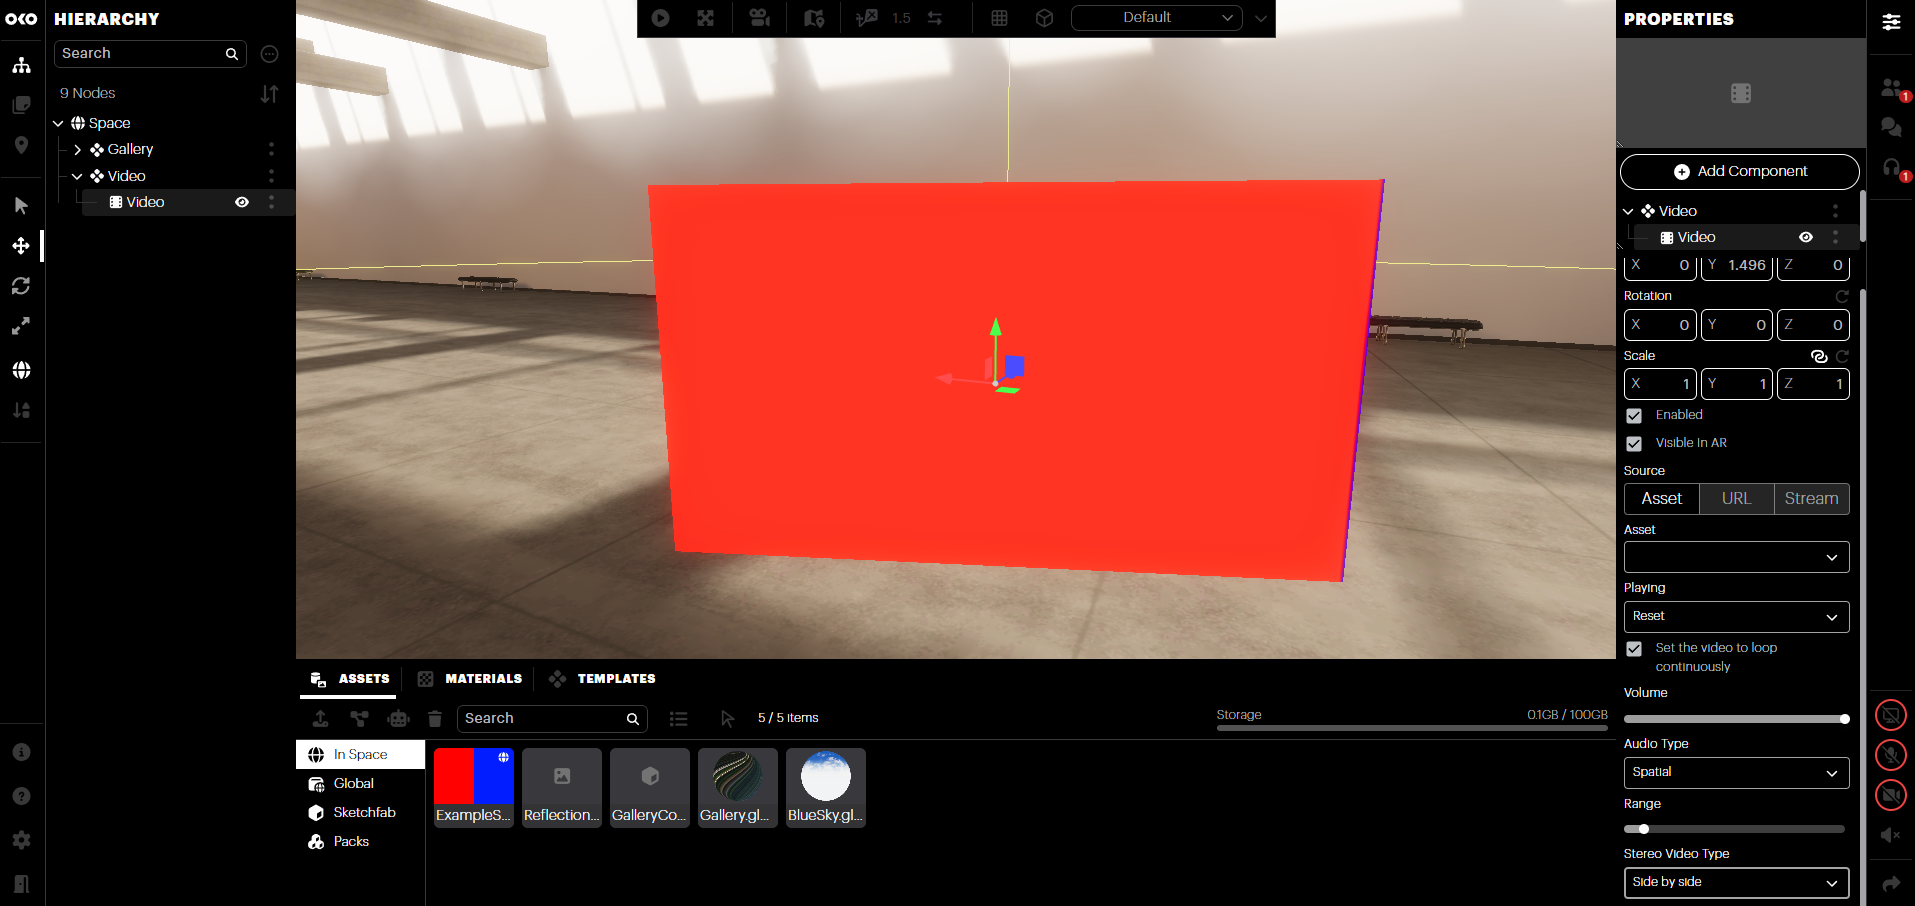
You’ll notice that the video component will display the video as one frame, typically the left or top frame by default. You can change this by selecting “Stereo flipped” in the same properties panel.
Using a Custom Material
This approach is recommended if you need more advanced functionality, such as displaying your video on multiple in-space surfaces or on custom surfaces and assets.
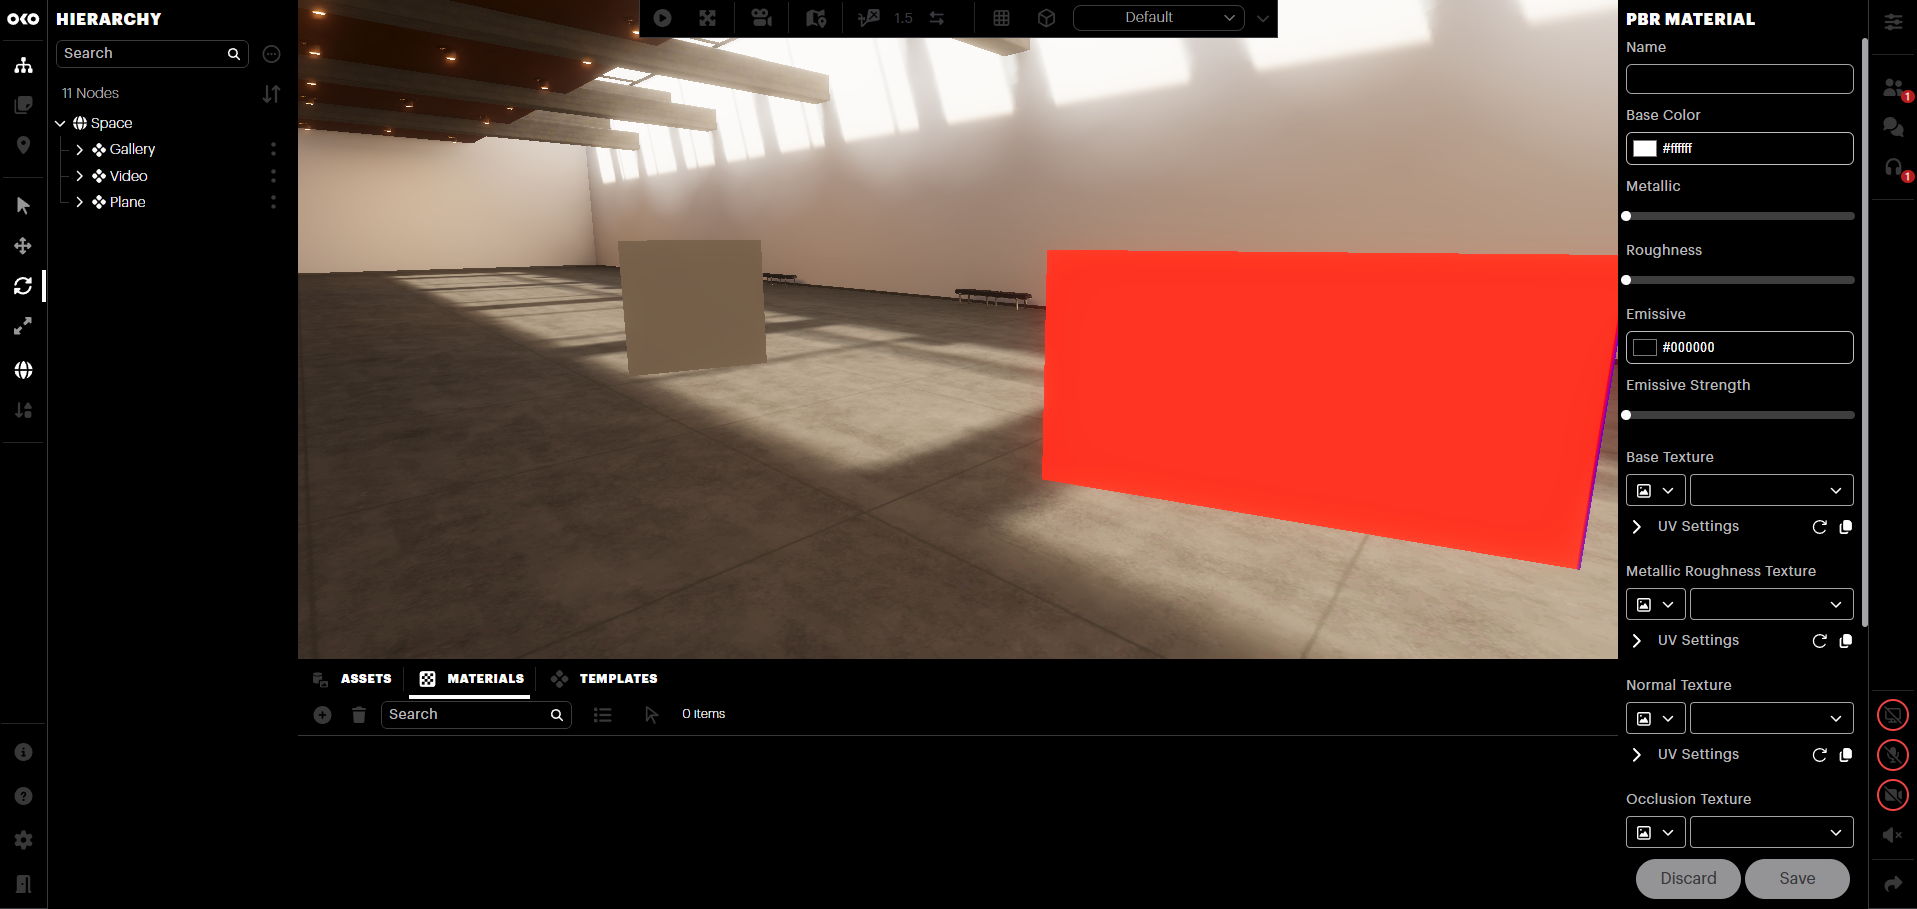
In the bottom panel, open the Materials tab.
Click the “Add” button to add a custom material and select “Default PBR”.
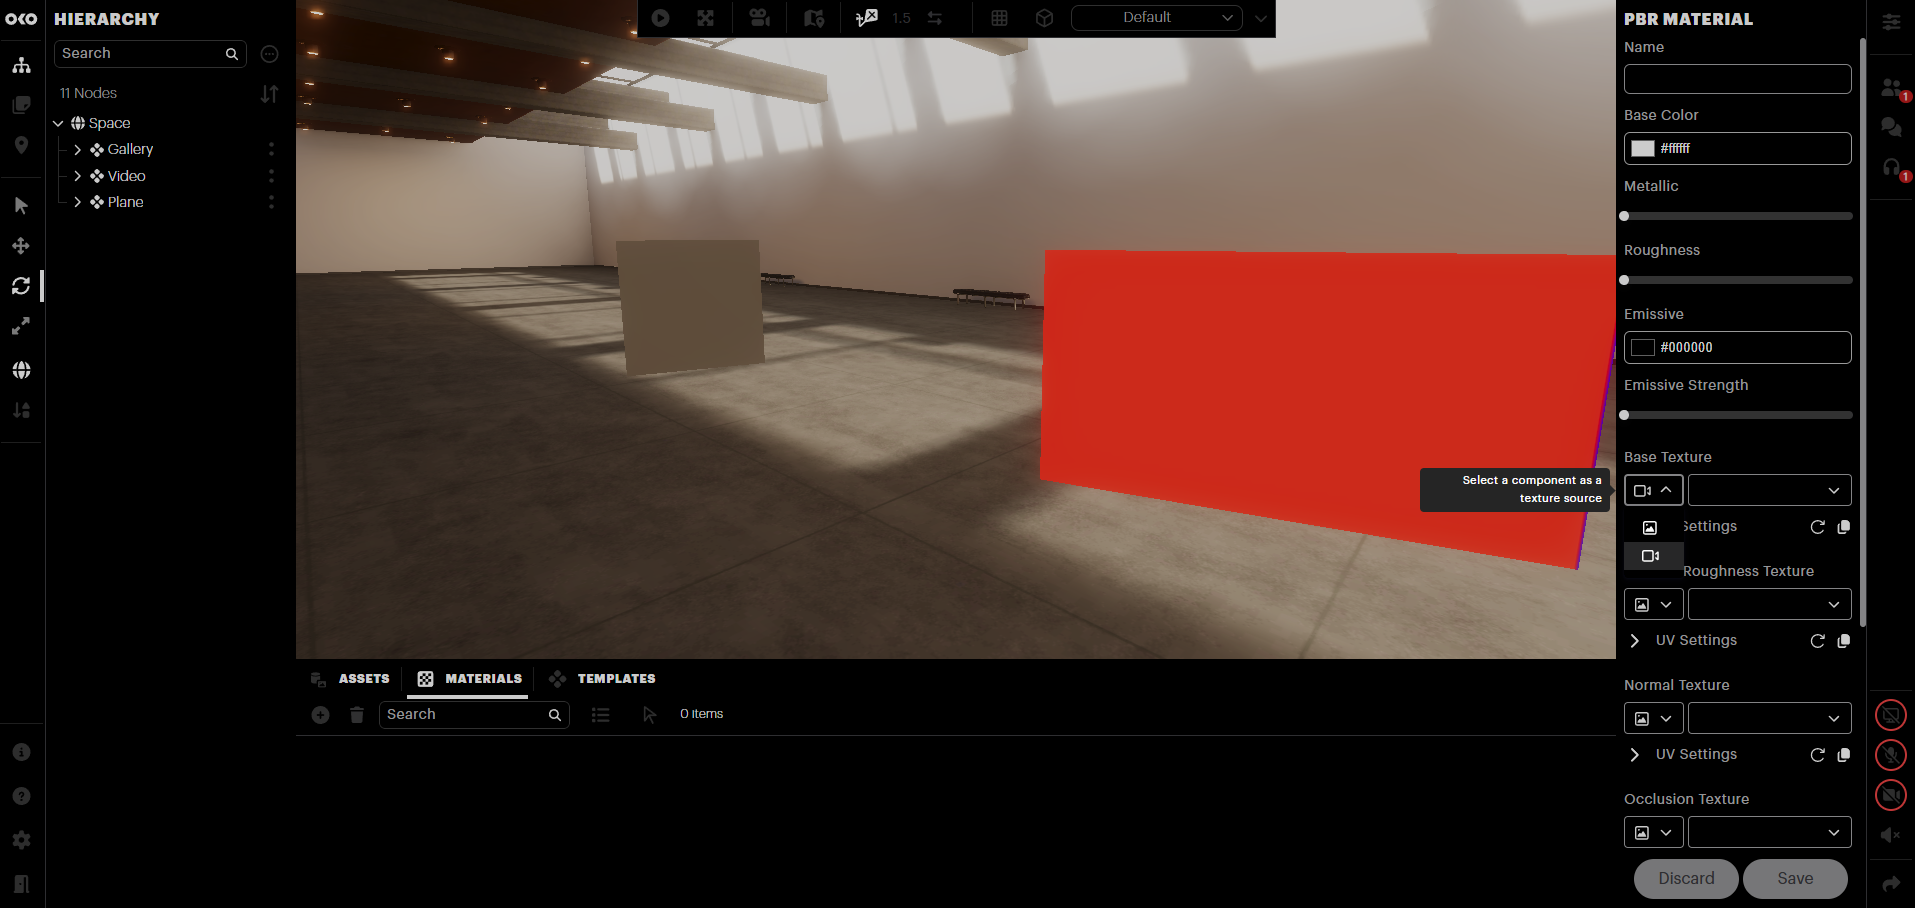
You will see various material options in the right-hand panel, including sections for each texture channel. For now, let's use “Base Texture.
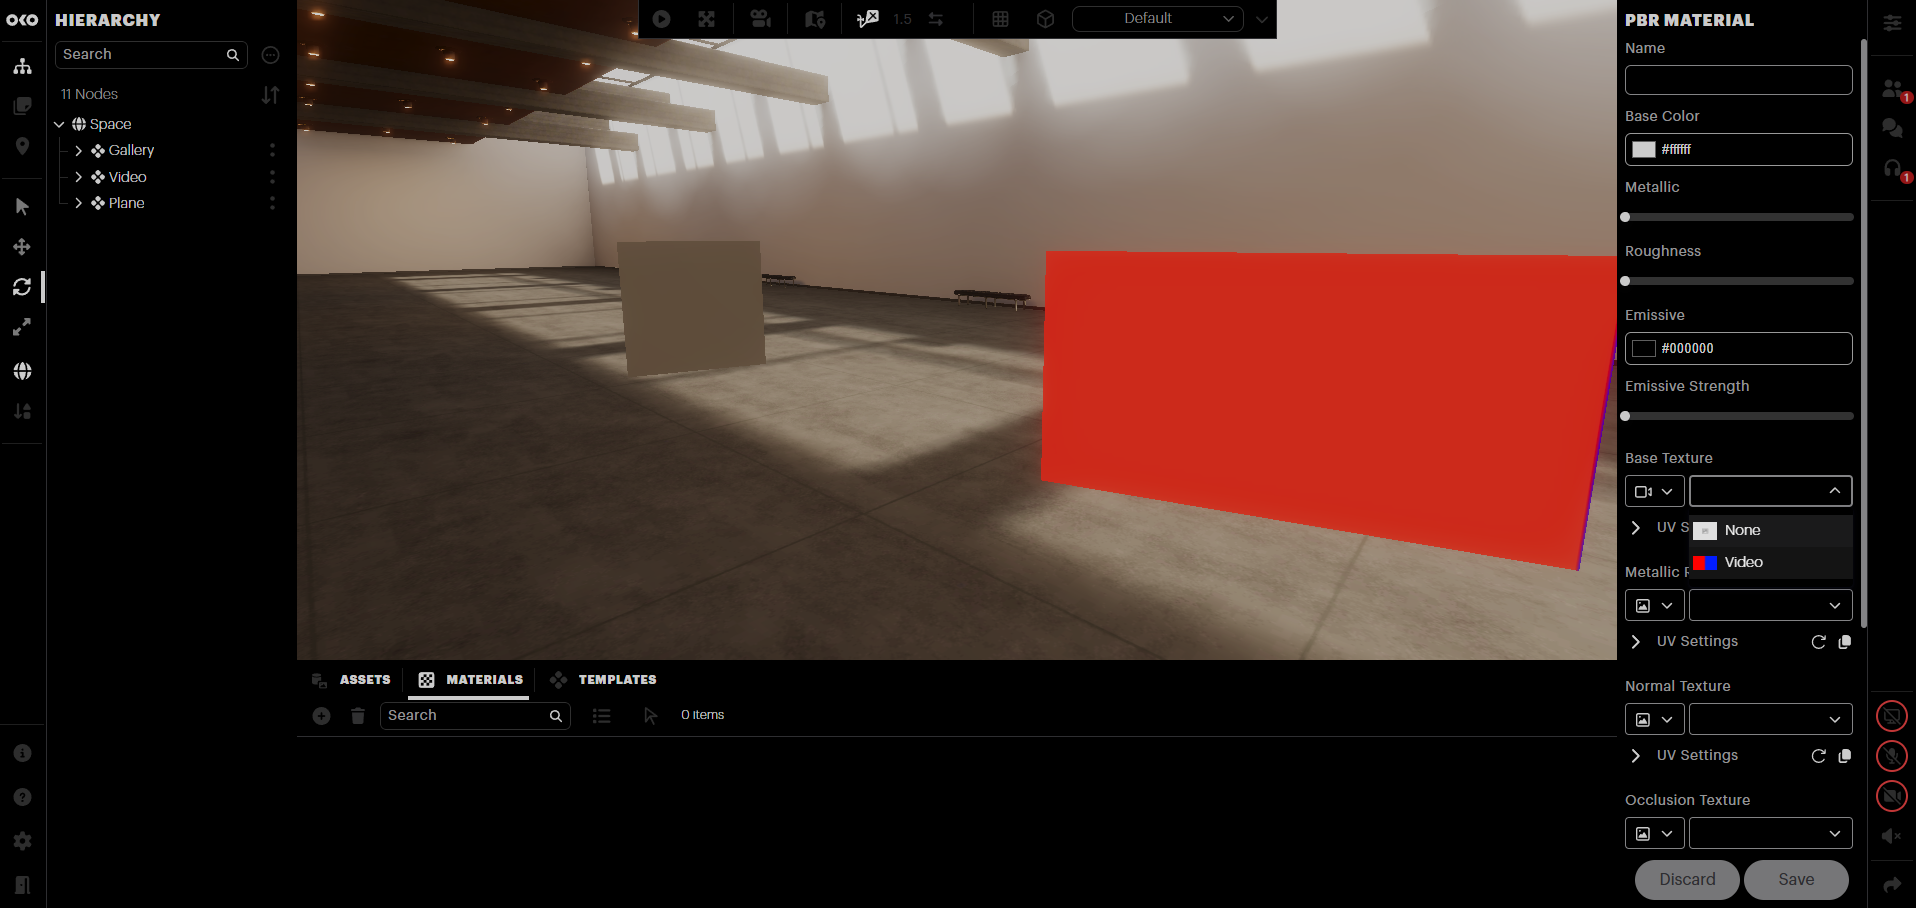
There are two drop-down options directly underneath “Base Texture”. For the first one, select “Video”.
The second drop-down will now list any video components that exist in your scene. Select the one previously created.
Click the “UV Settings” drop-down to show further settings for this texture channel.
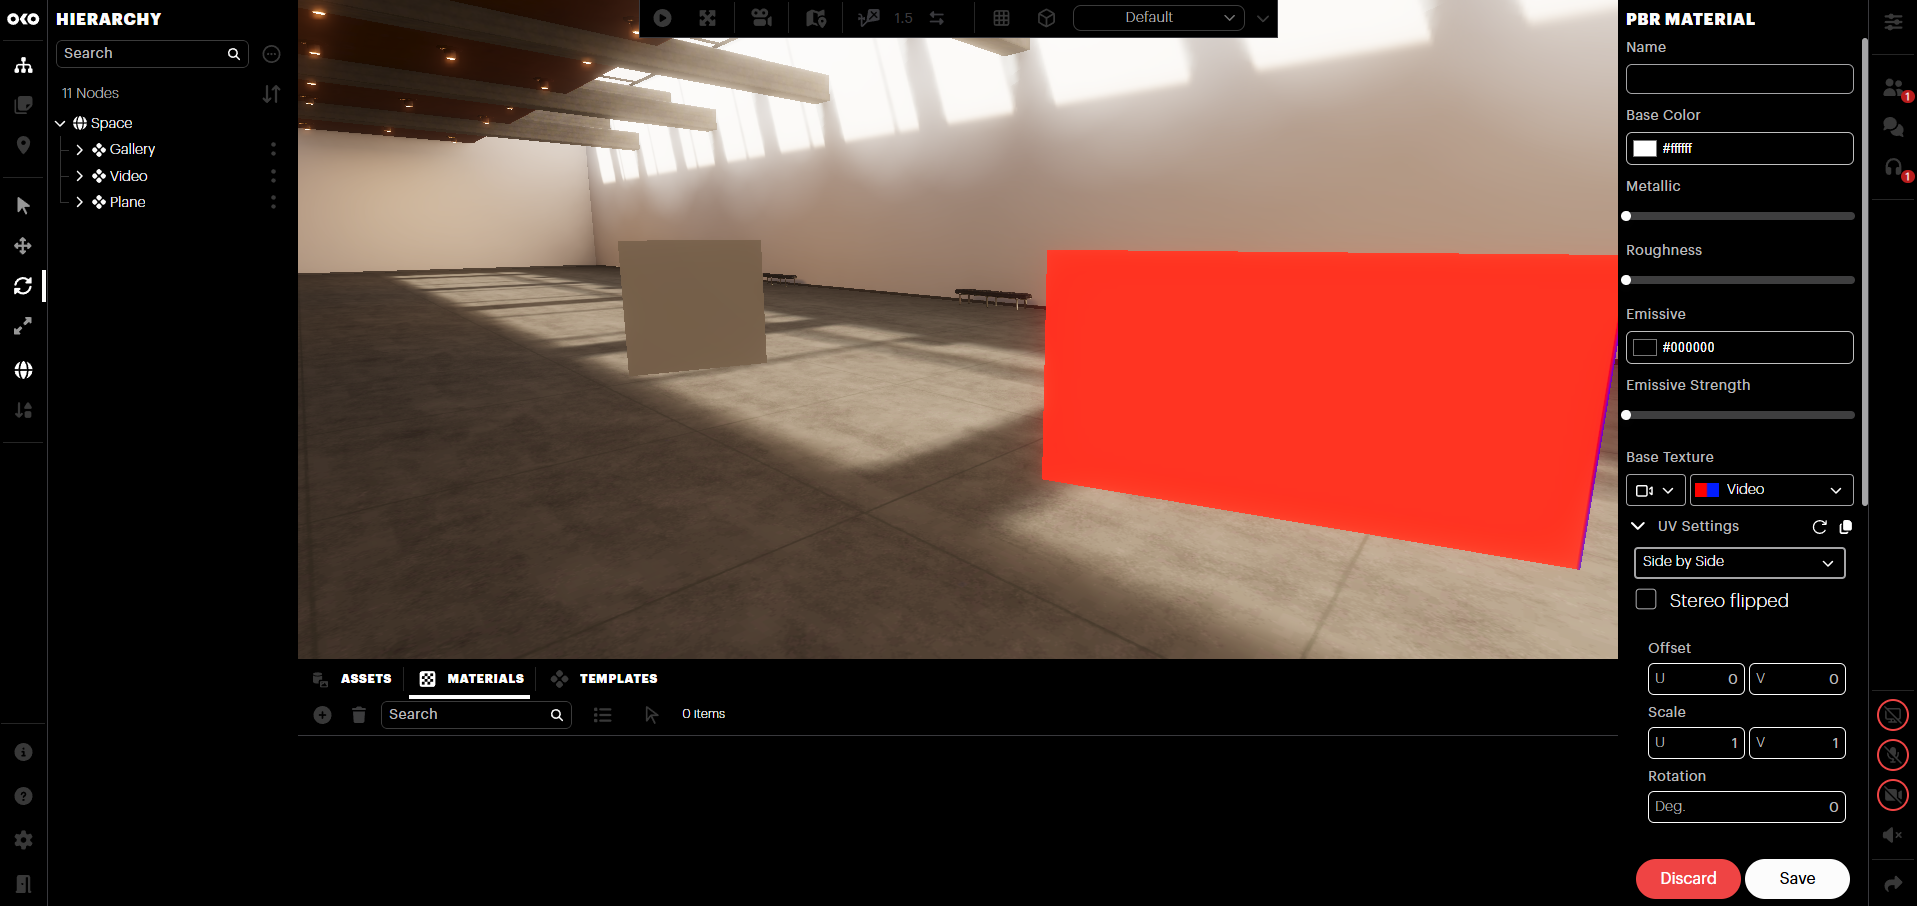
For “Stereo mode”, select the option which represents how your stereo video is laid out.
Top/Bottom: Use this for videos which appear as two frames, one above the other.
Side-by-side: Use this for videos which appear as two frames, one beside the other.
Click “Save” to save changes to the material.
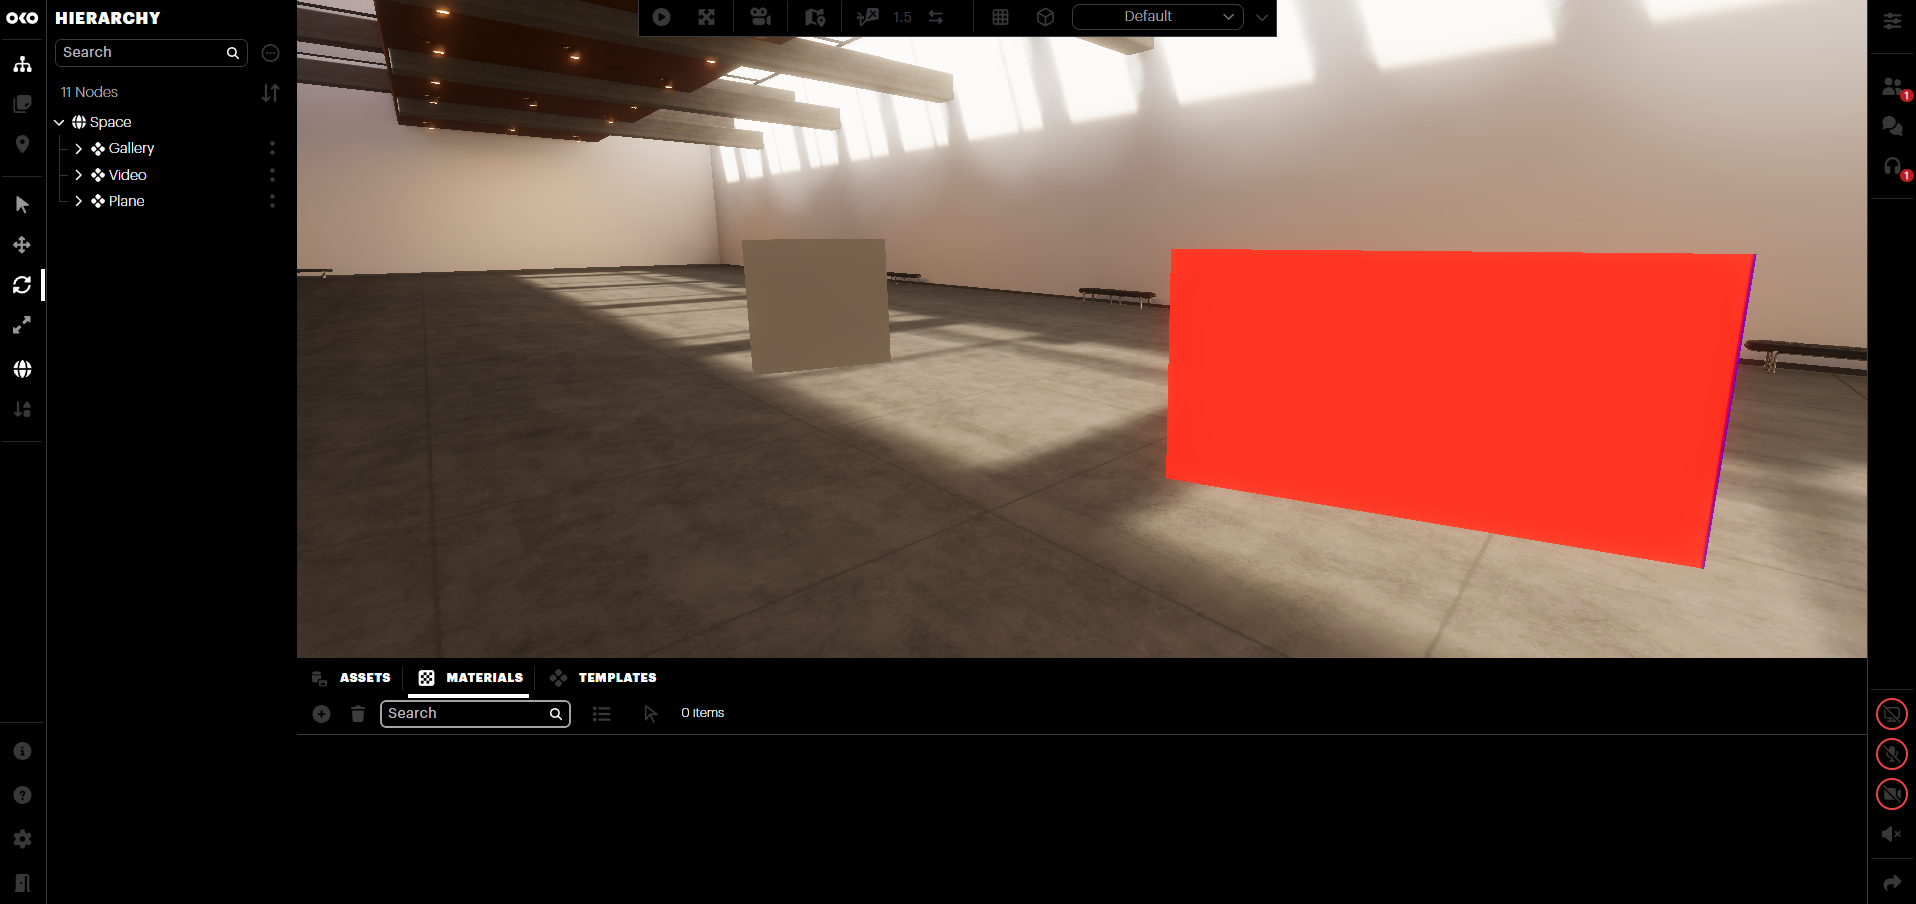
Drag the material from the Materials panel onto any objects in the scene to see the result.
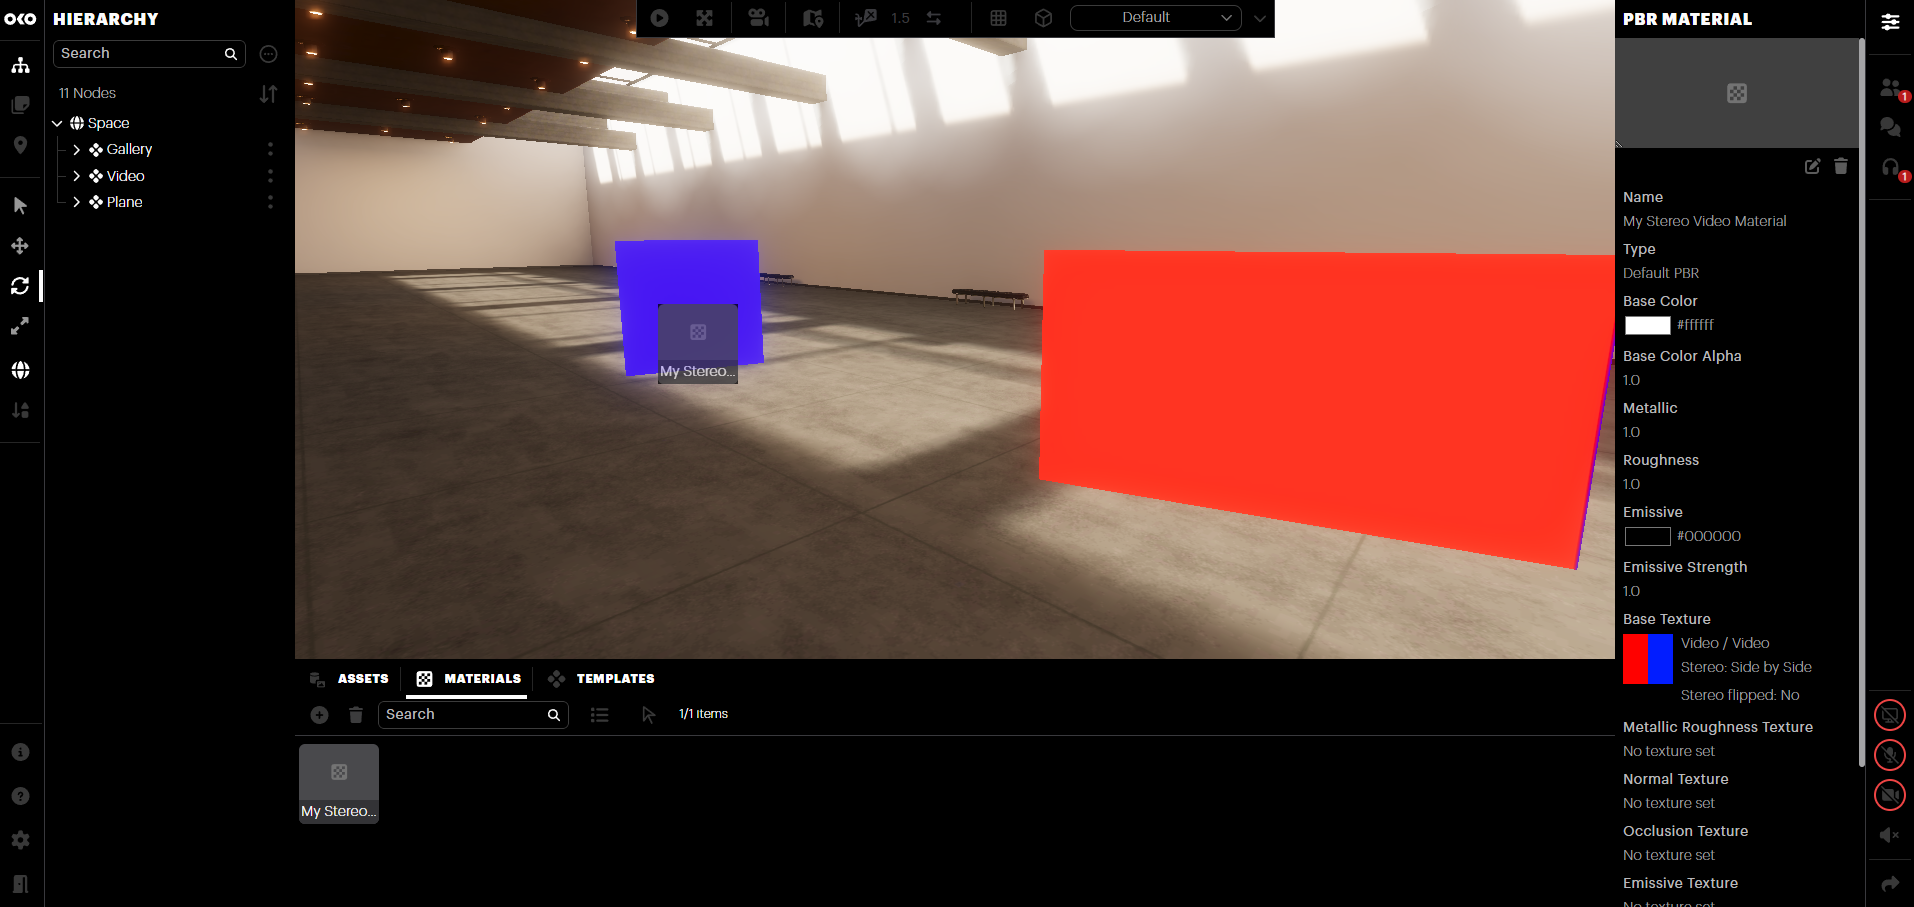
You’ll notice that the object you applied the material to will display the video as one frame, typically the left or top by default. You can change this (for all objects using this material) by selecting “stereo flipped” in the custom material properties → Base Texture -> UV Settings.
Important notes
You can use both techniques at the same time. However, keep in mind that the custom material will override the video component settings for any assets using it. For example, a video component set to “side-by-side” will continue to play that way. But if the custom material is set to “top/bottom”, any surfaces using that custom material will display in top/bottom, without affecting the video component.
You will need a stereo rendering device to see the stereoscopic effect; other devices will only see one half of the video frame, depending on the modes selected.