
Using ticketing (Eventbrite) in OKO
This guide covers how to set up and use ticketing with OKO and Eventbrite.
Instructions
First, create a new space.
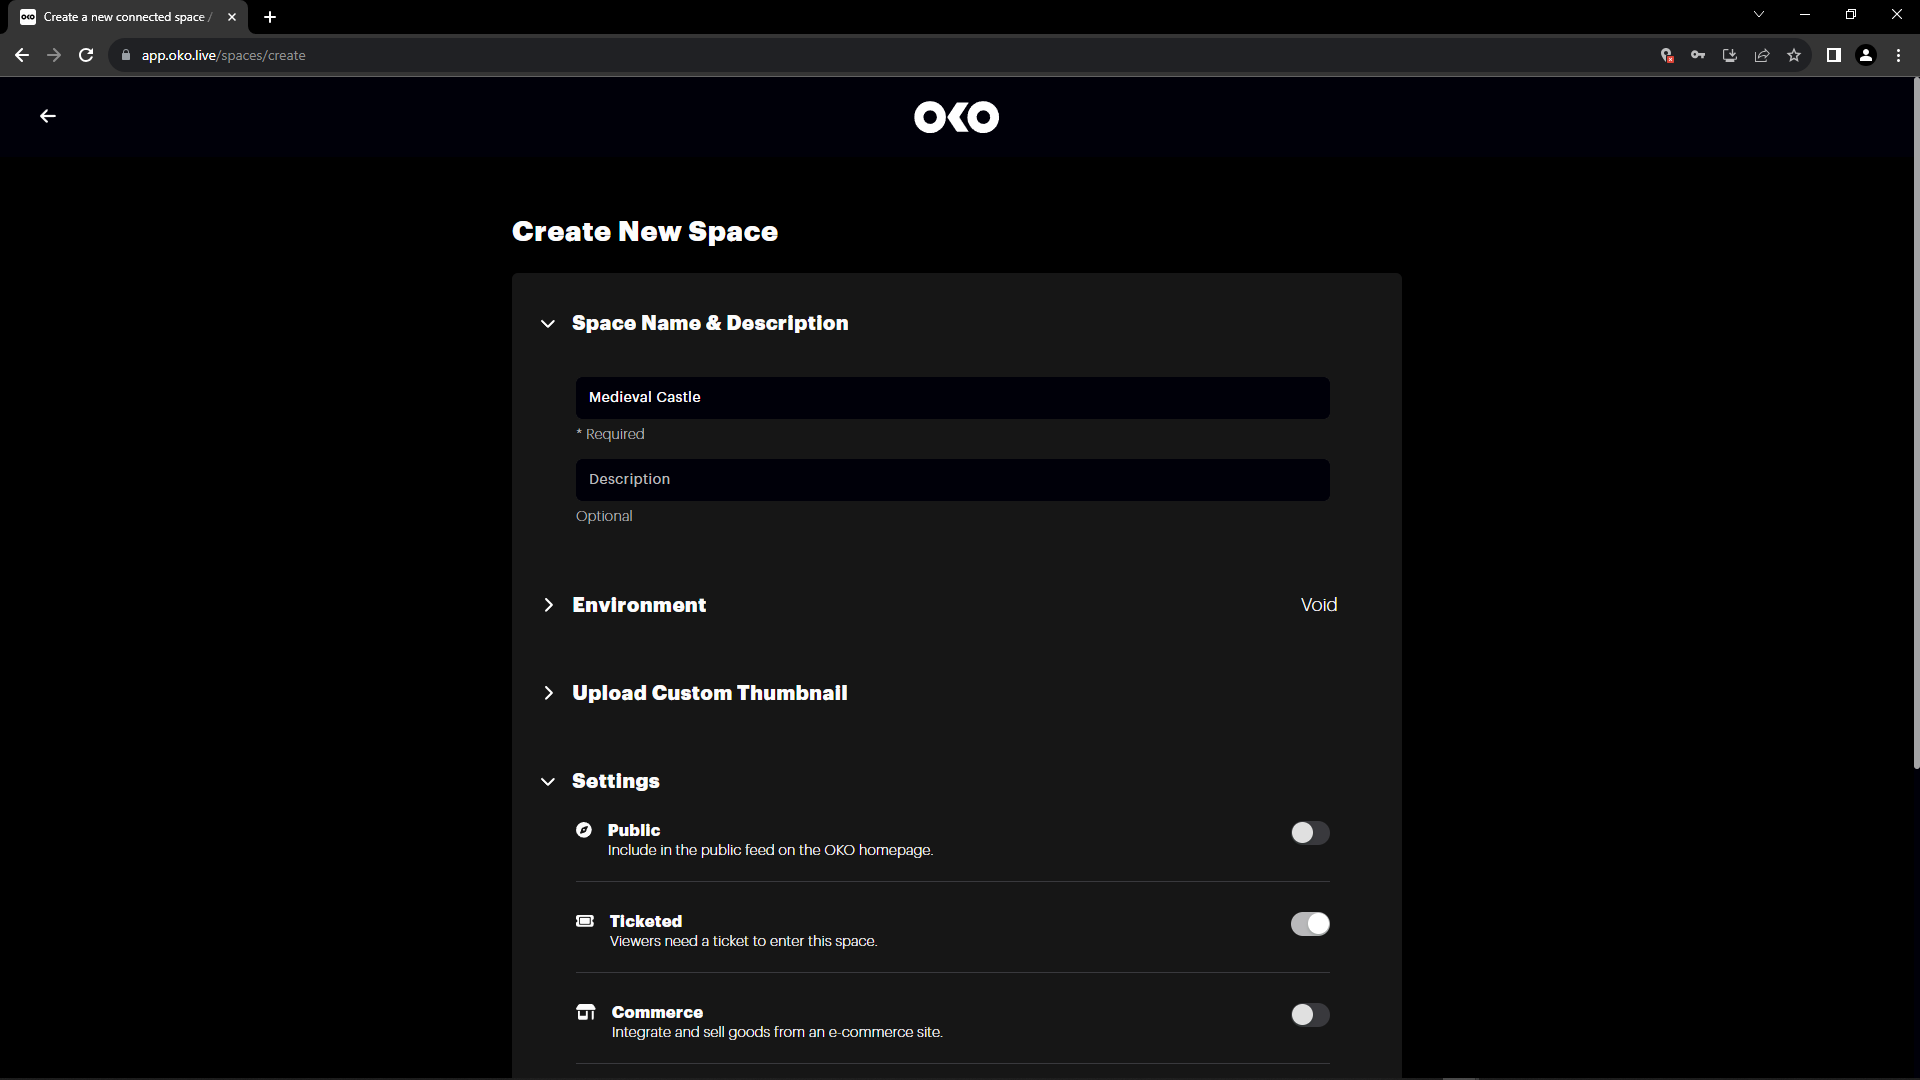
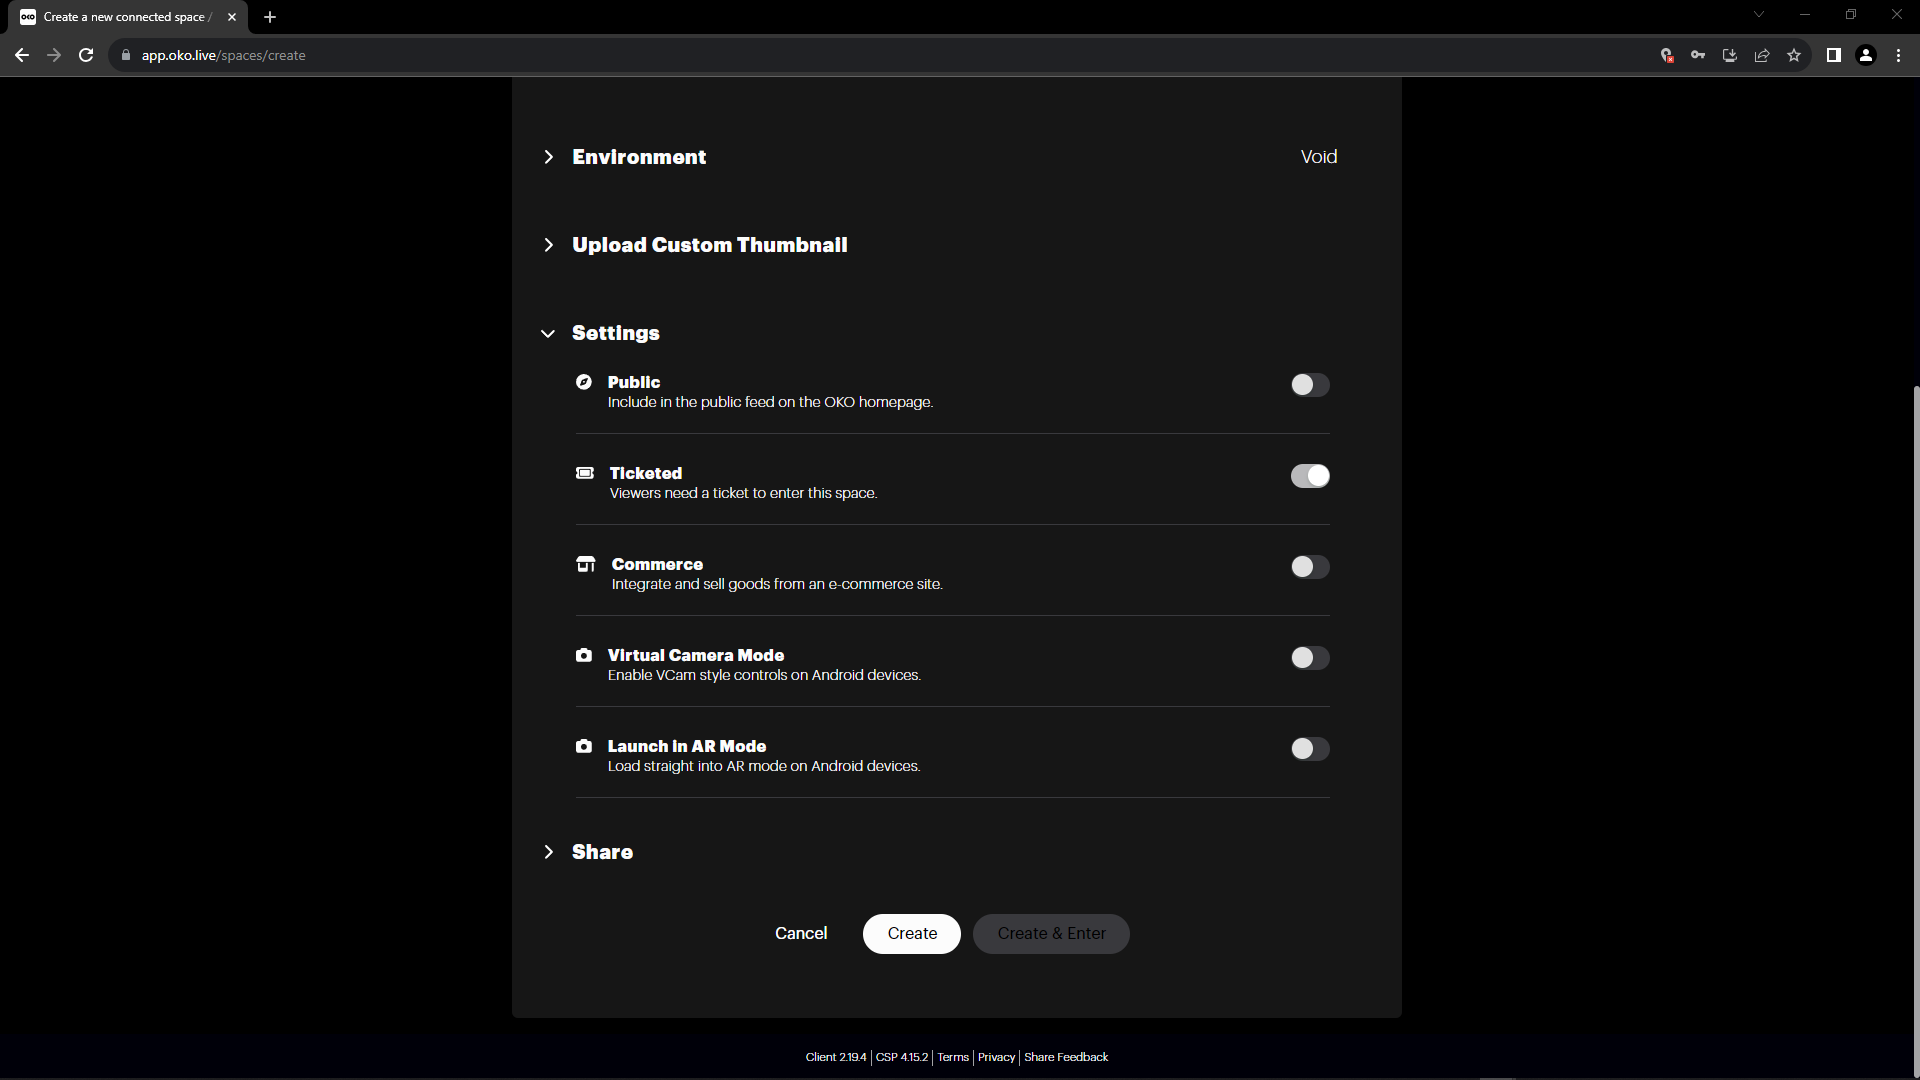
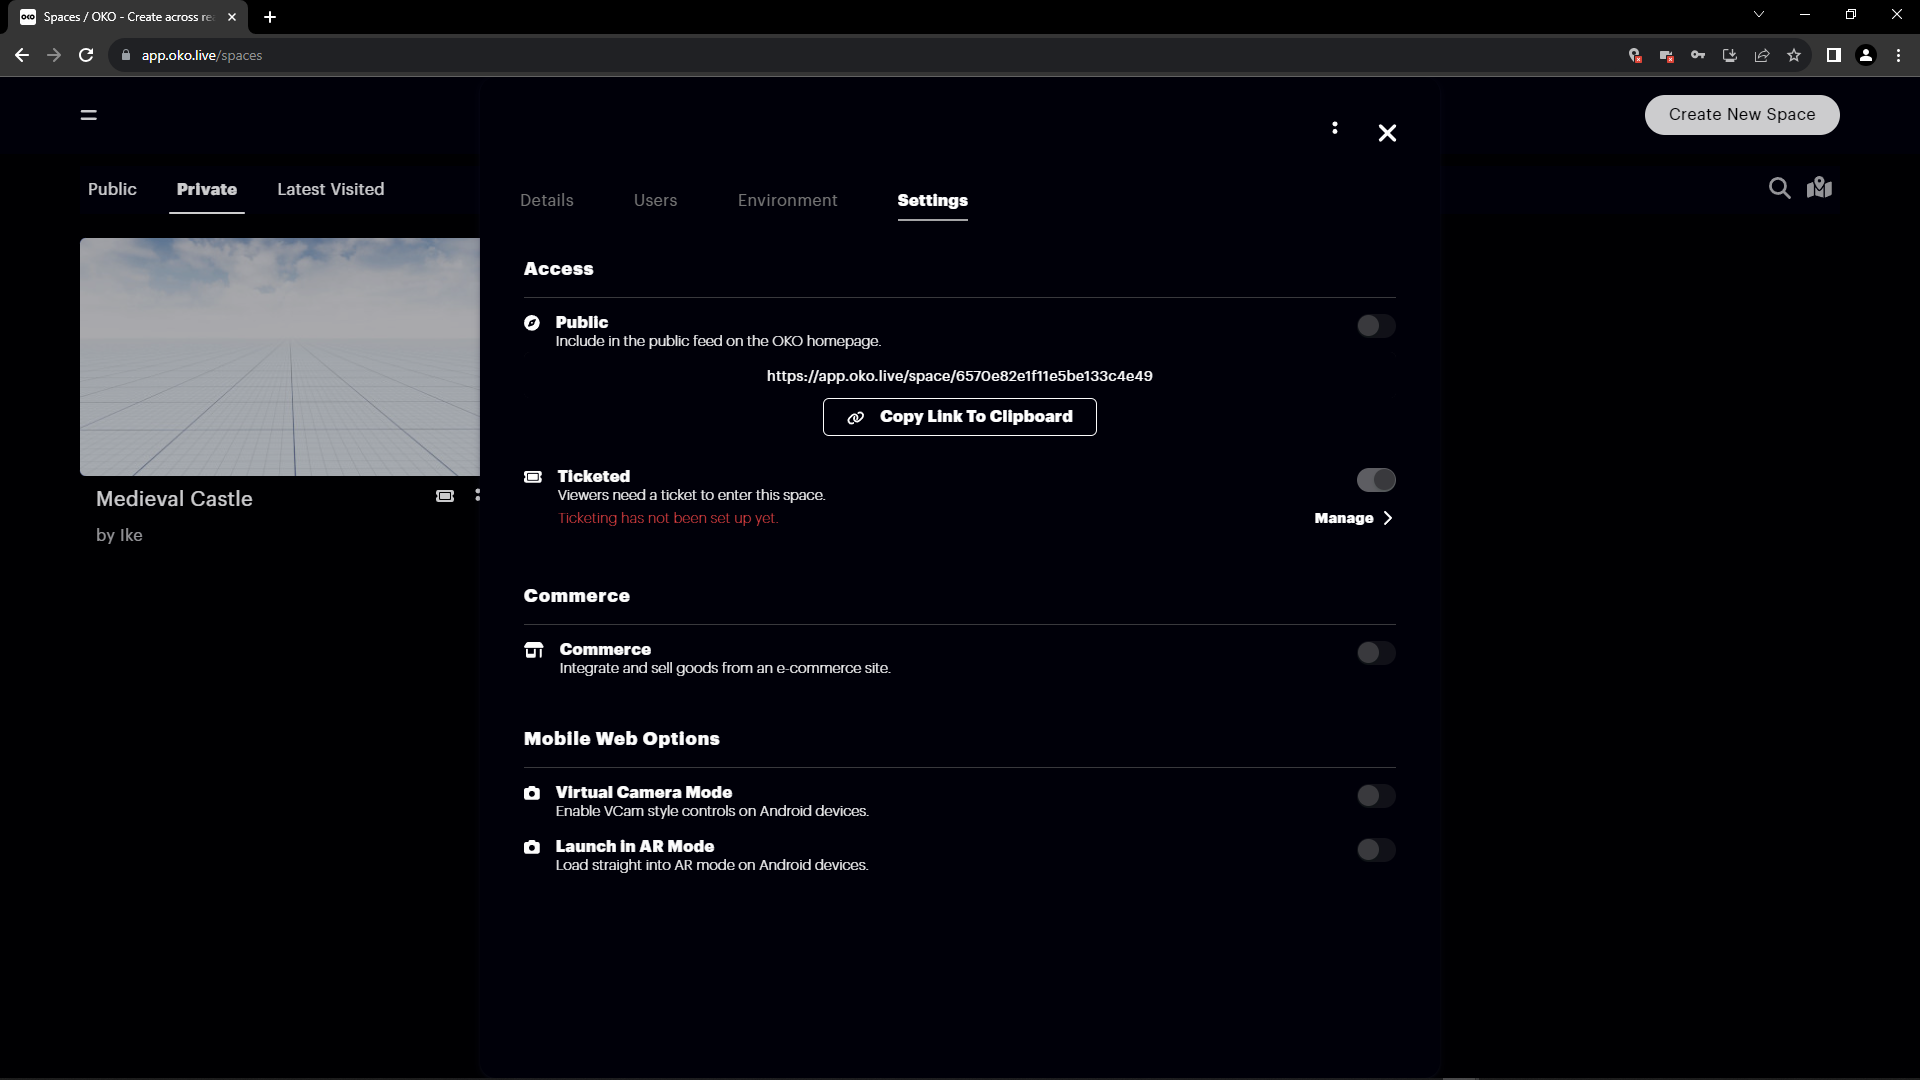
Make sure to turn on “Ticketed” in Settings.
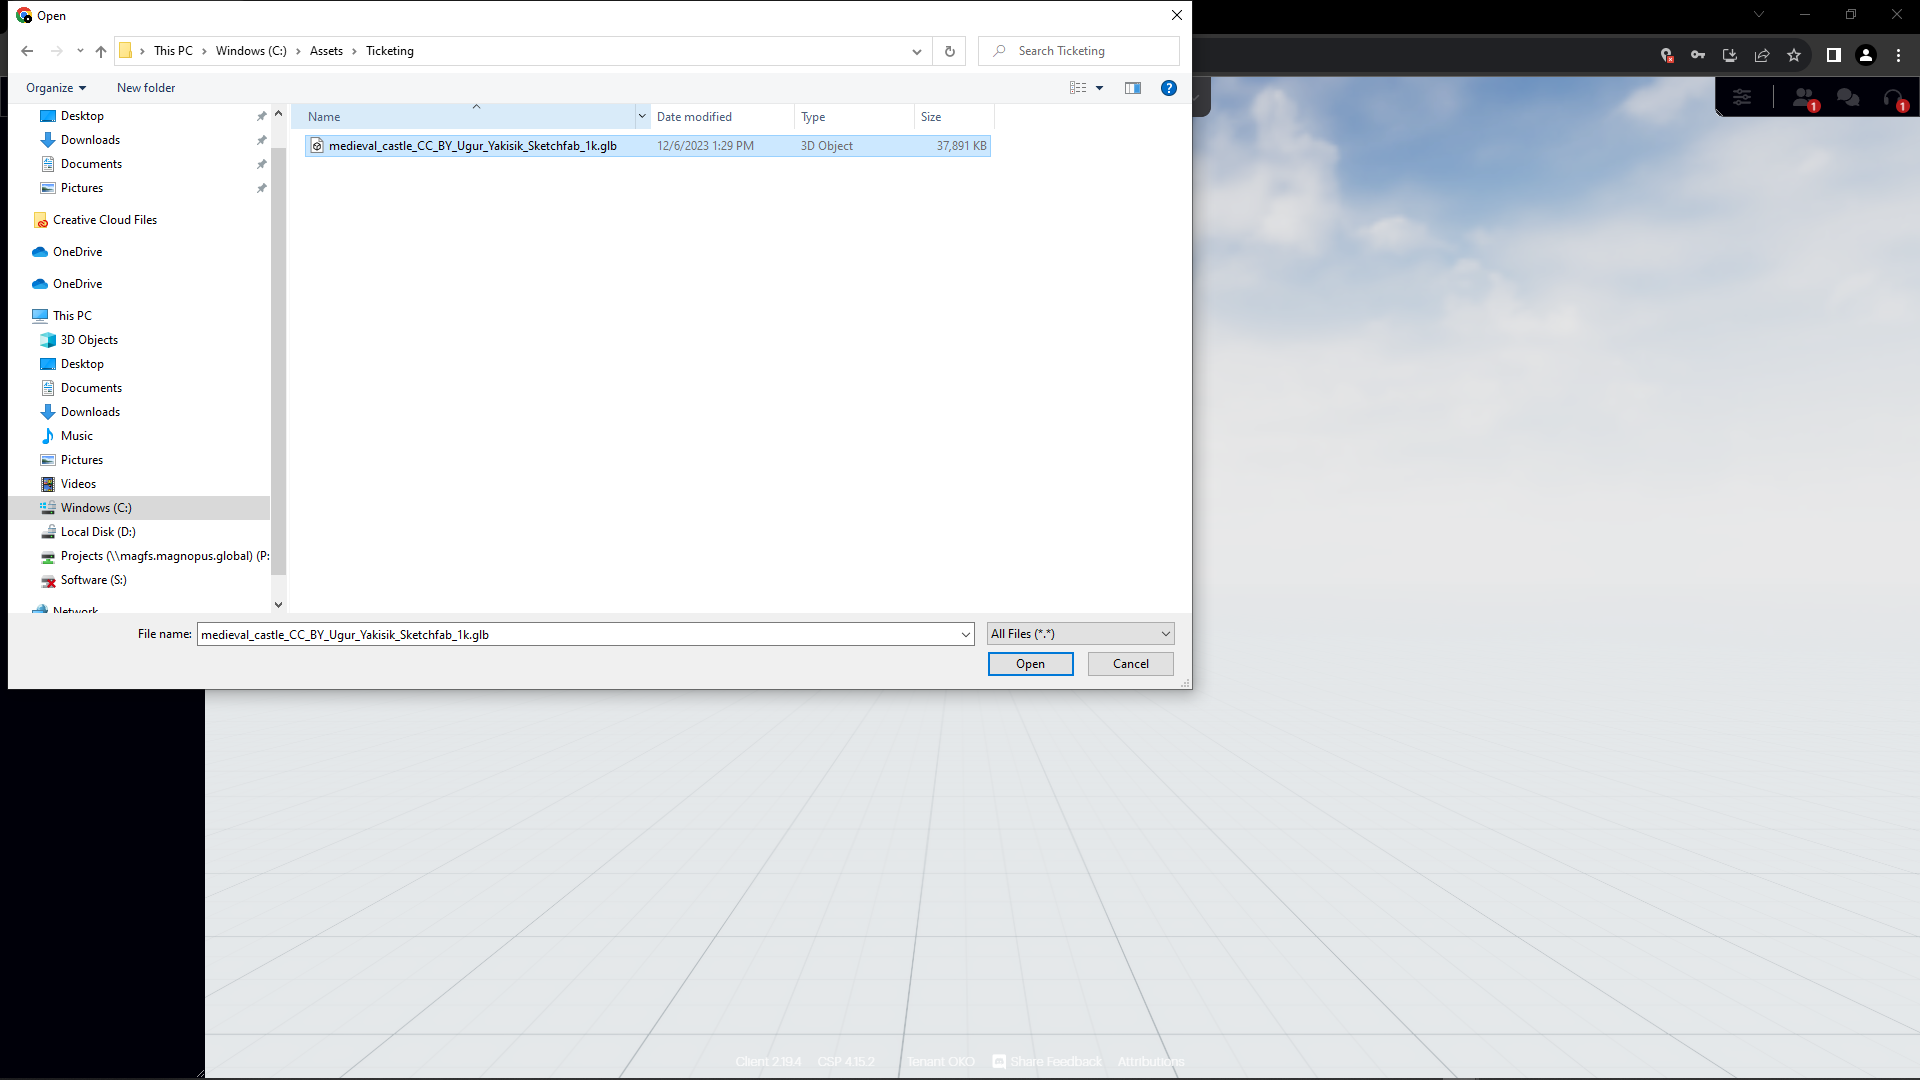
Load your asset(s)… In this case, “medieval castle” is being used. (Credit: CC BY 4.0 by Ugur Yakisik on Sketchfab)
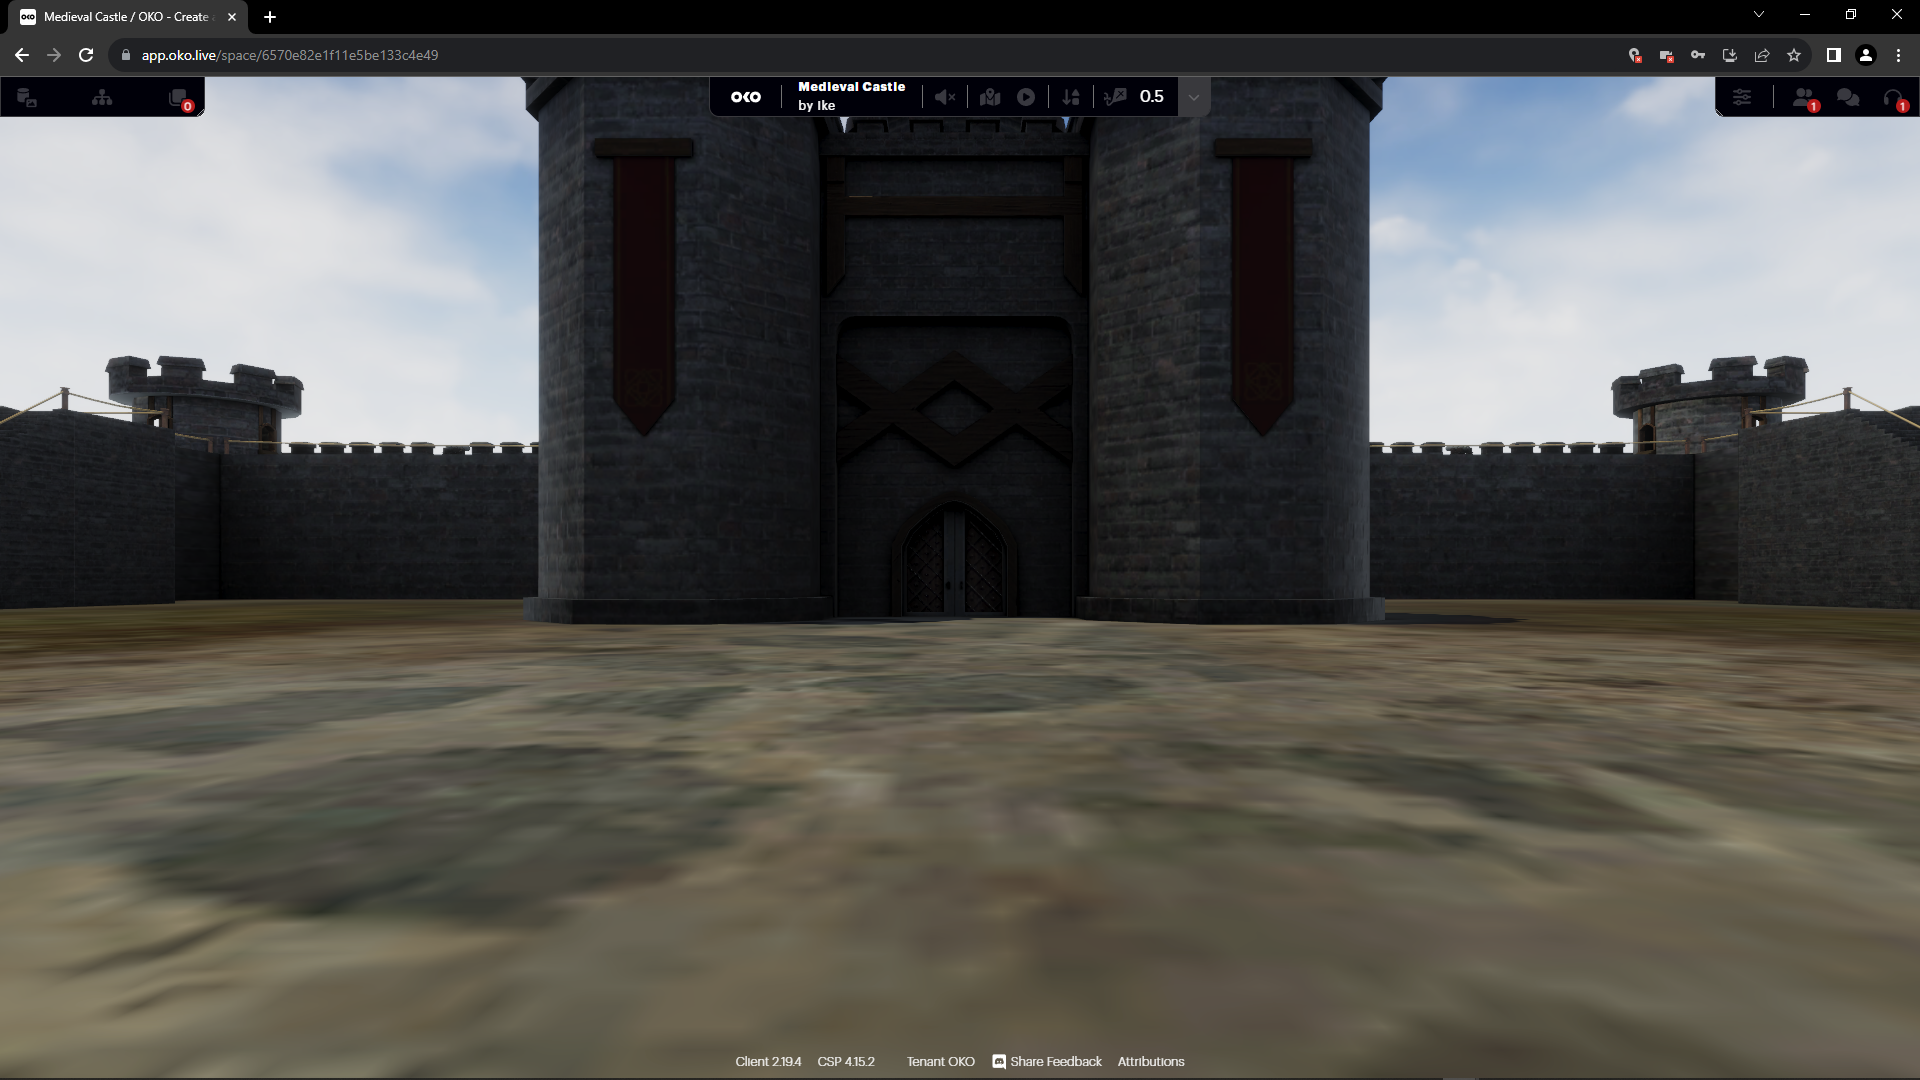
Place your asset(s) into the space.
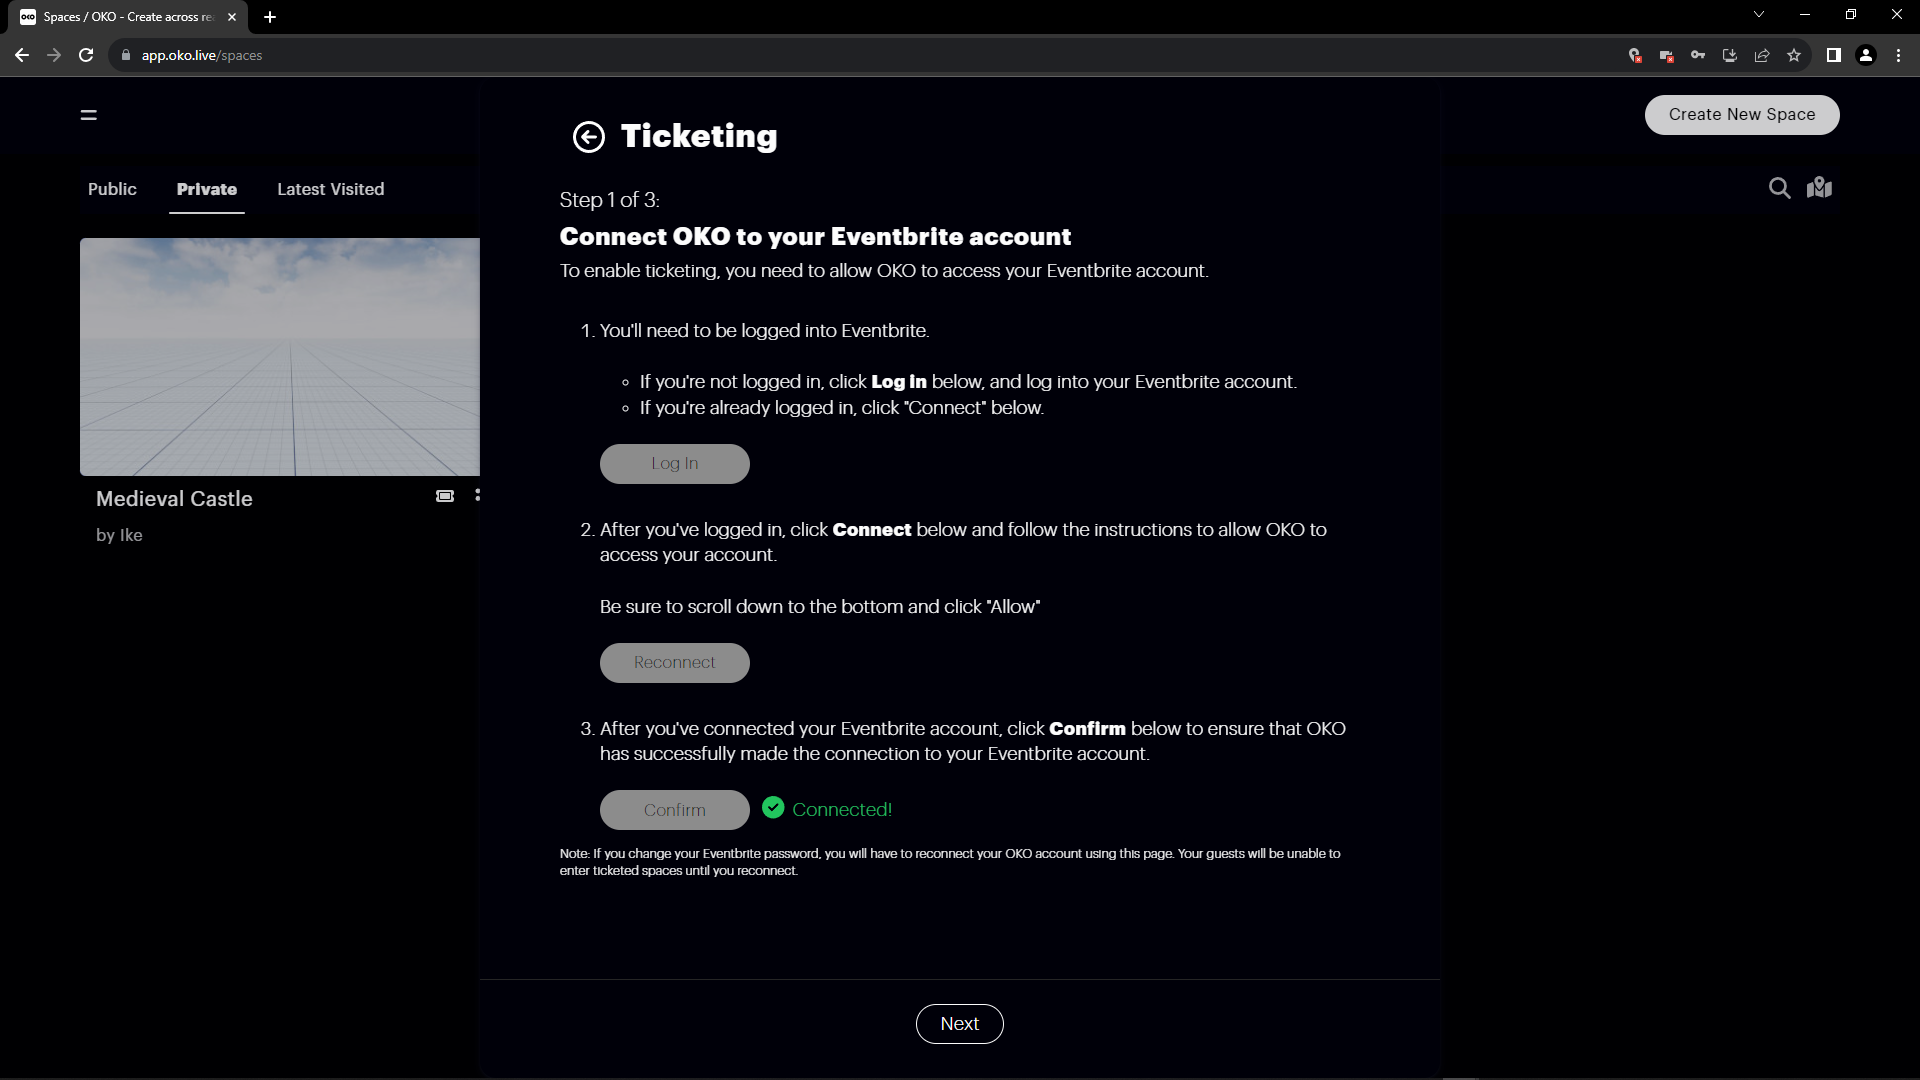
Go to the settings tab. Under the Ticketed section select Manage.
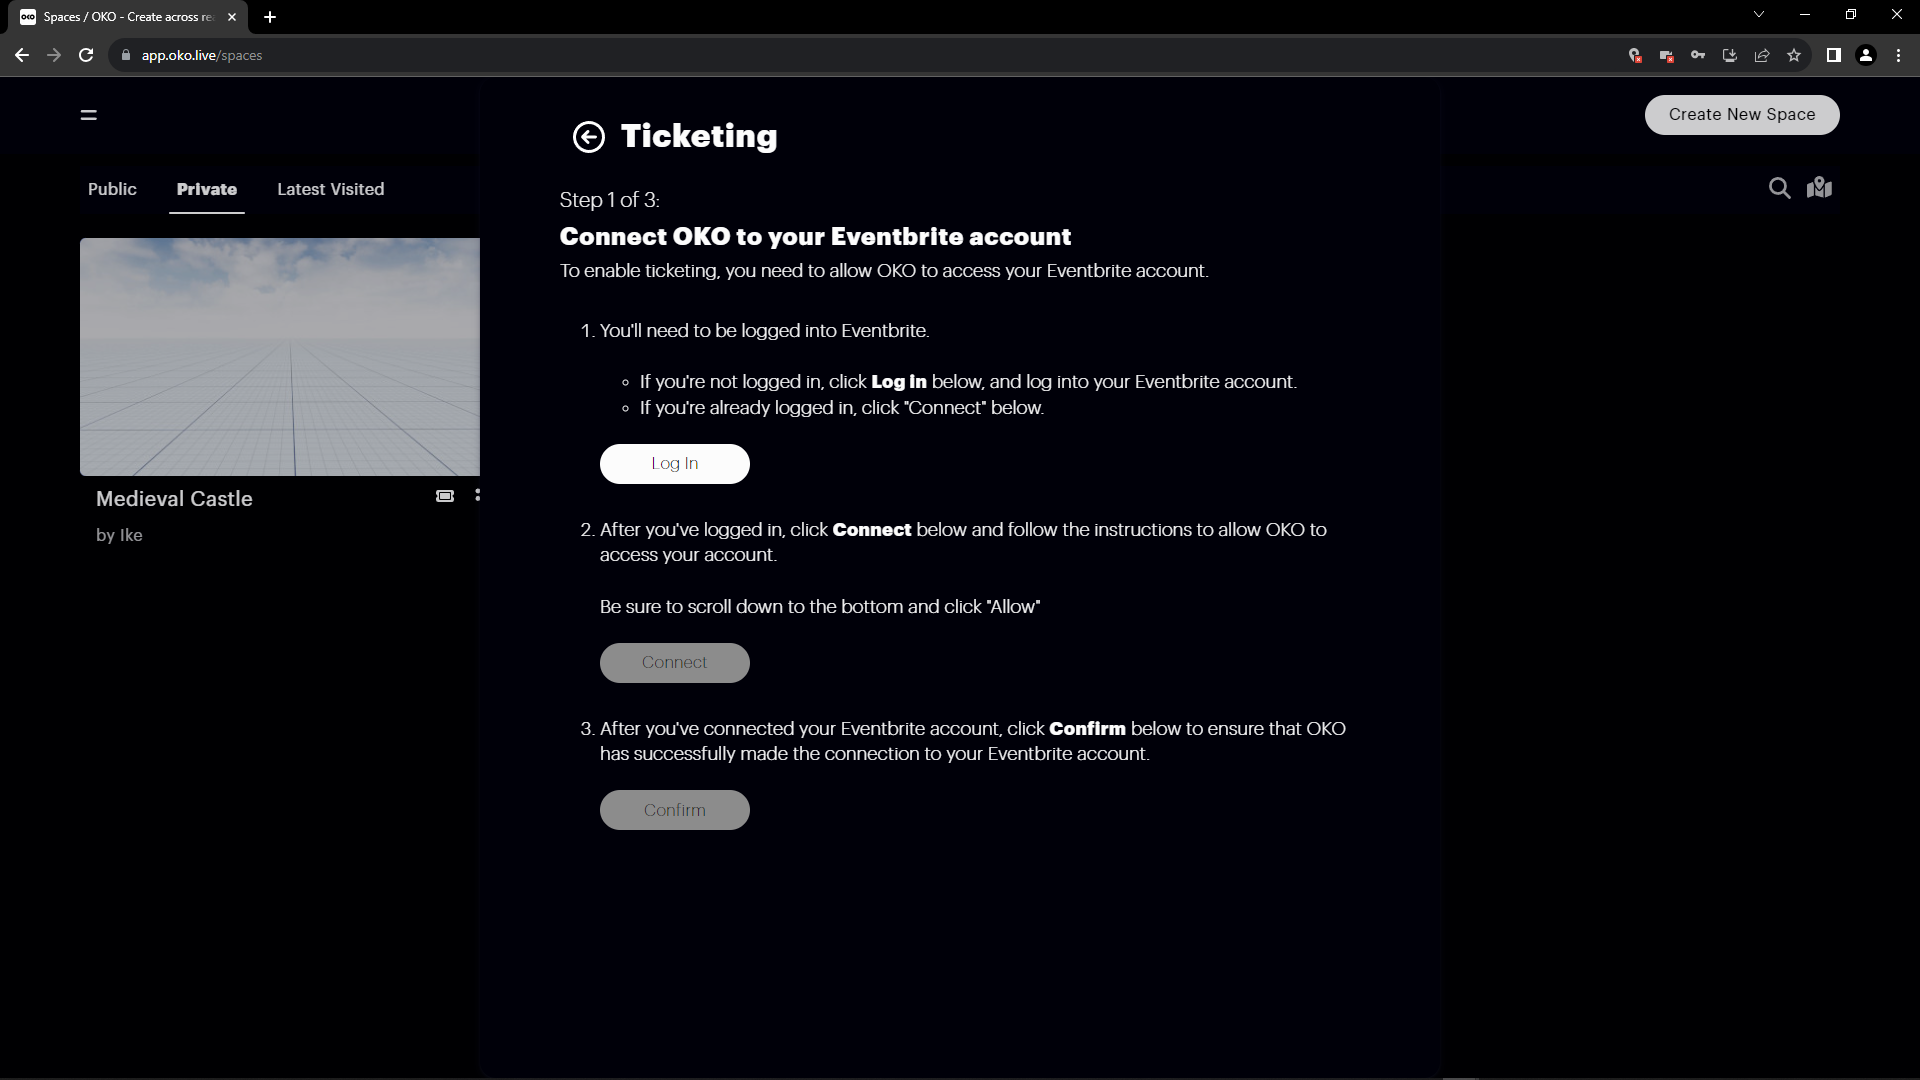
Click on “Log in” to log into Eventbrite.
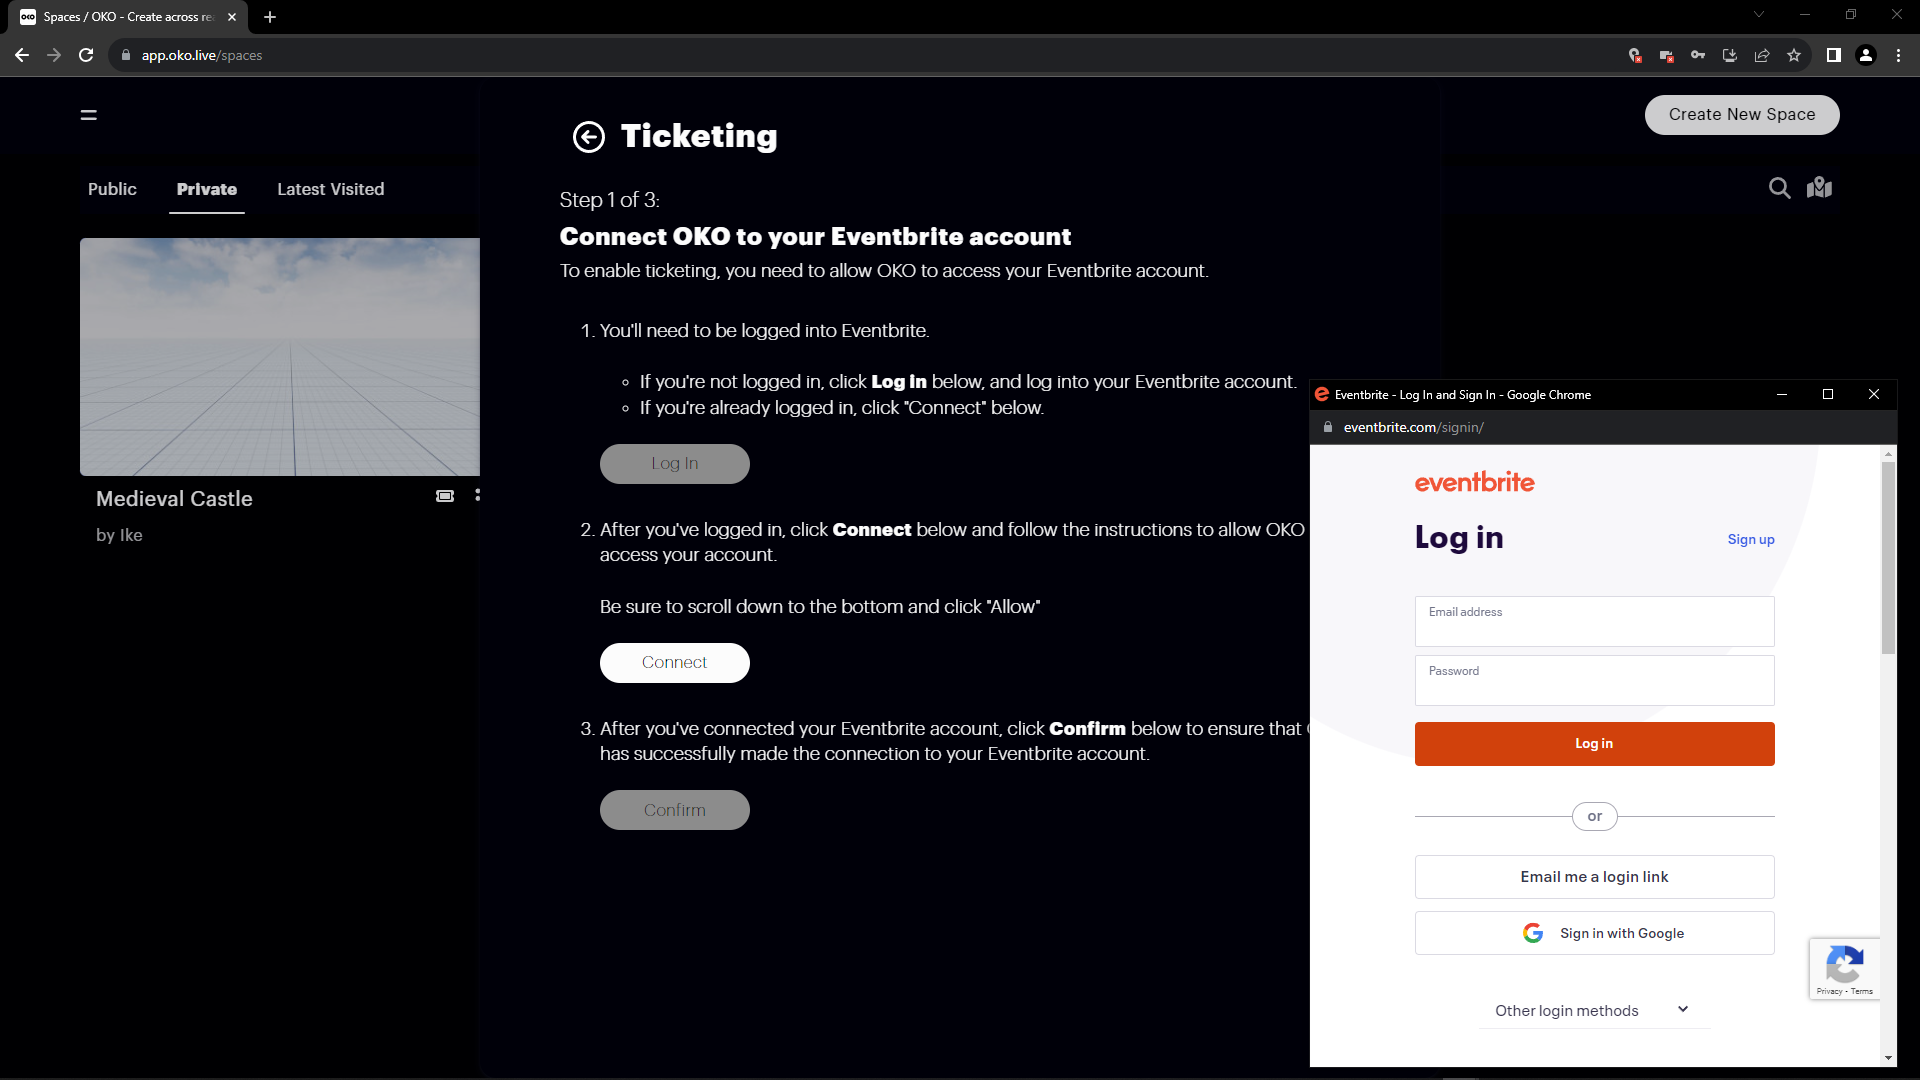
Log in / Sign up for Eventbrite.
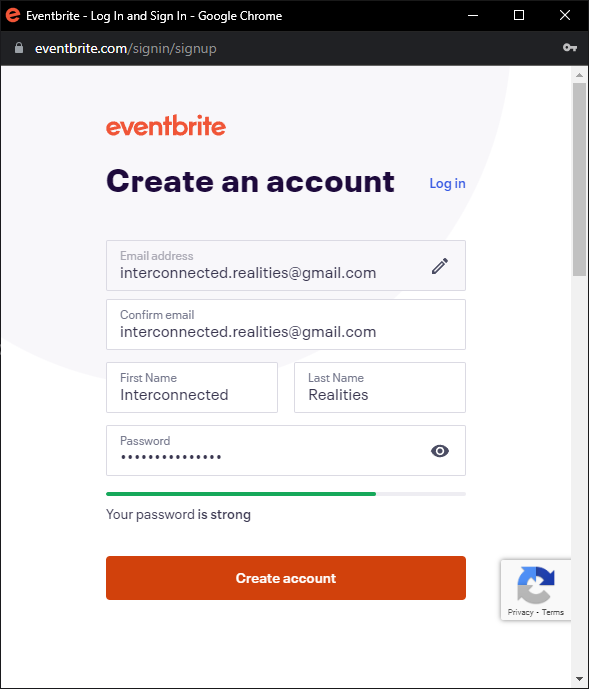
Sign up for an Eventbrite account.
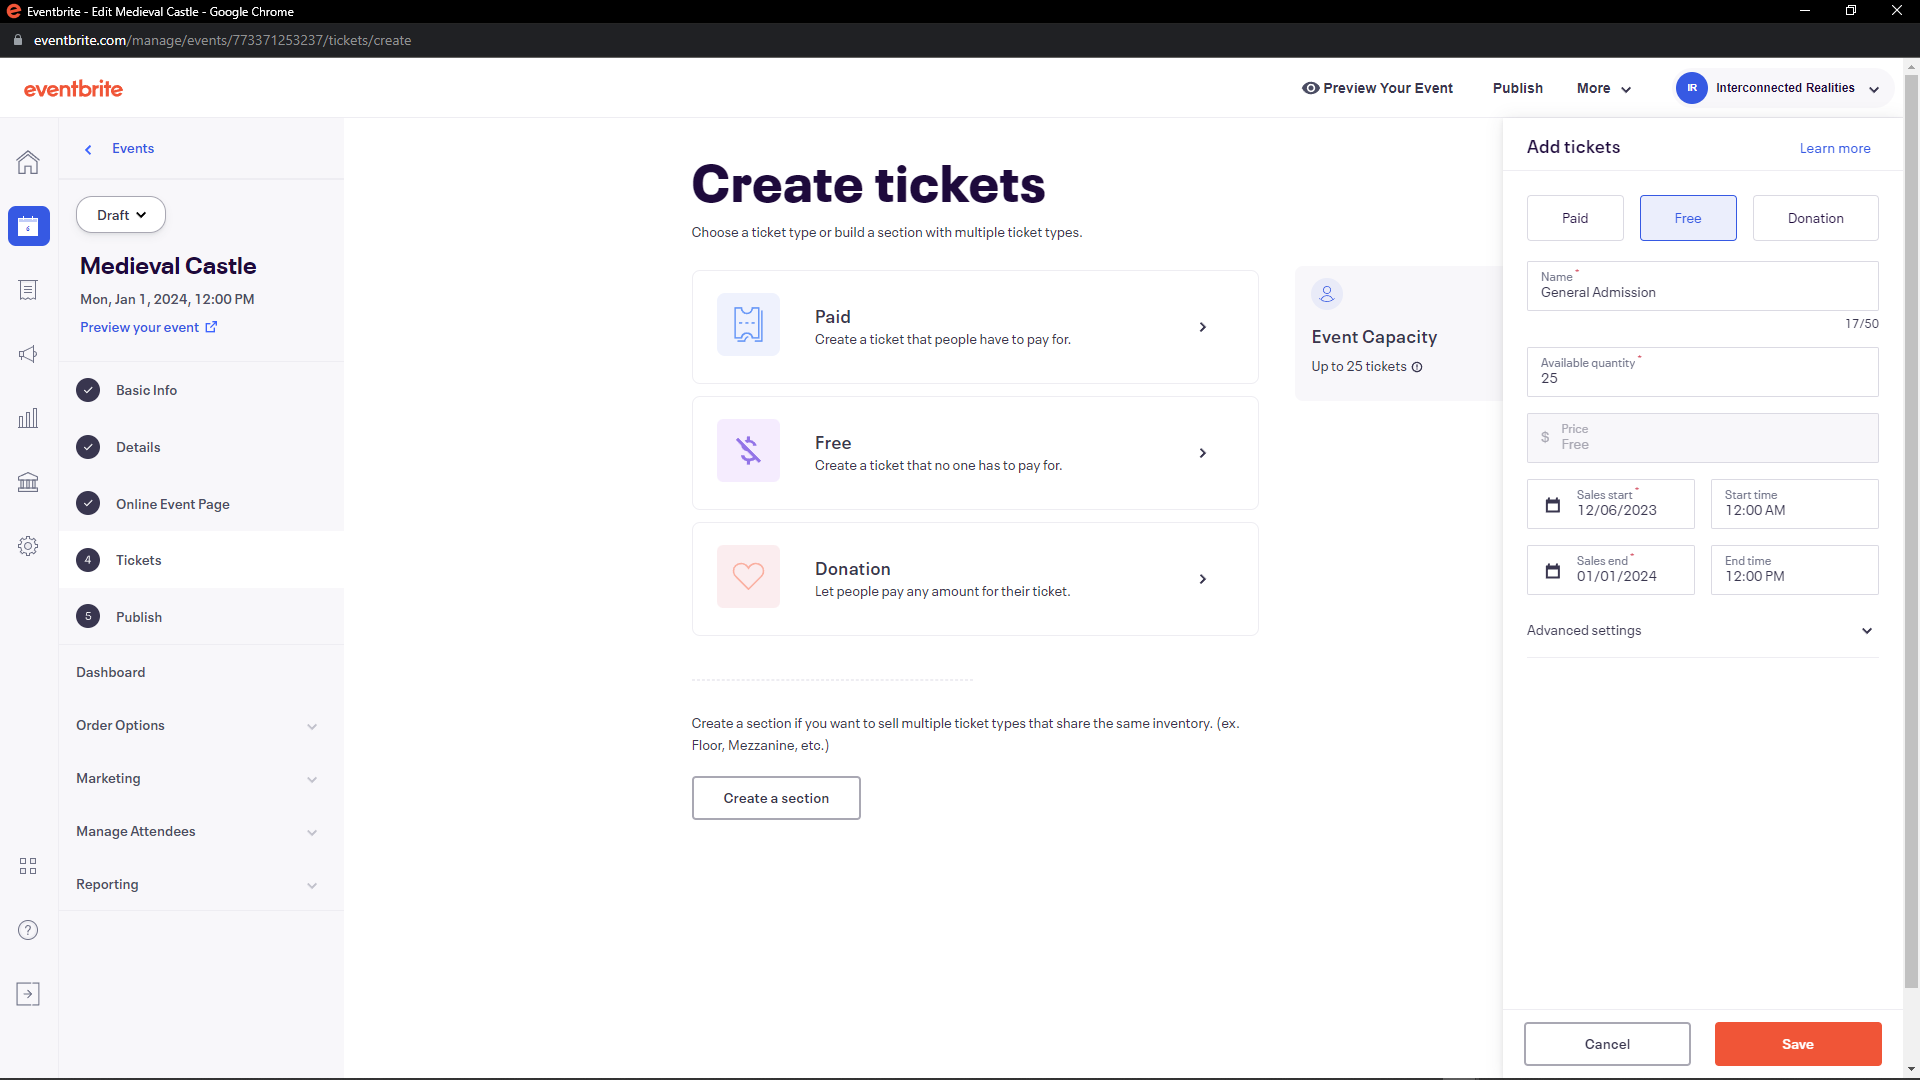
Next, enter the event information.
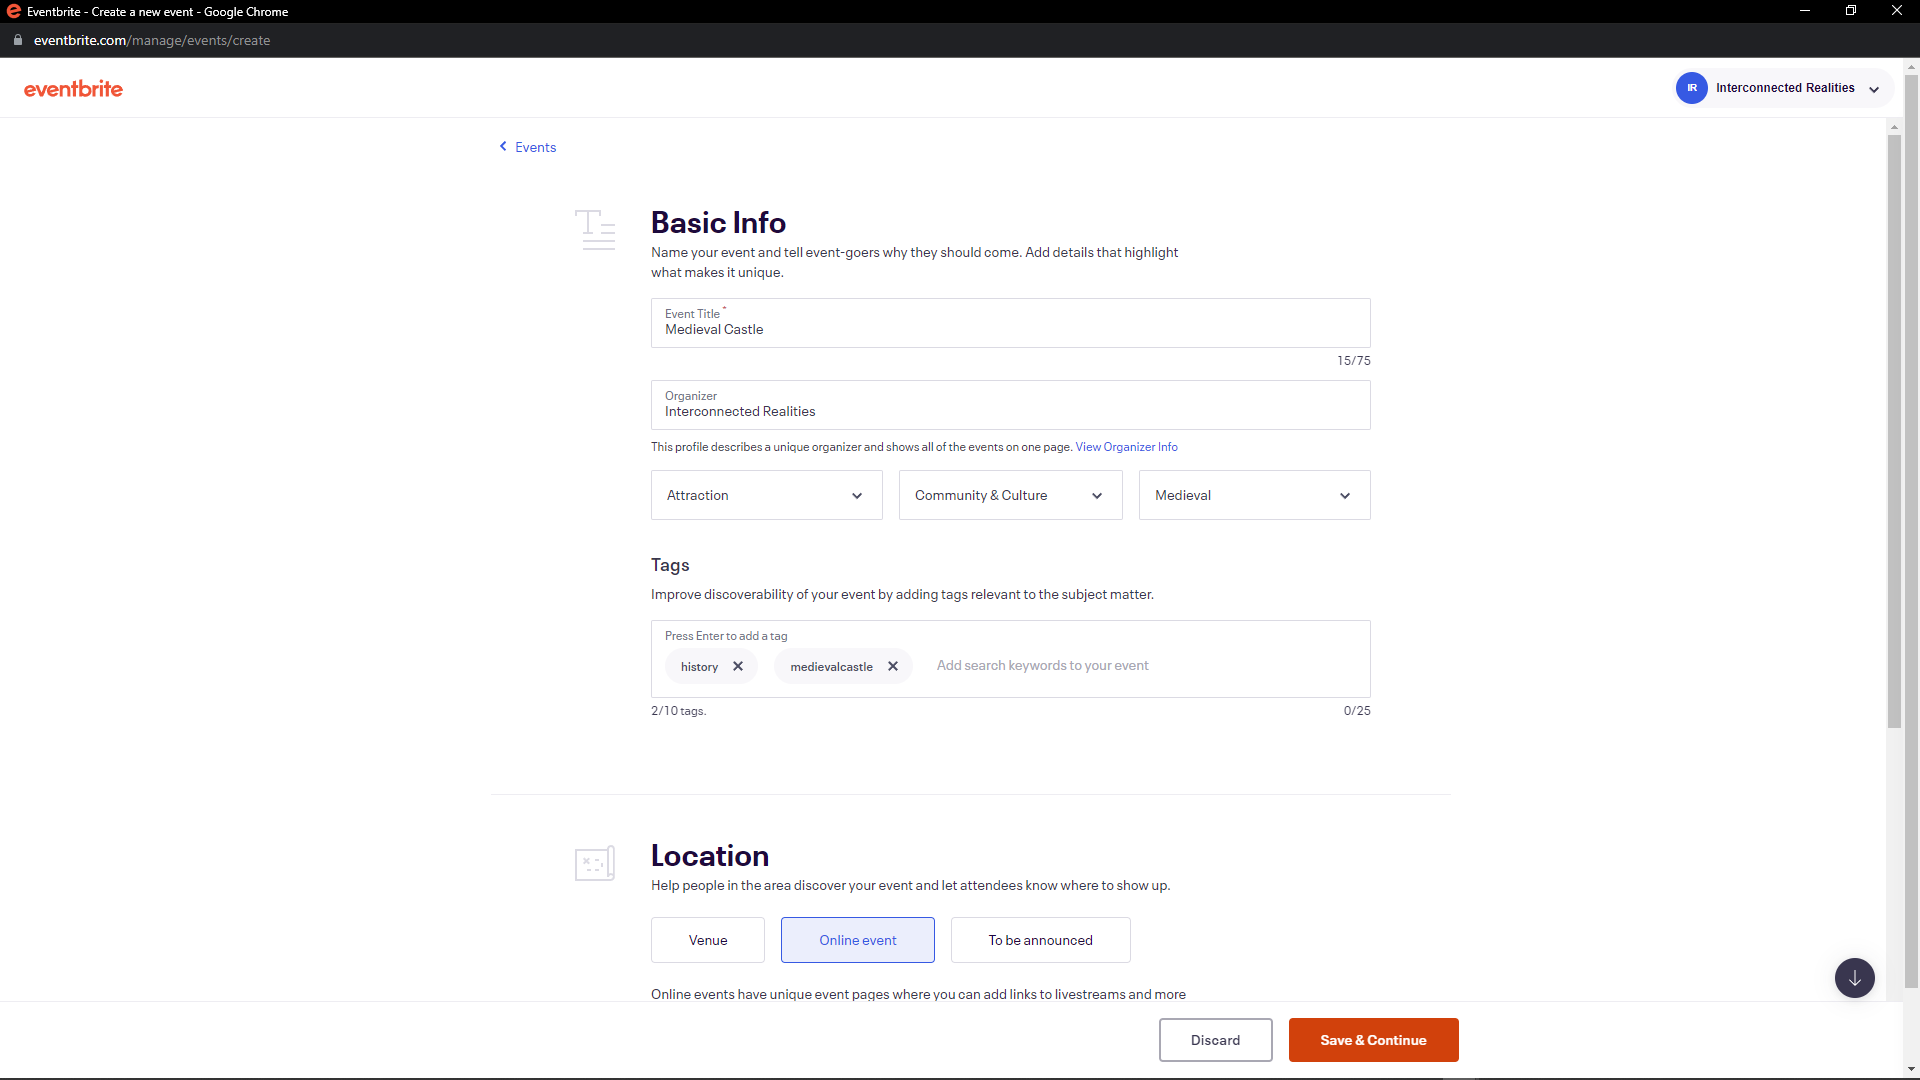
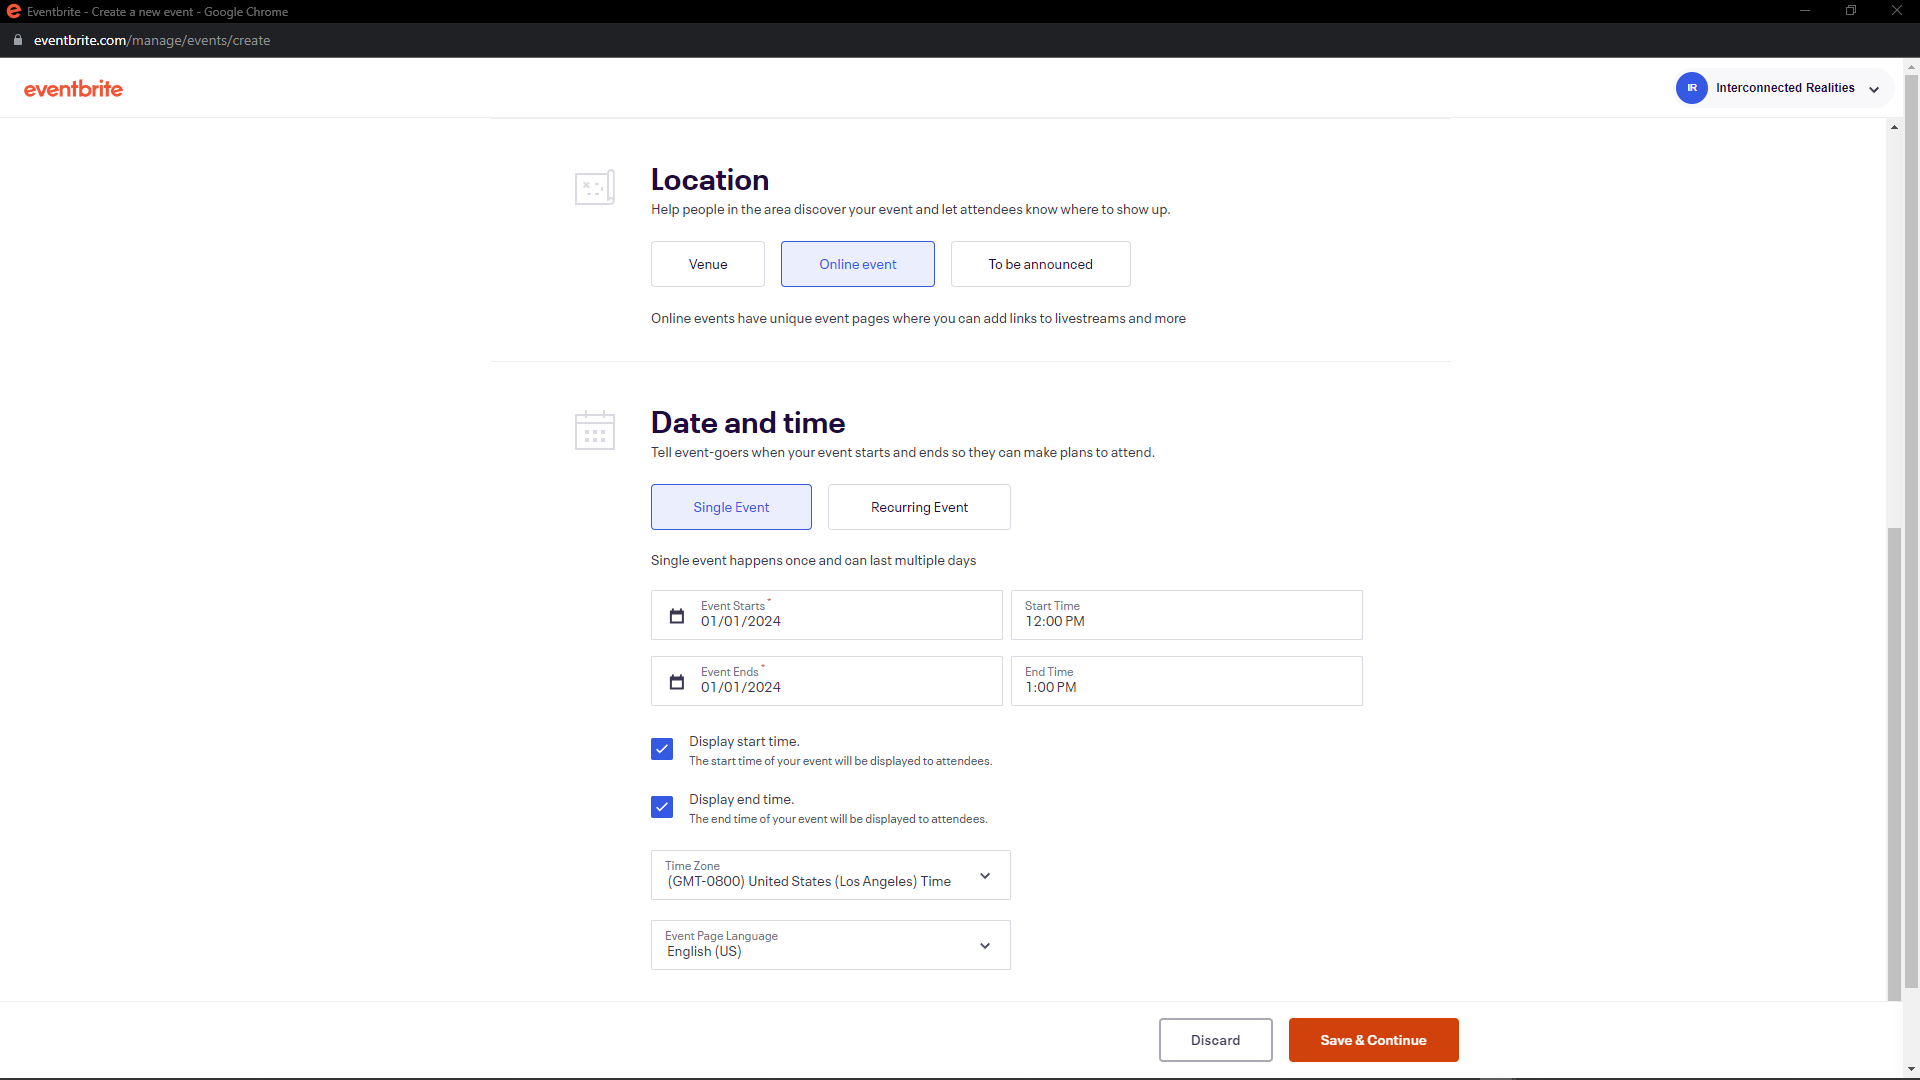
Set the date and time for the event.
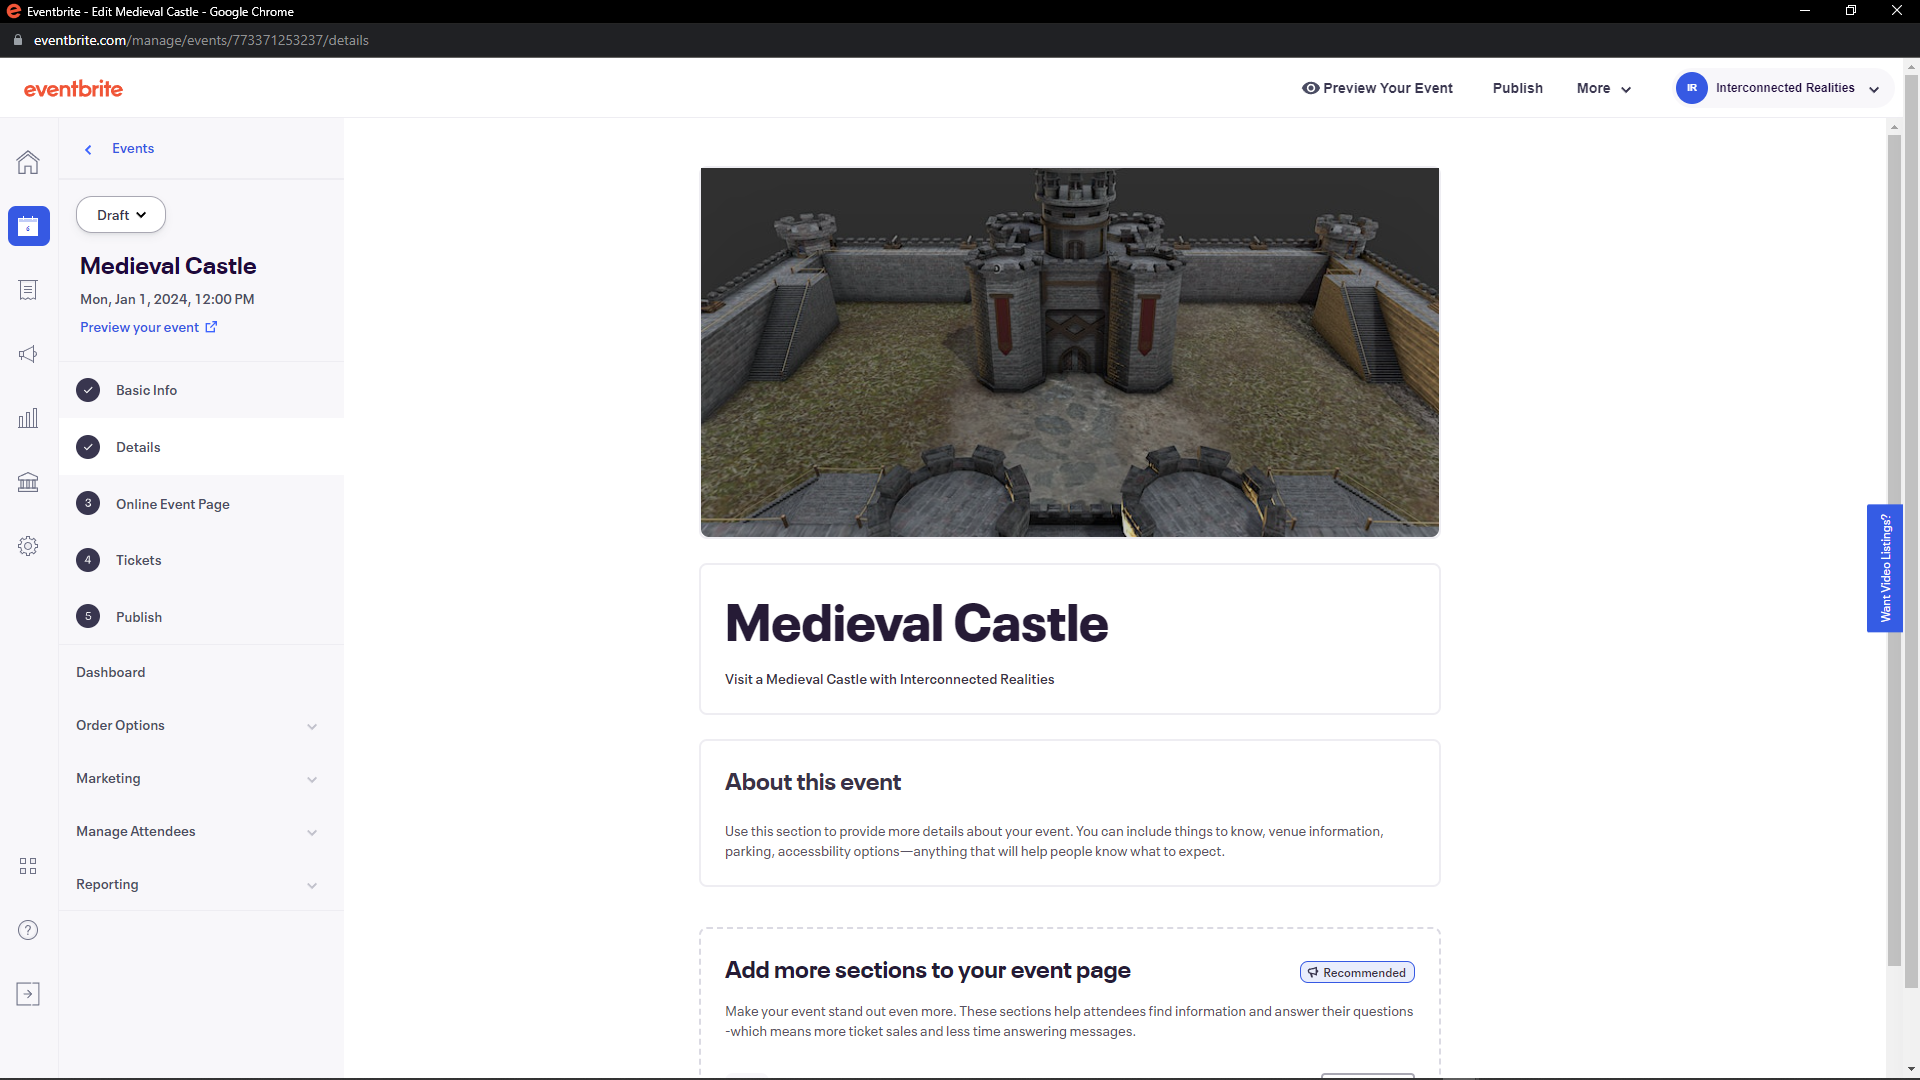
Add more details to Eventbrite.
Go back to the settings tab to click on “Connect”.

Allow “Your First API Key” to access your Eventbrite account.
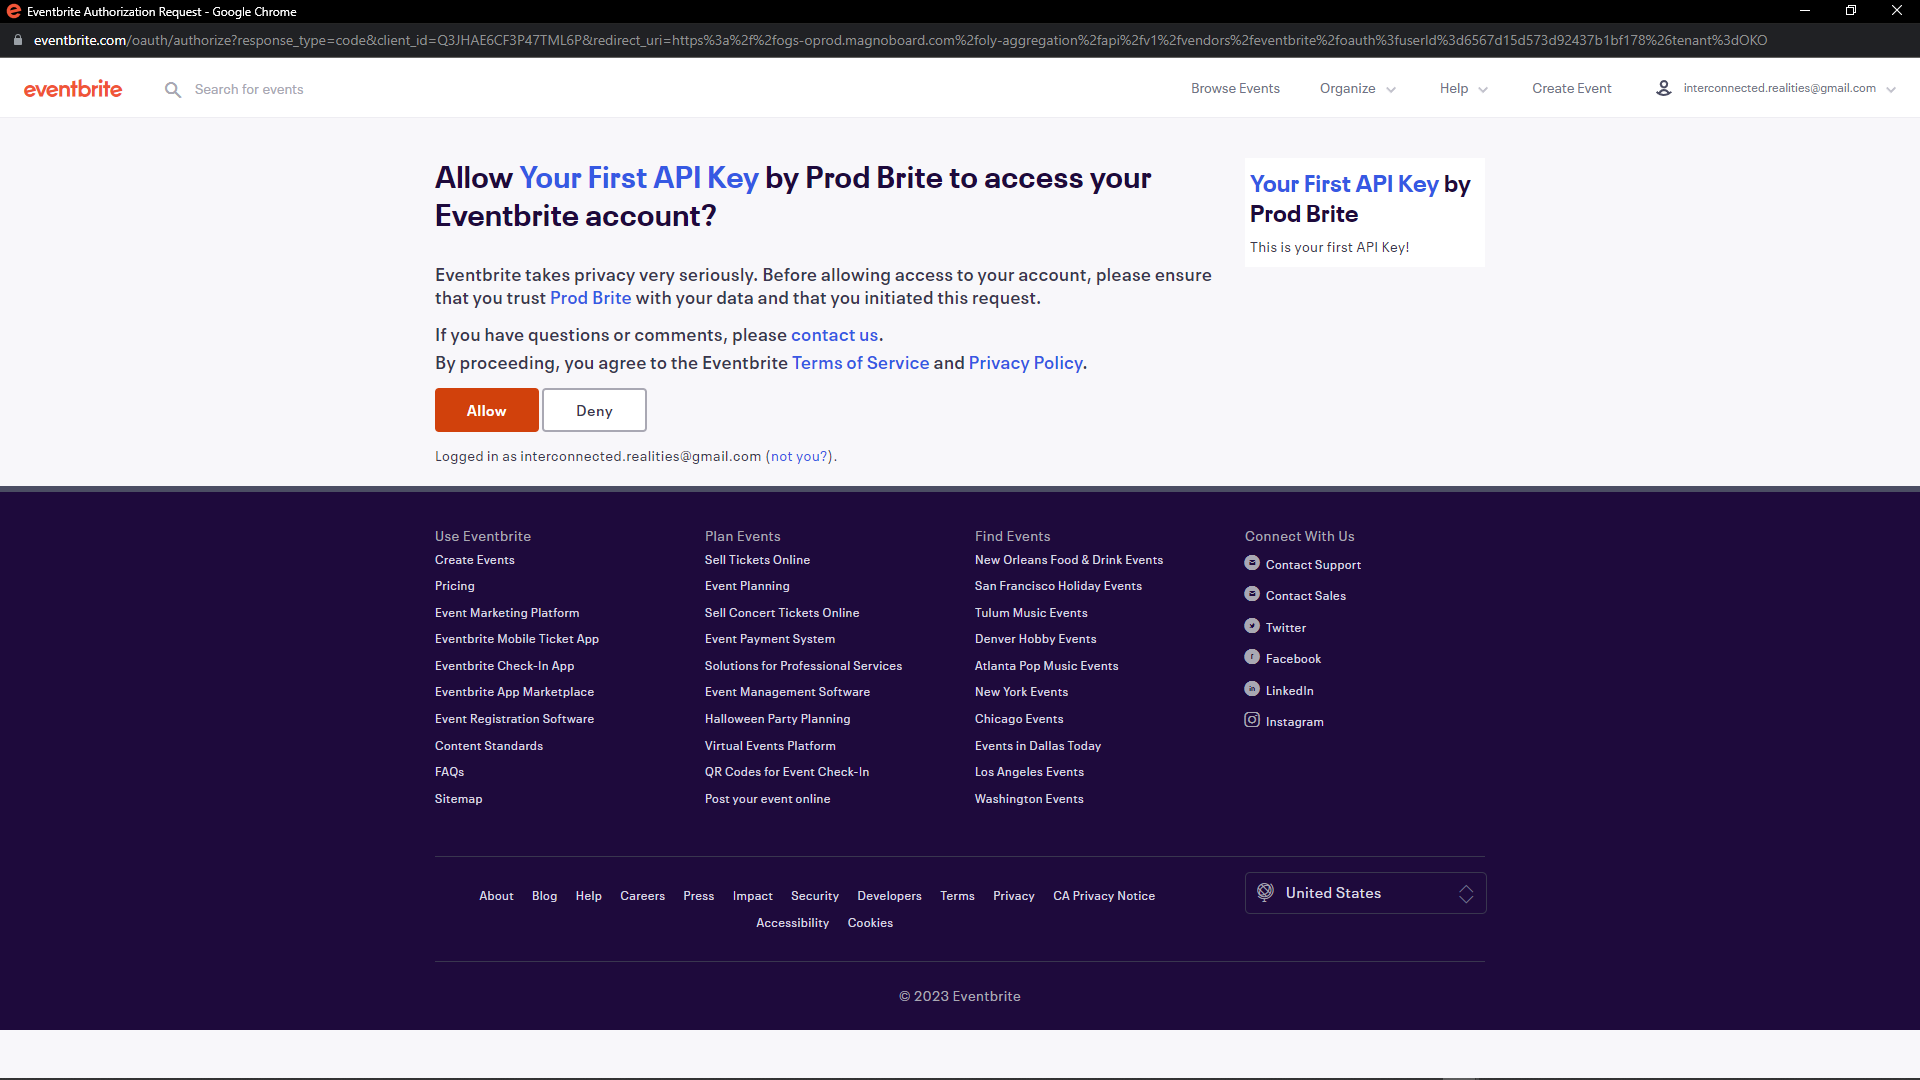
Confirm the connection to Eventbrite.

Connected!
Set up the Eventbrite event info using the URL of the space.
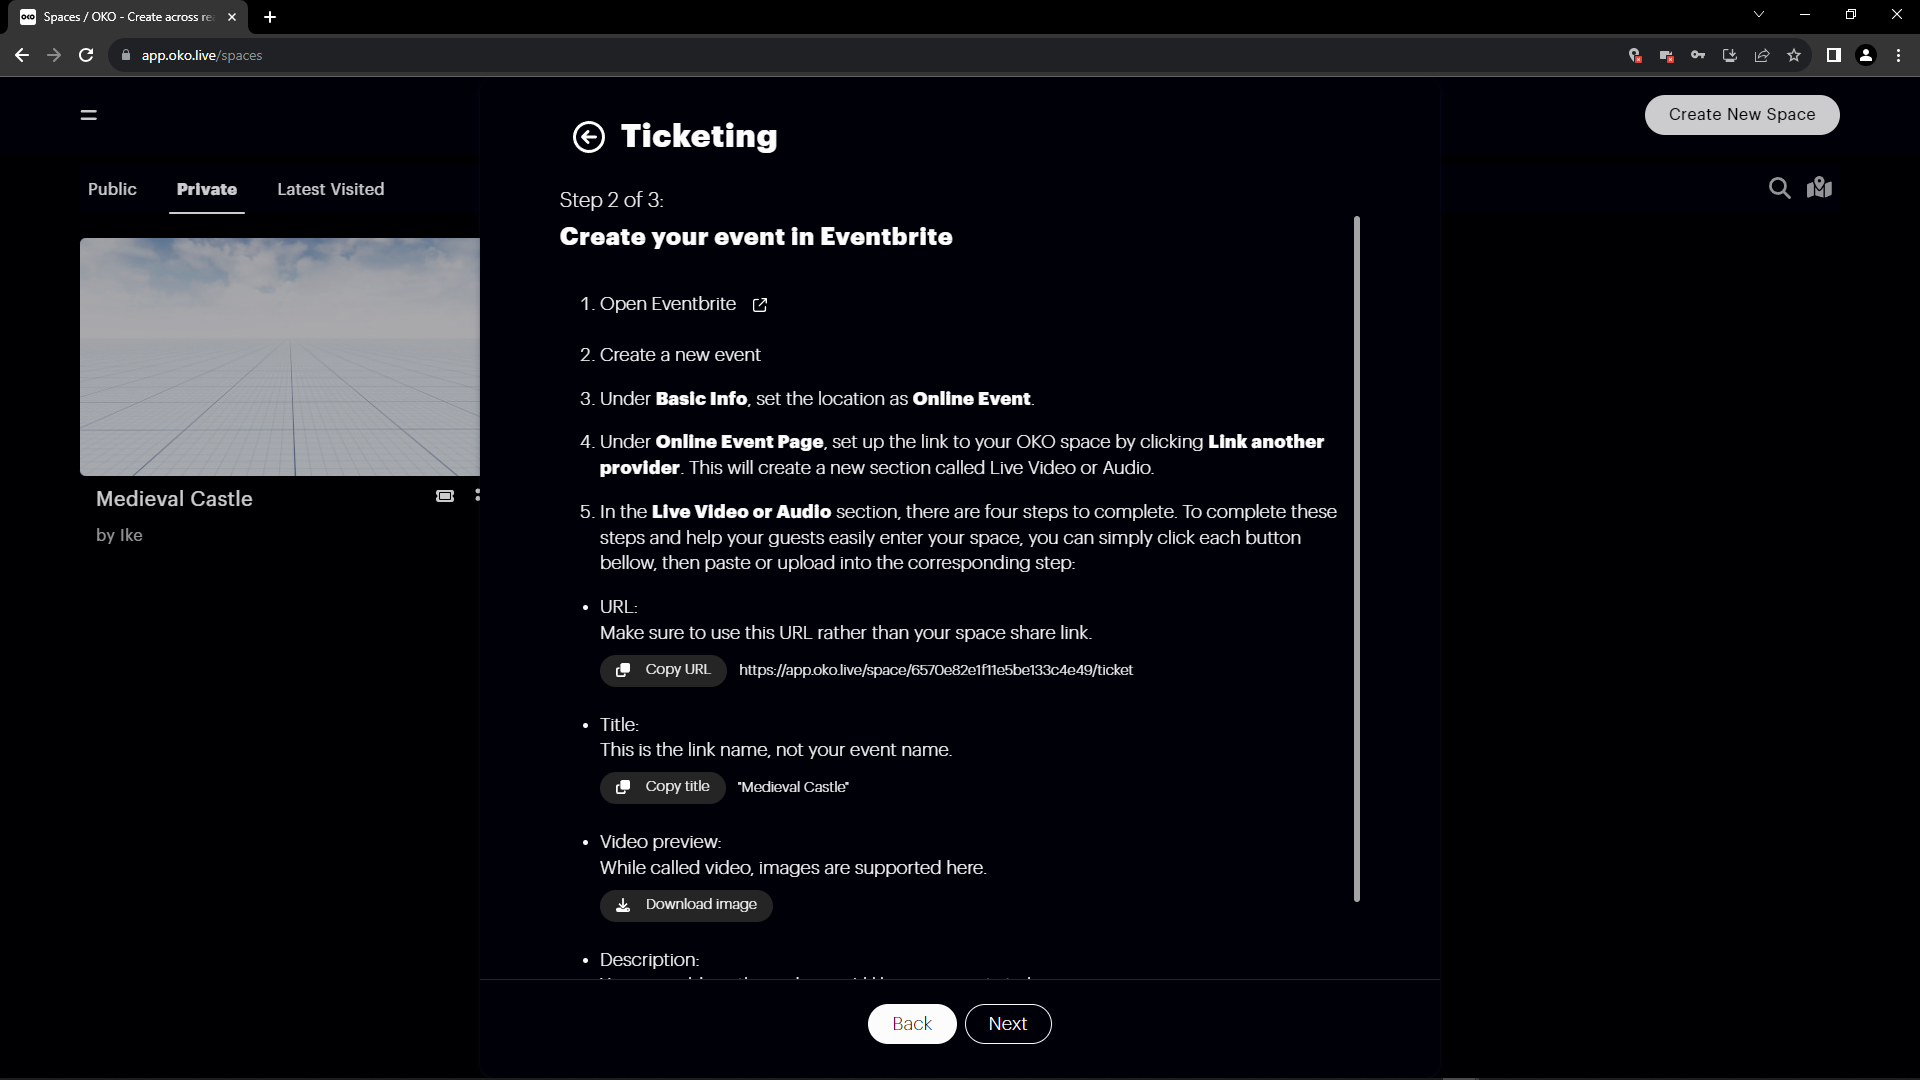
Set the URL to the URL of the OKO Space.

Set the number of tickets.
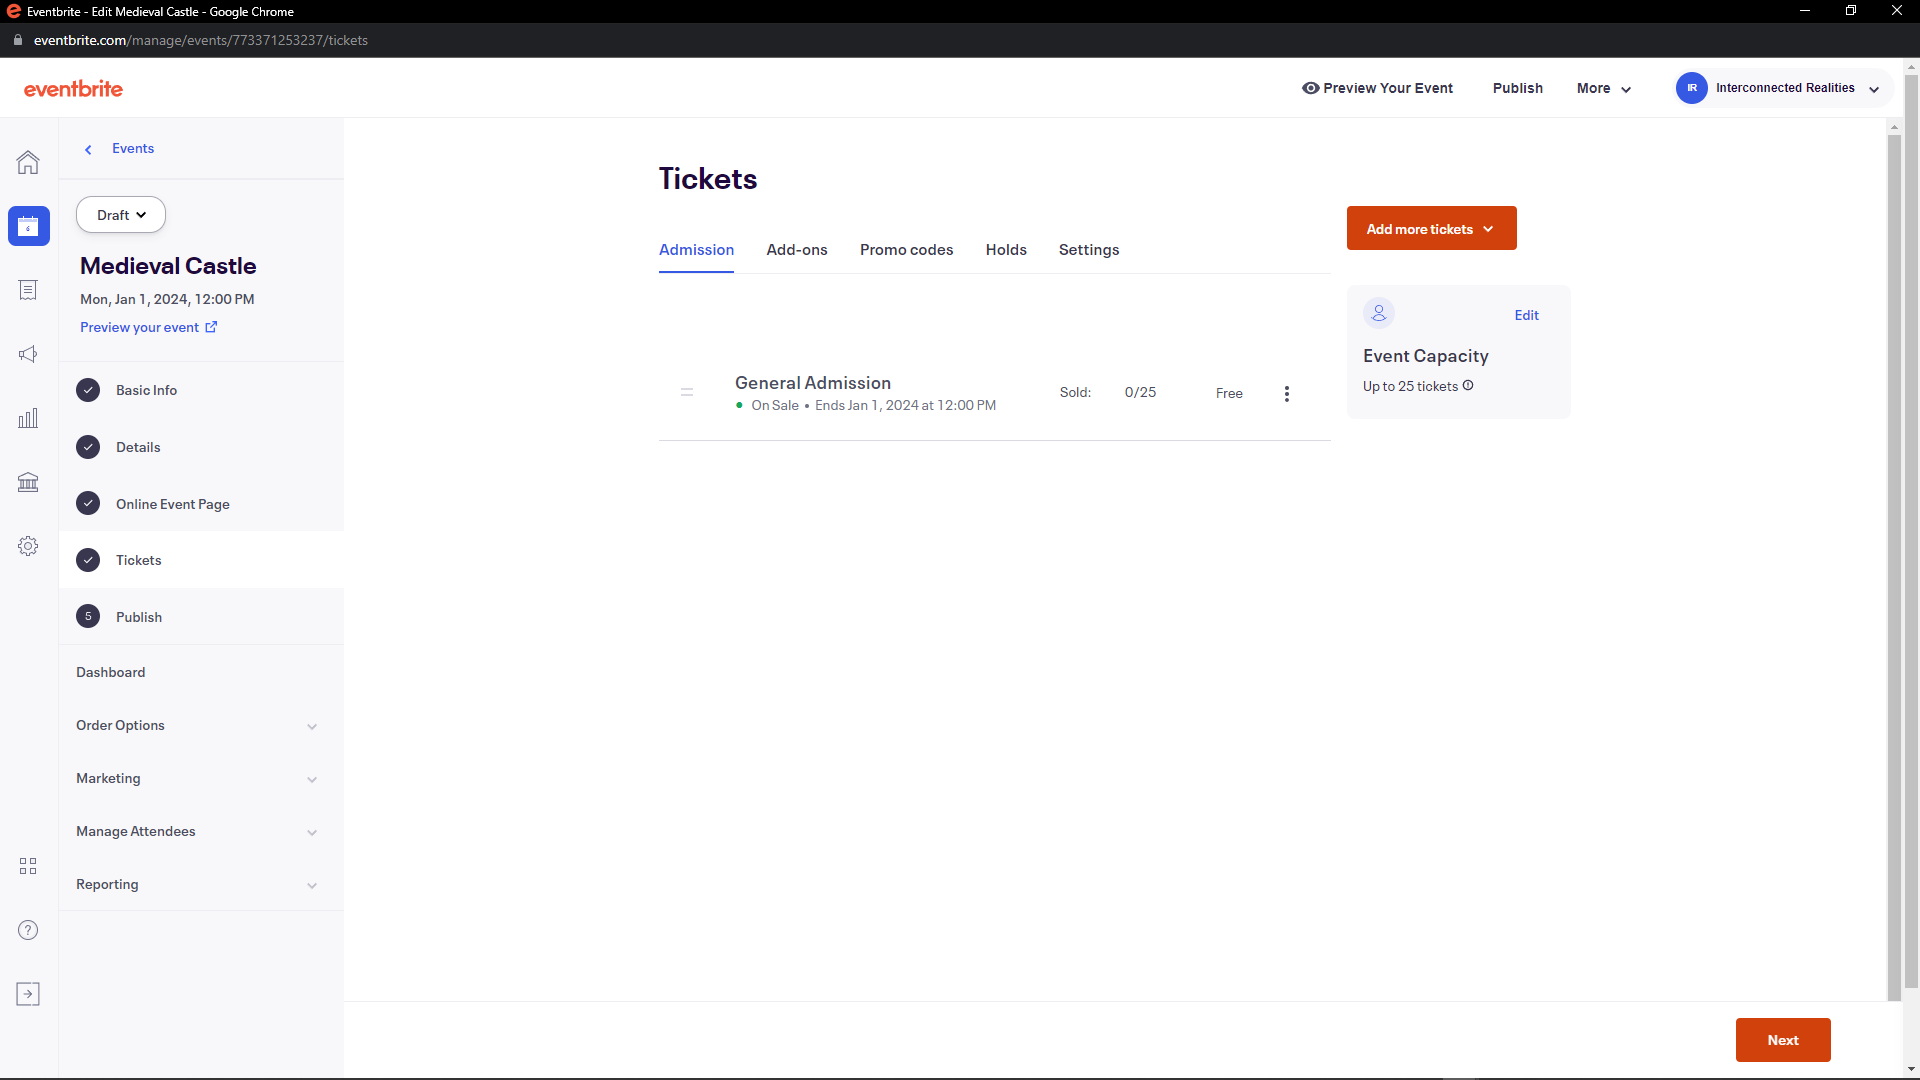
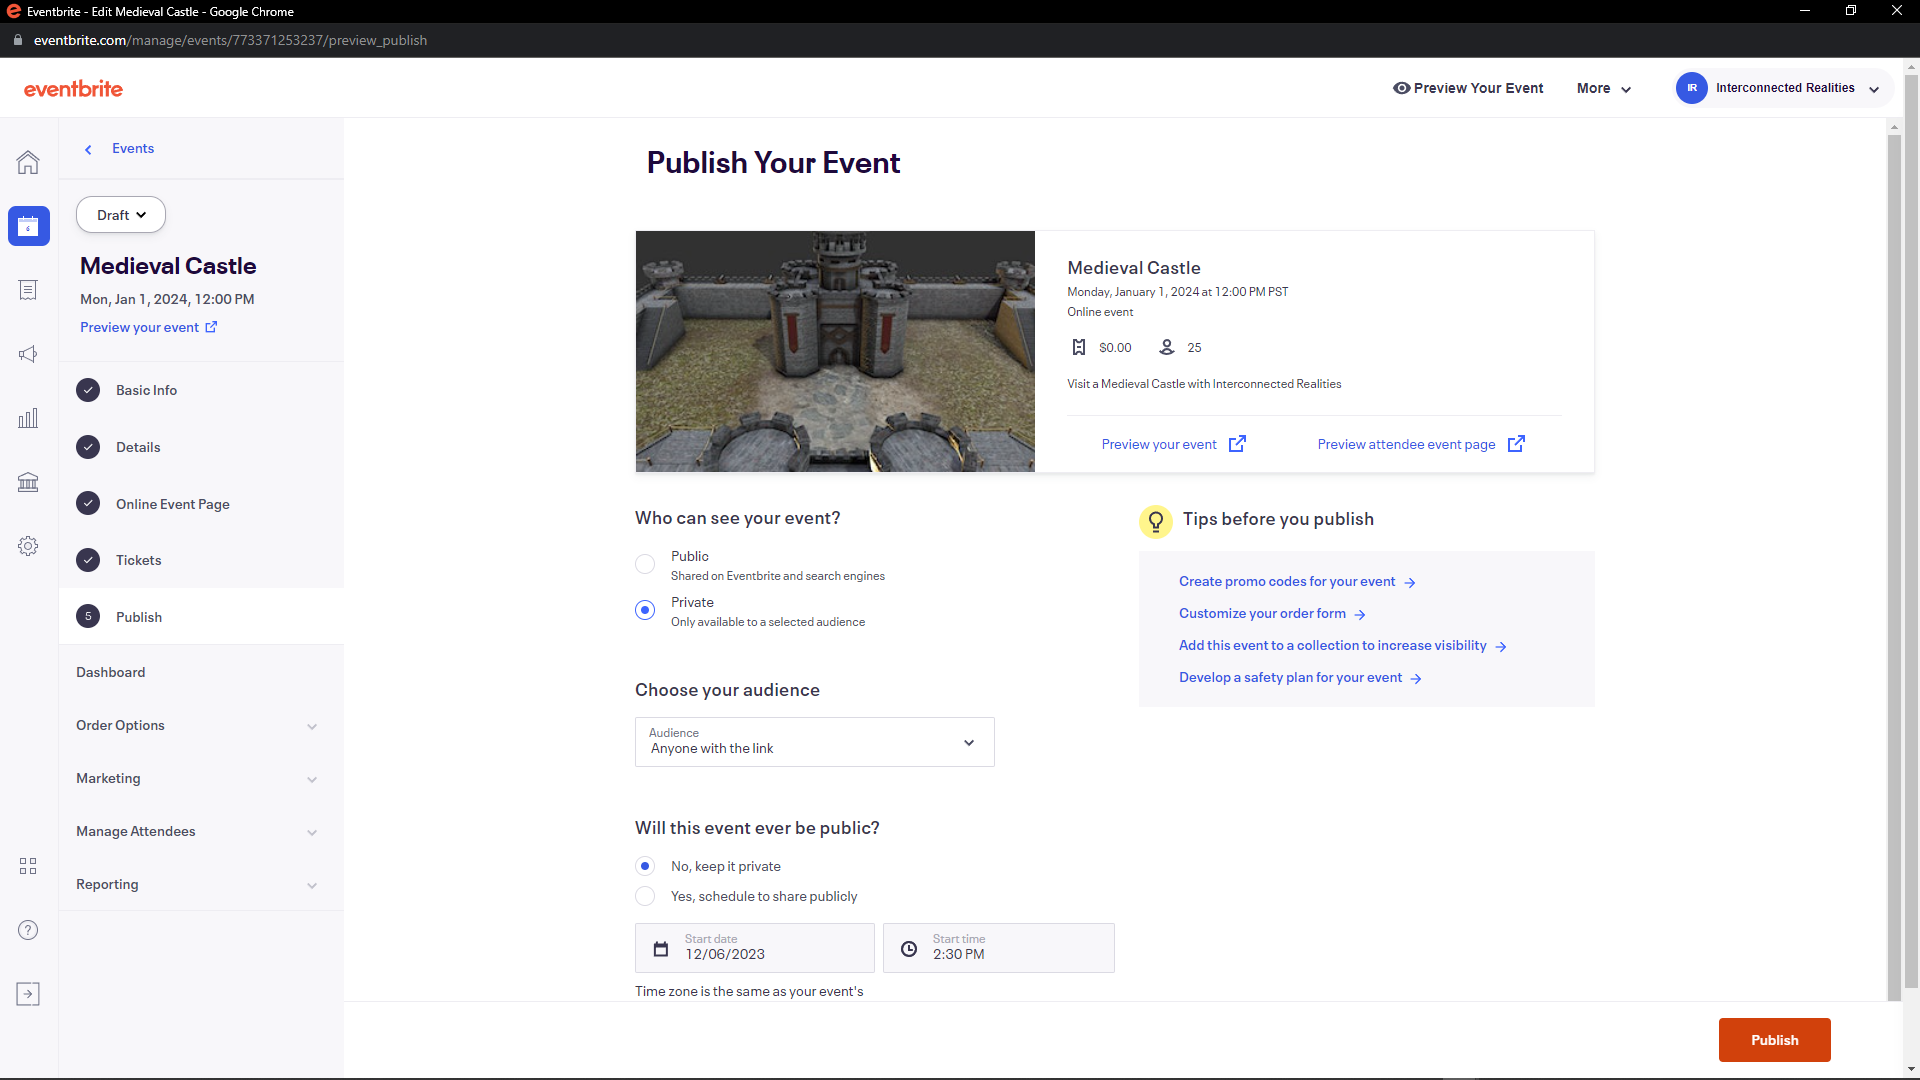
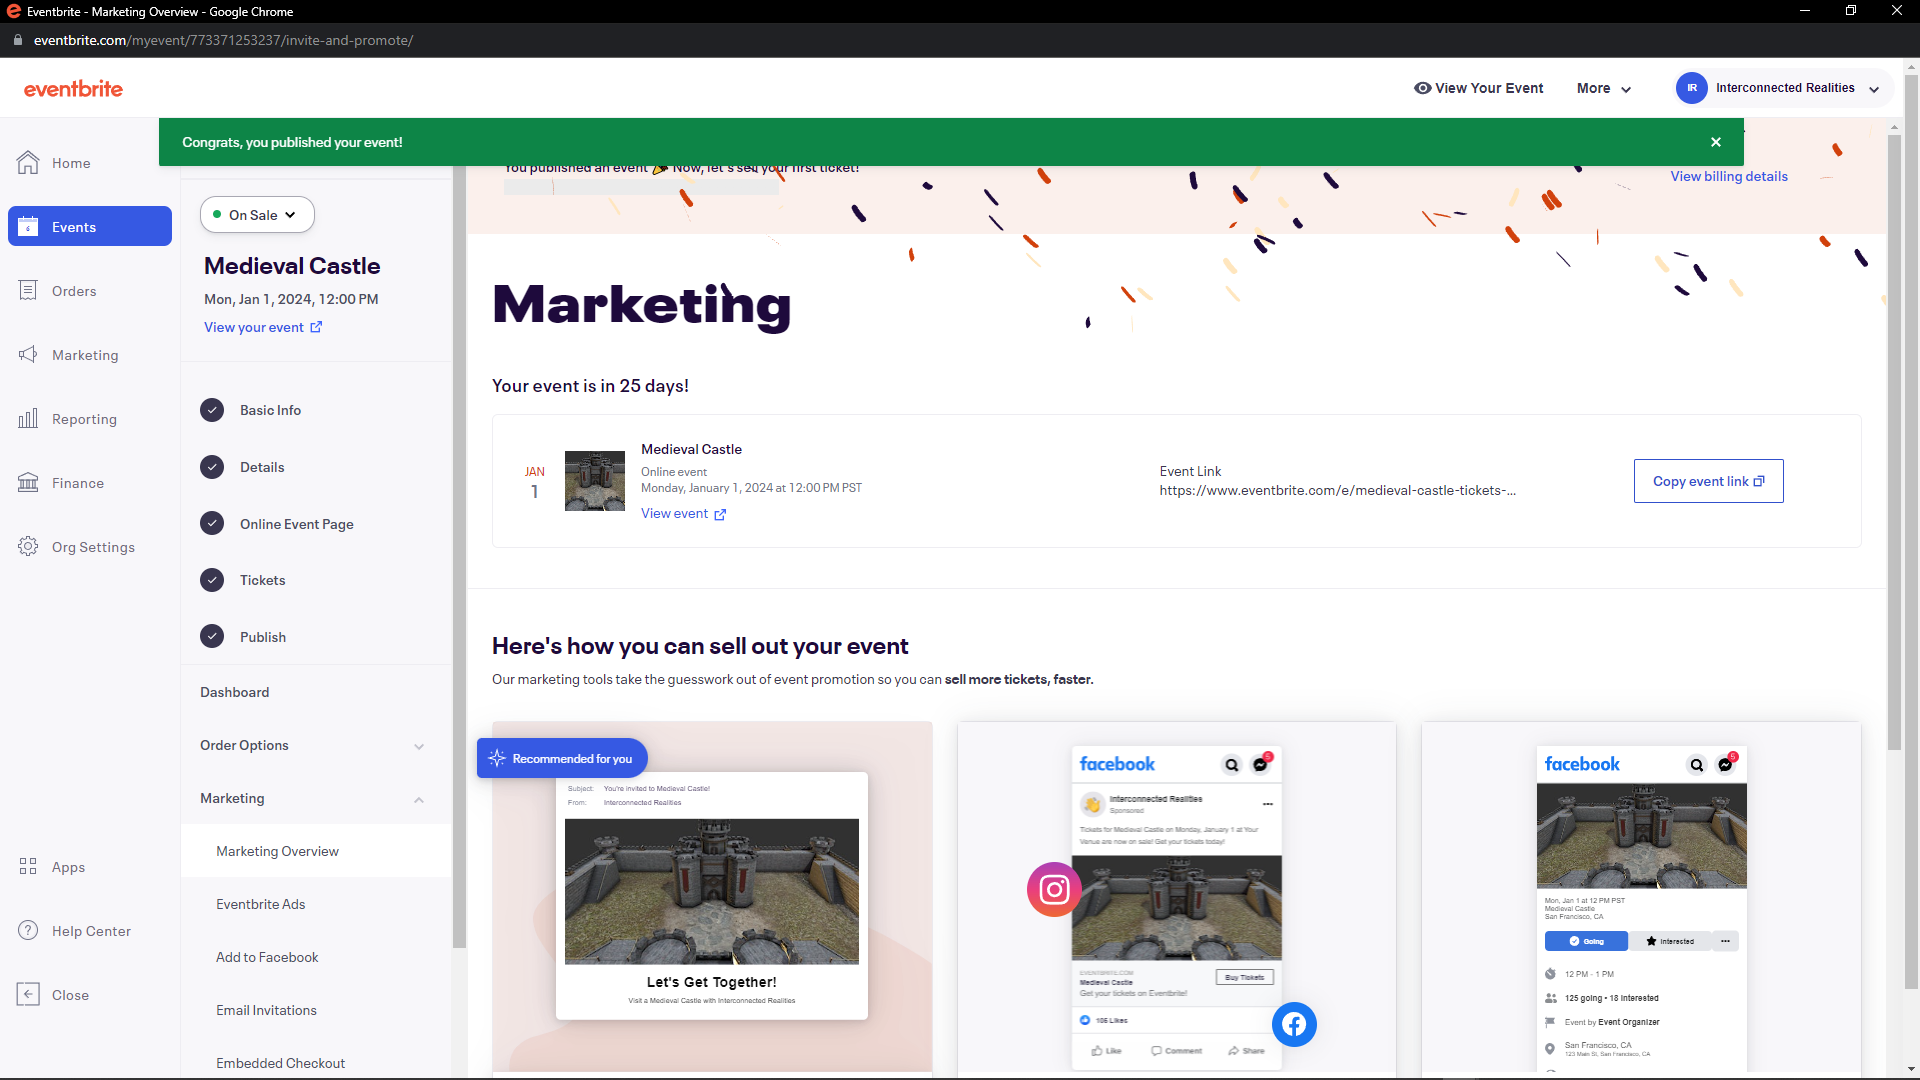
Publish the event.
Add the URL of the Eventbrite event to OKO.
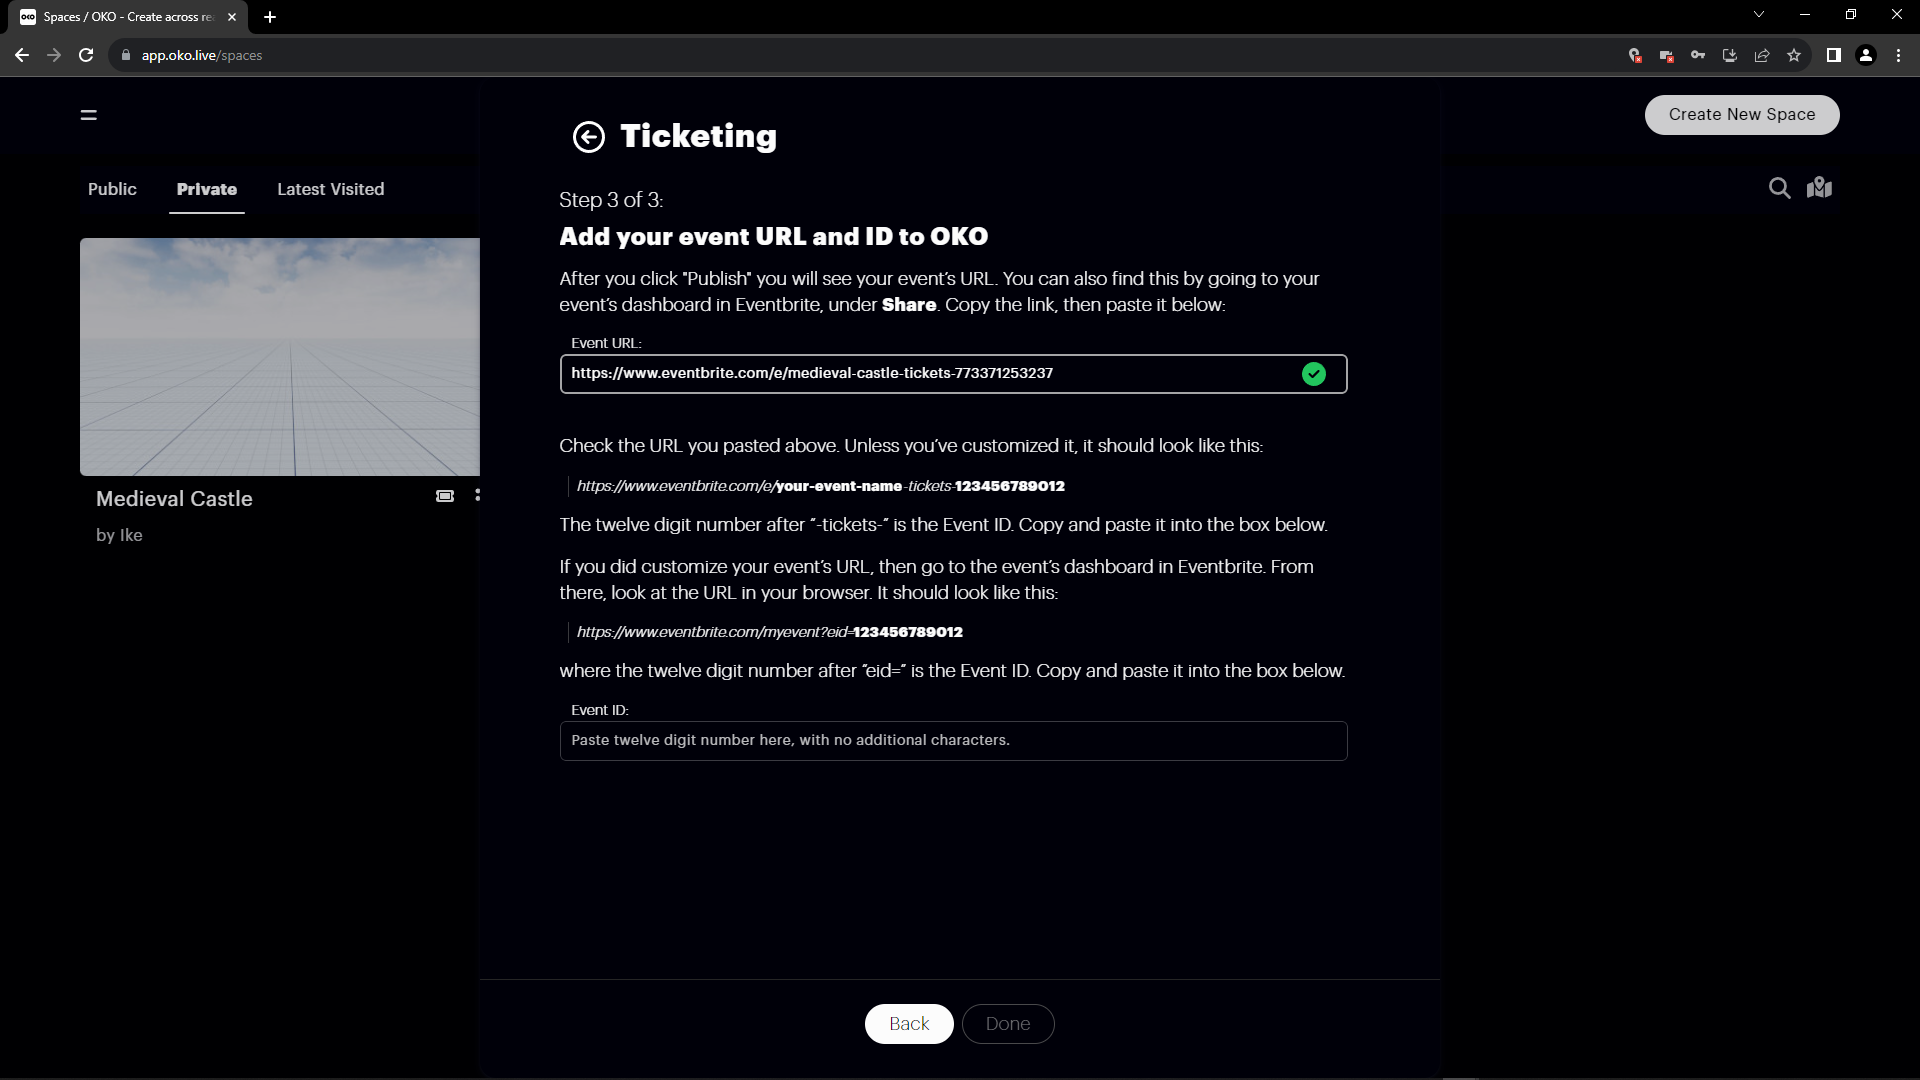
Add the event ID.
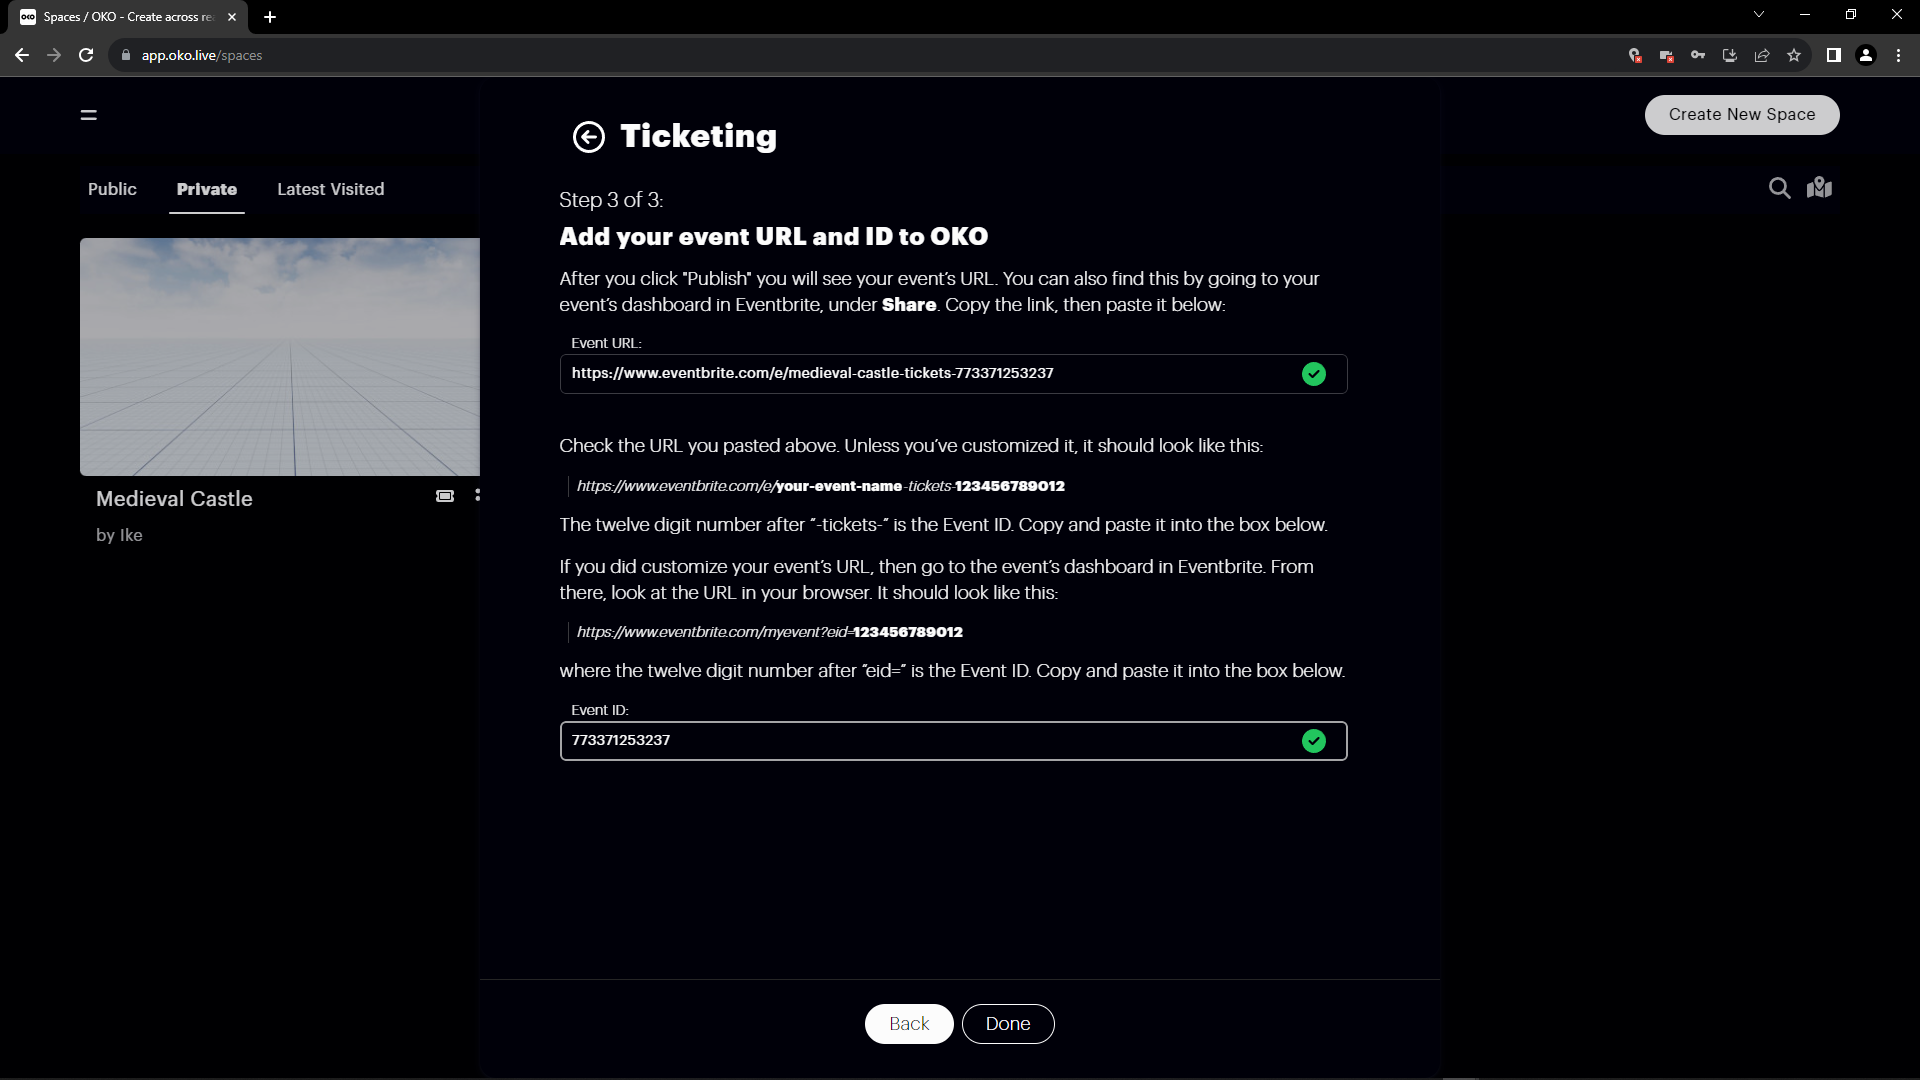
And that completes the Eventbrite setup!
