How to use e-commerce in OKO
This guide covers how to set up and use the e-commerce functionality in OKO via Shopify.
E-Commerce functionality can only be initially set up on OKO Web before assigning product ID’s in a space. You can add product ID’s via both OKO Web and using the OKO Unreal Plugin once setup is complete.
Setting up e-commerce
You can add or remove the e-commerce functionality either when creating or editing a space.
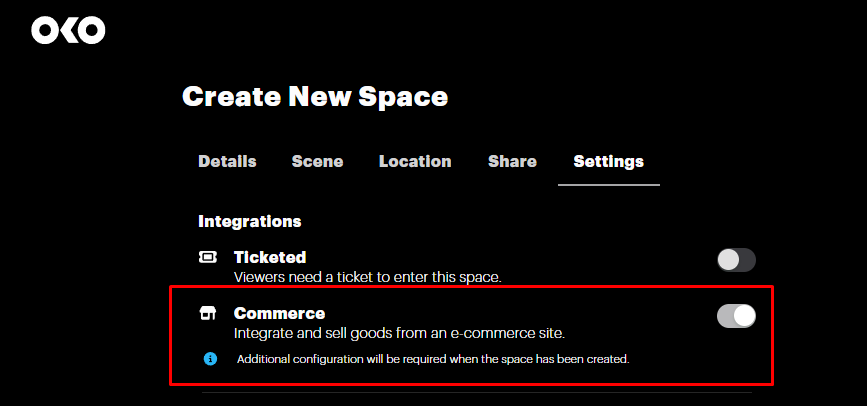
To toggle on e-commerce when creating a space, start by pressing the "Create New Space" button in the upper right-corner. Then, in the Create Space Settings tab, enable ‘Commerce’ and proceed to create the space.
You will now be taken through the flow to connect your space with Shopify.
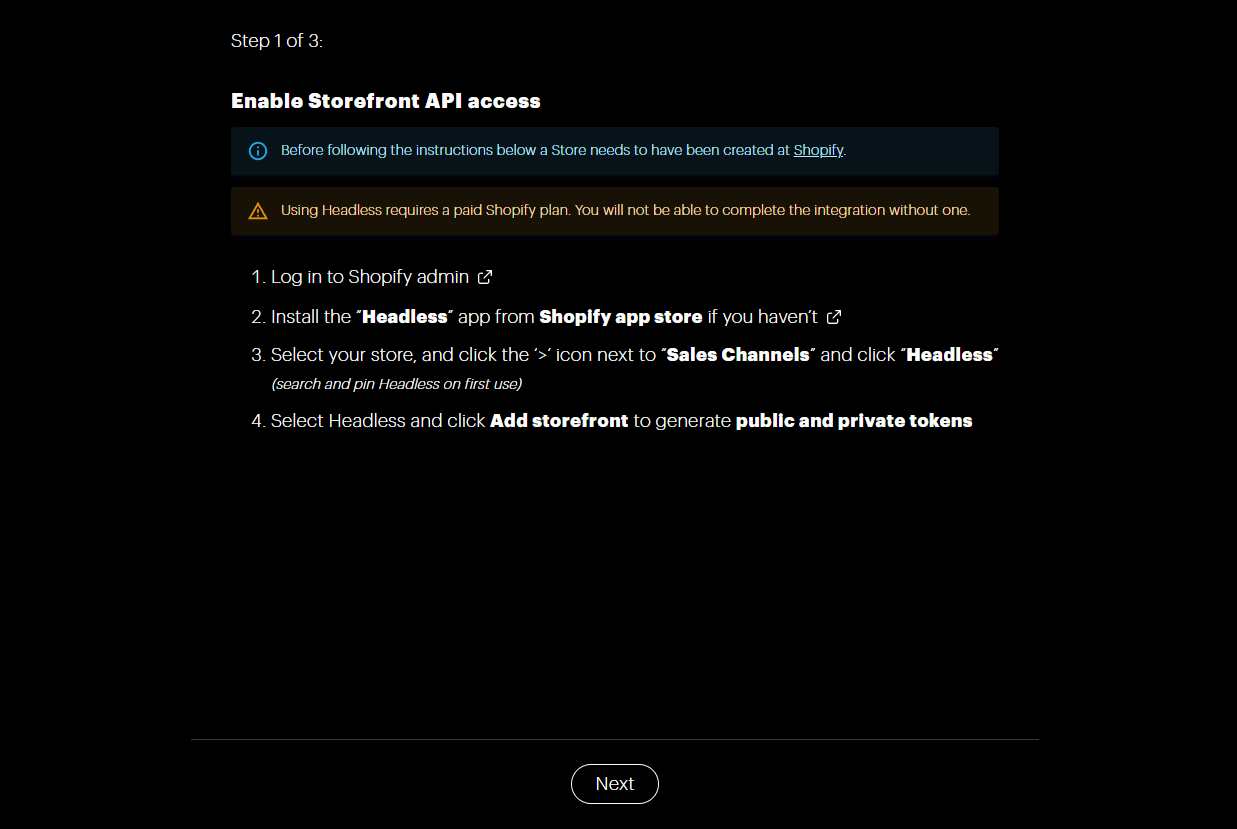
Note that you will either require a paid Shopify plan or need to use shopify.dev to test e-commerce with OKO.
Let’s use shopify.dev, to show the workflow from end to end. First, sign up for a dev account on shopify.dev (unless you already have a paid account on http://shopify.com ).
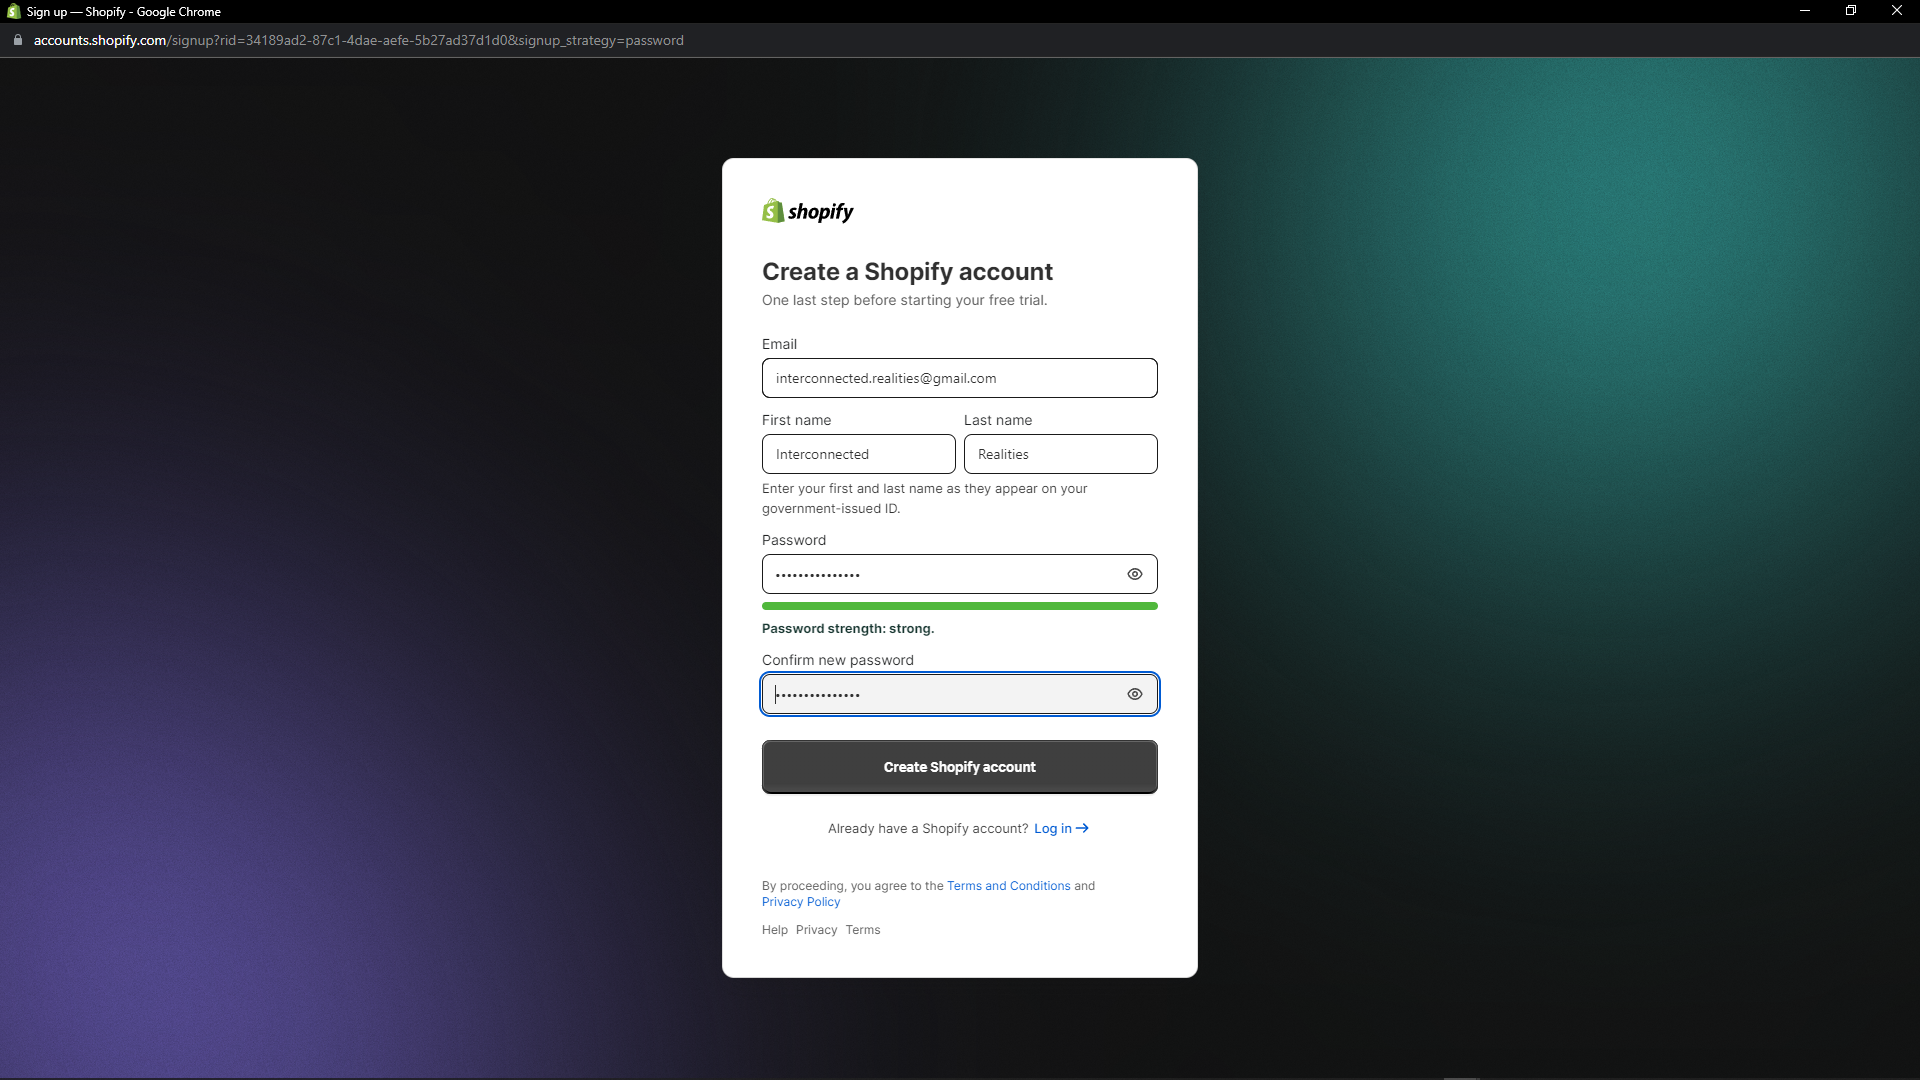
Sign up with your preferred method. For this example, we’ll sign up using an email address.
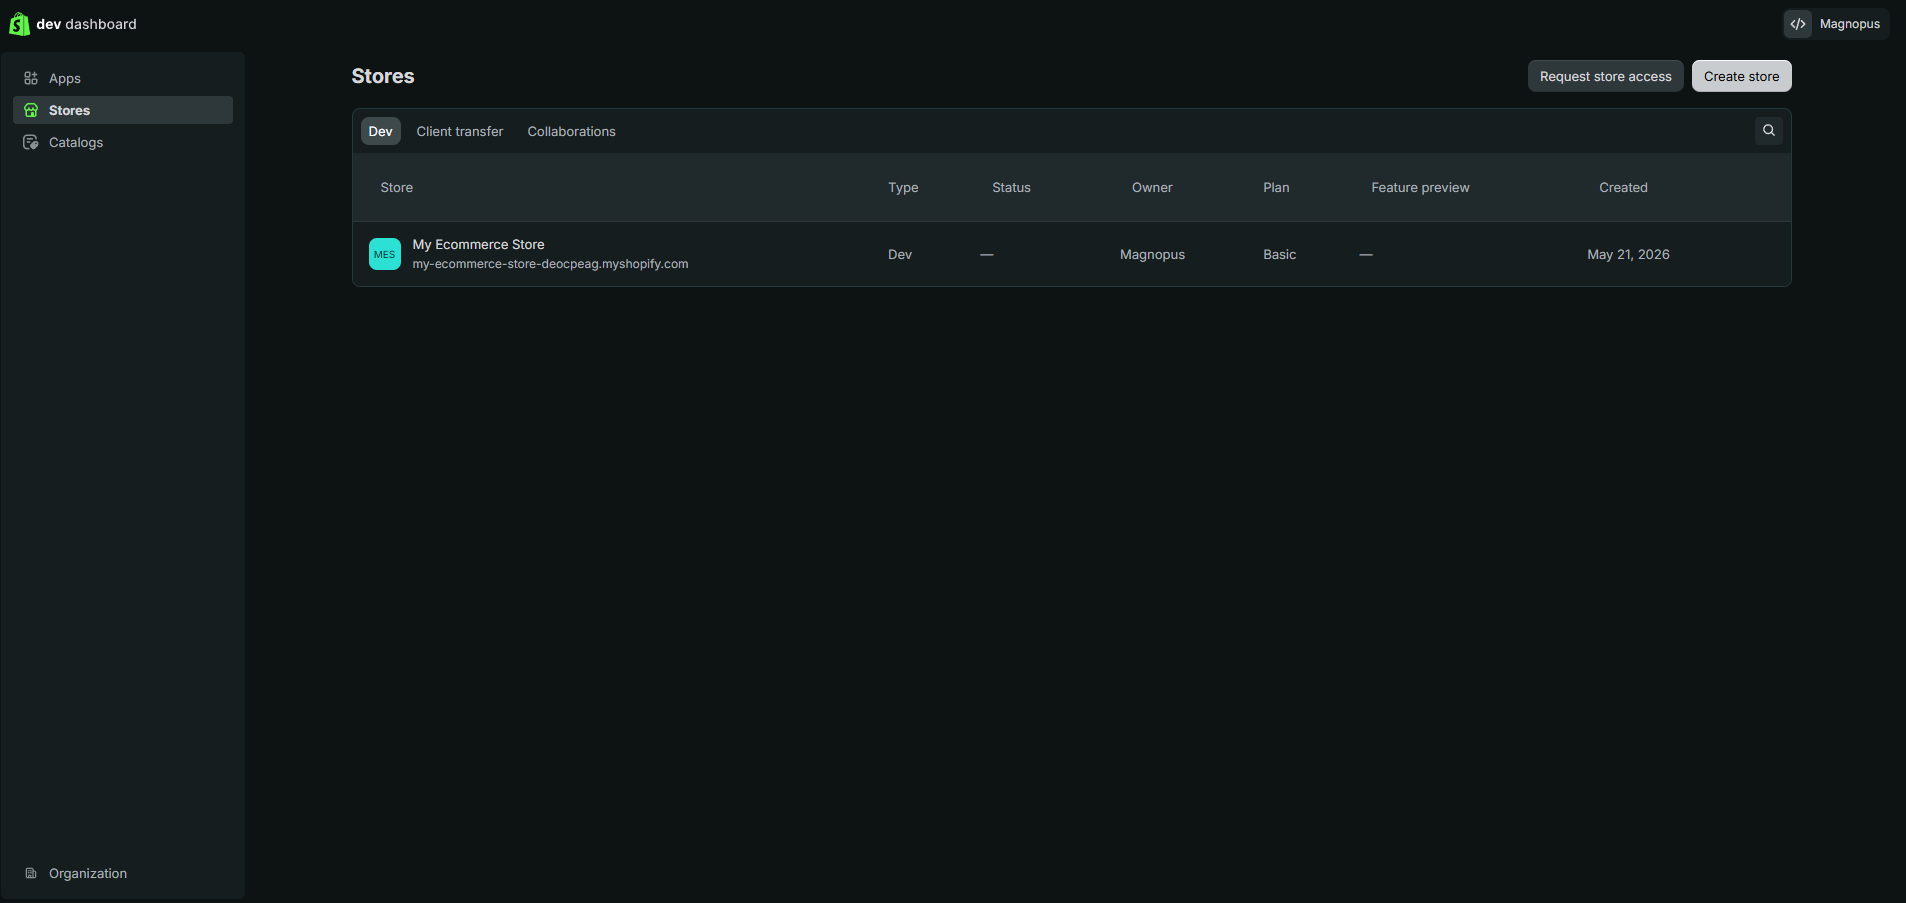
When you have entered all the requisite info, click on the “Stores” tab on the left to navigate to the “Stores” page. This is your Shopify Partners administration page. (If you don’t see a “Stores” tab, you need to make sure to use a paid or dev Shopify account, as this tab will not be visible with a free – even free trial – non-dev Shopify account.)
If needed, follow the flow to add your Shopify store.
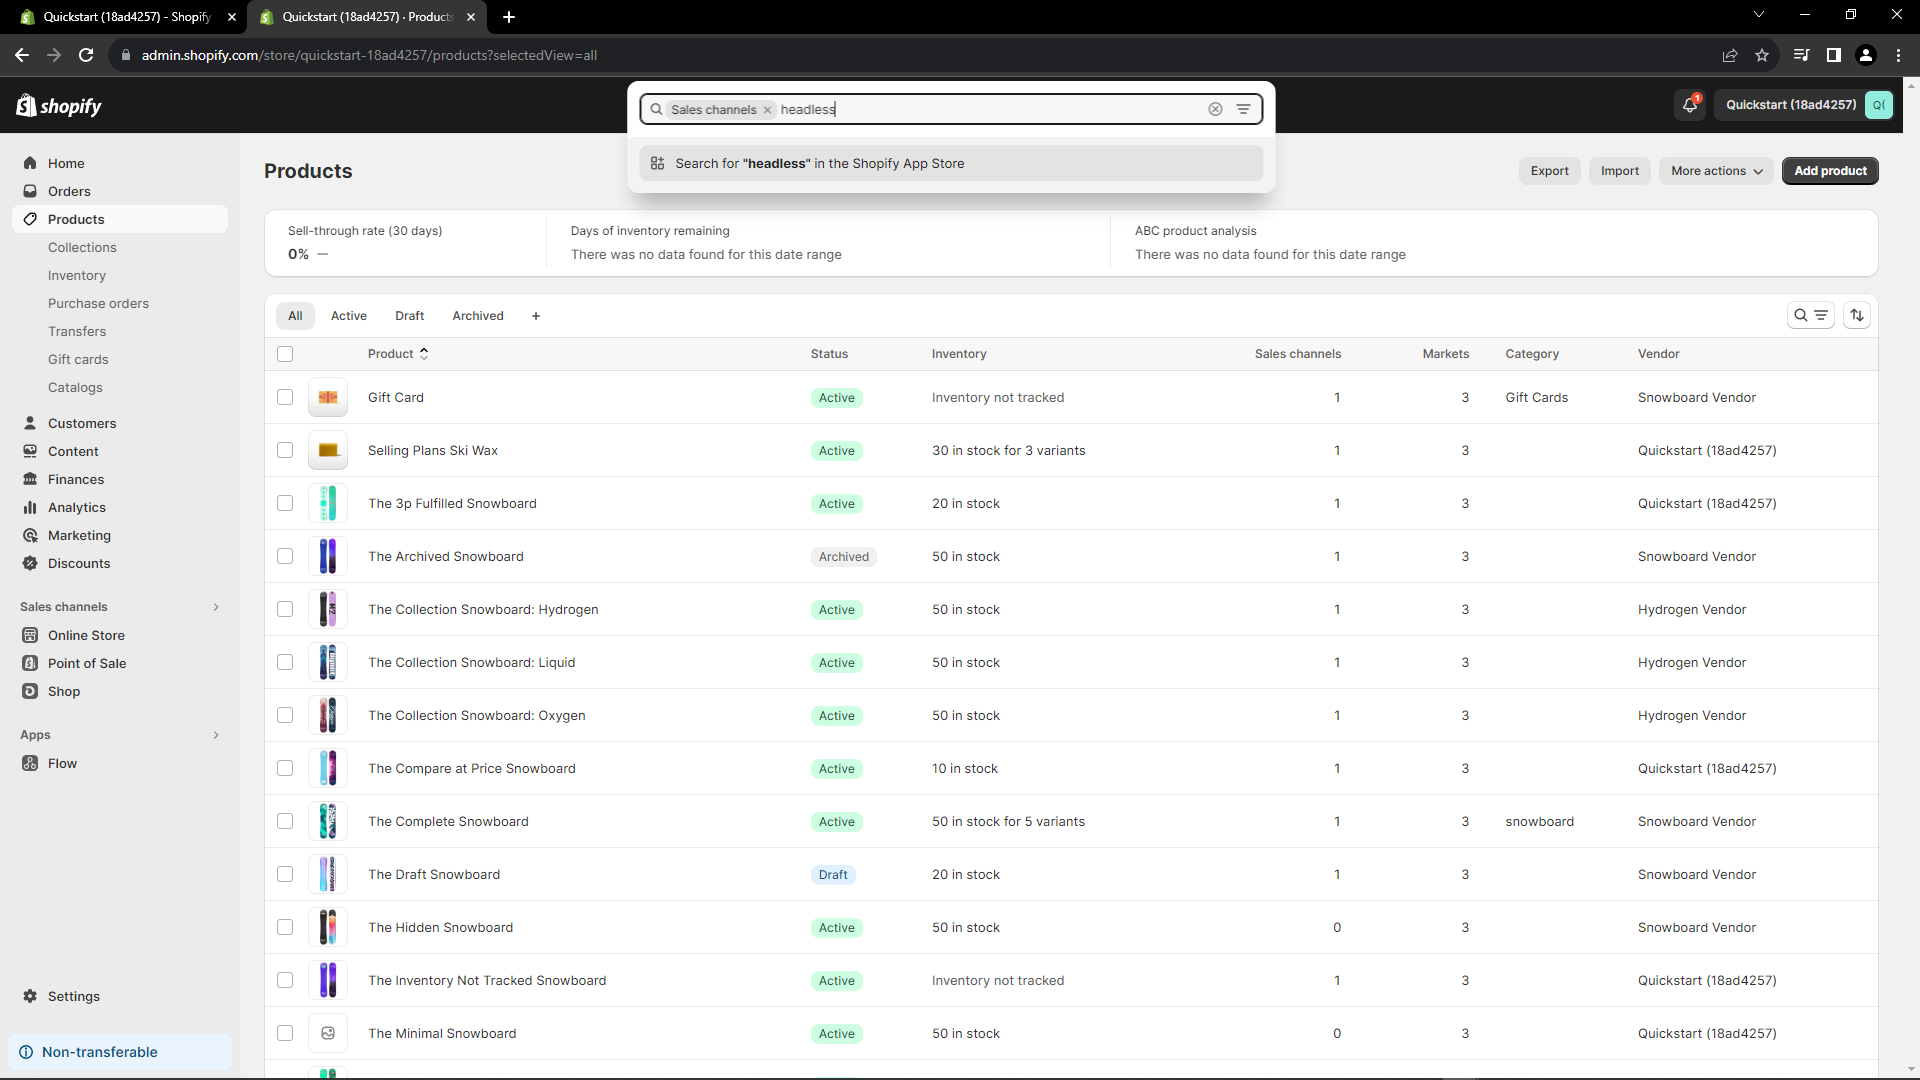
With a Shopify store selected, you will be taken to the store’s dashboard. Click on the “Sales channels” link label on the left, and search for “Headless”.
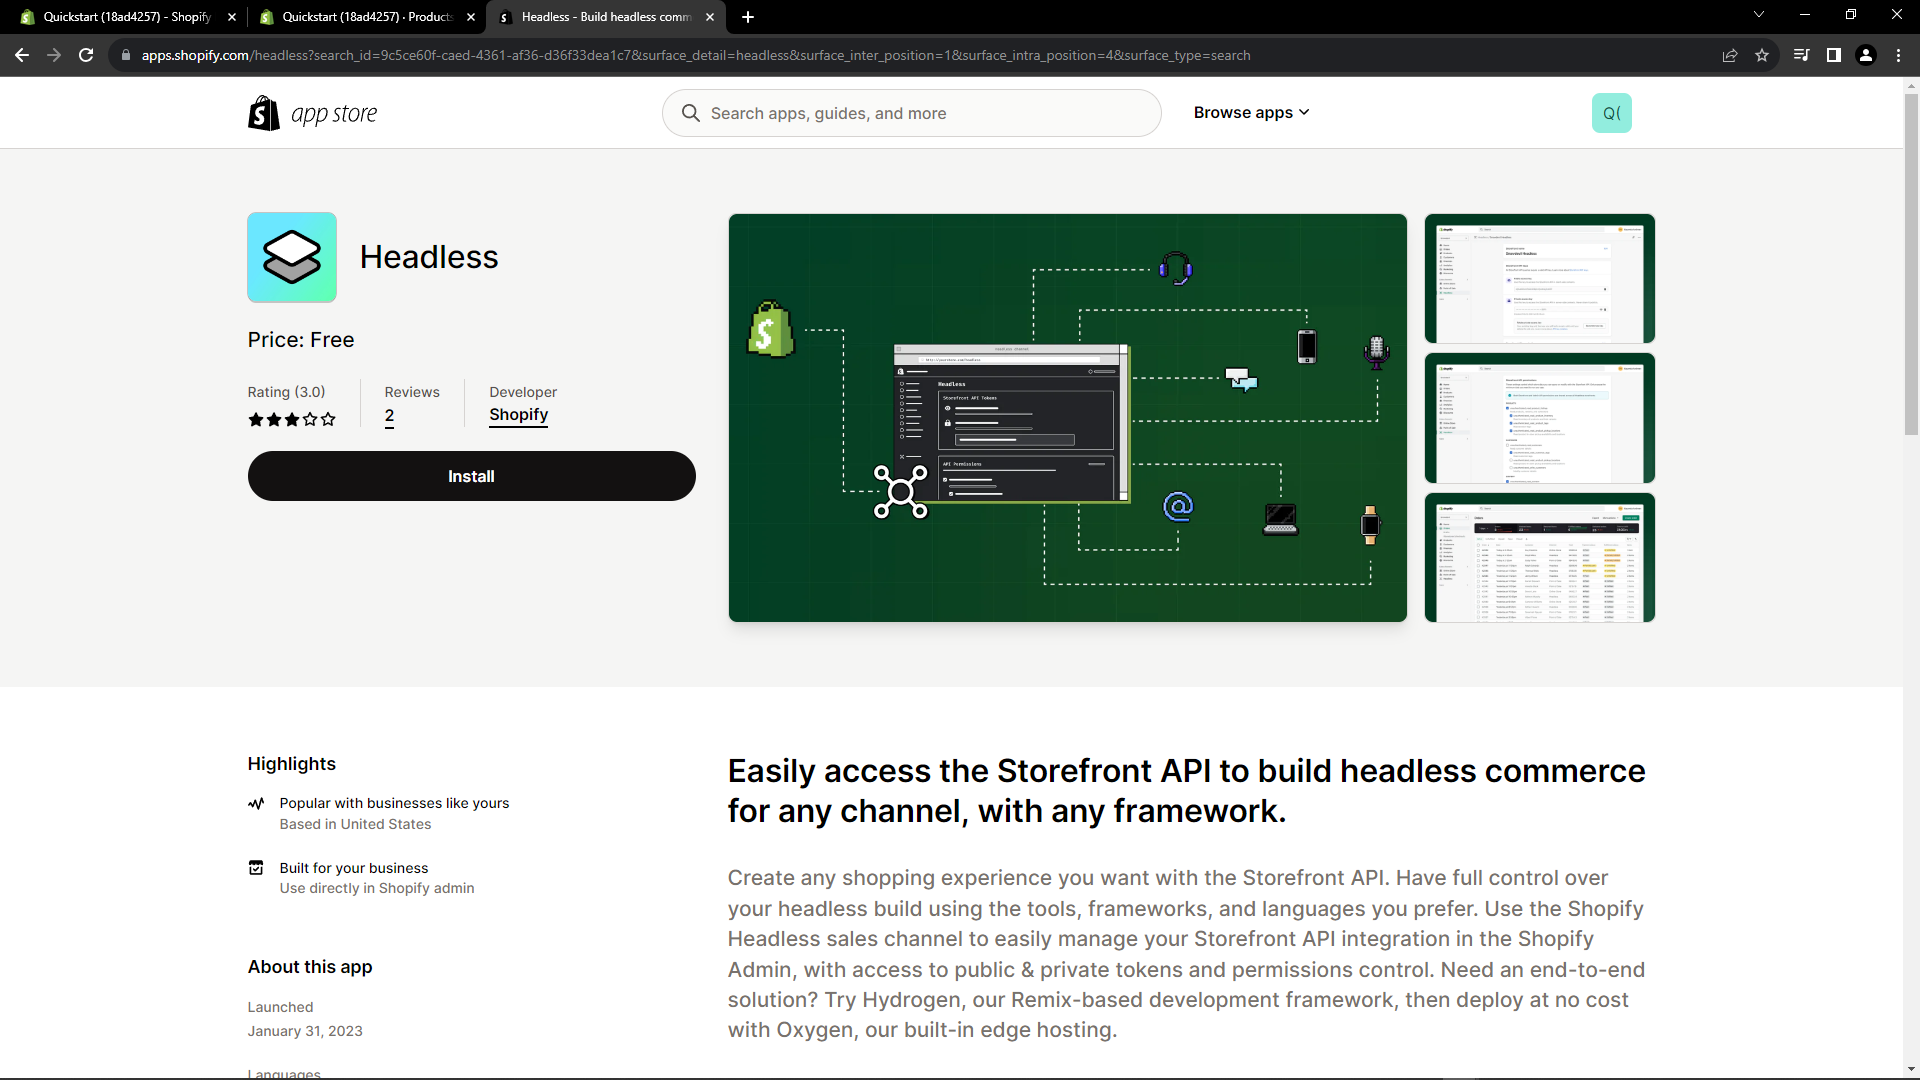
You will arrive at this page. Click “Install” to Install the Headless App.
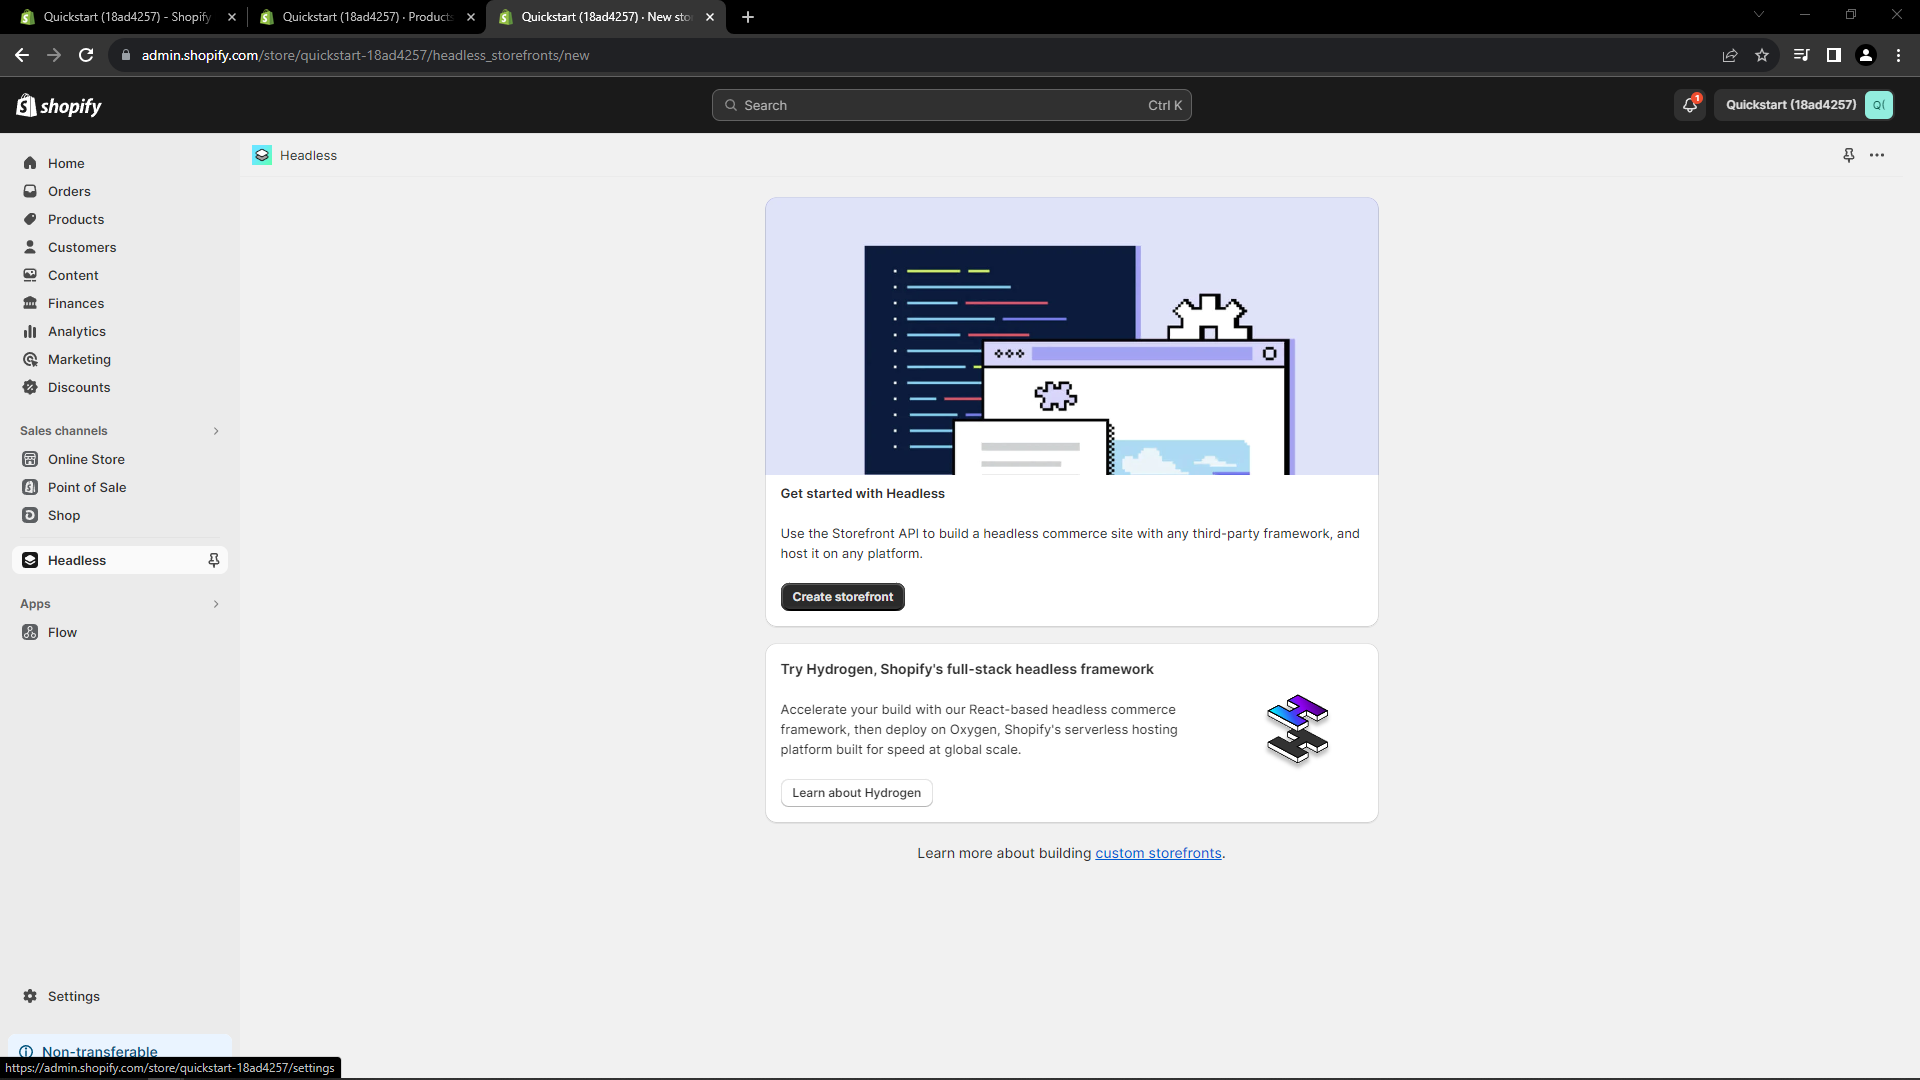
Click “Create Storefront” to create a Headless storefront.
Notice the “Headless” link label on the left and the pin next to it. Click on the pin so the Headless channel stays visible to the left.
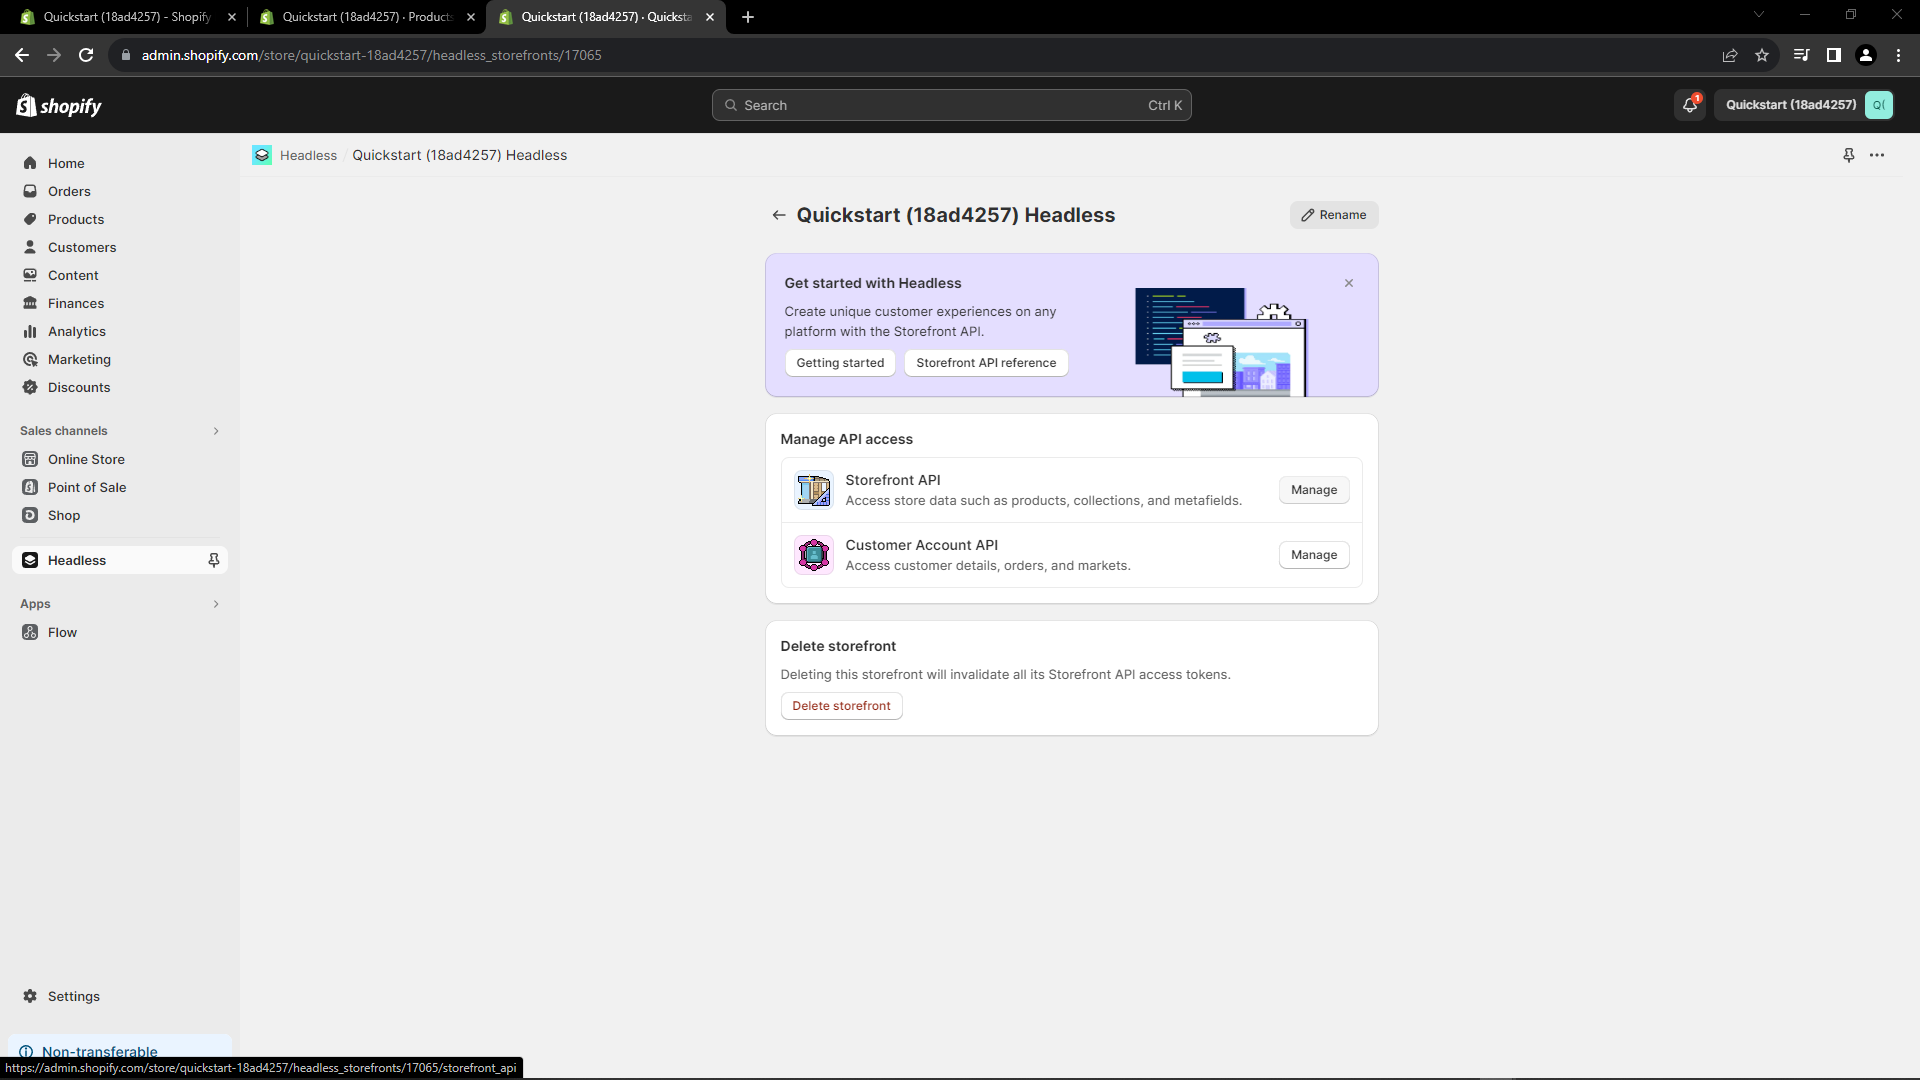
Click “Manage” to the right of the Storefront API to manage the tokens.
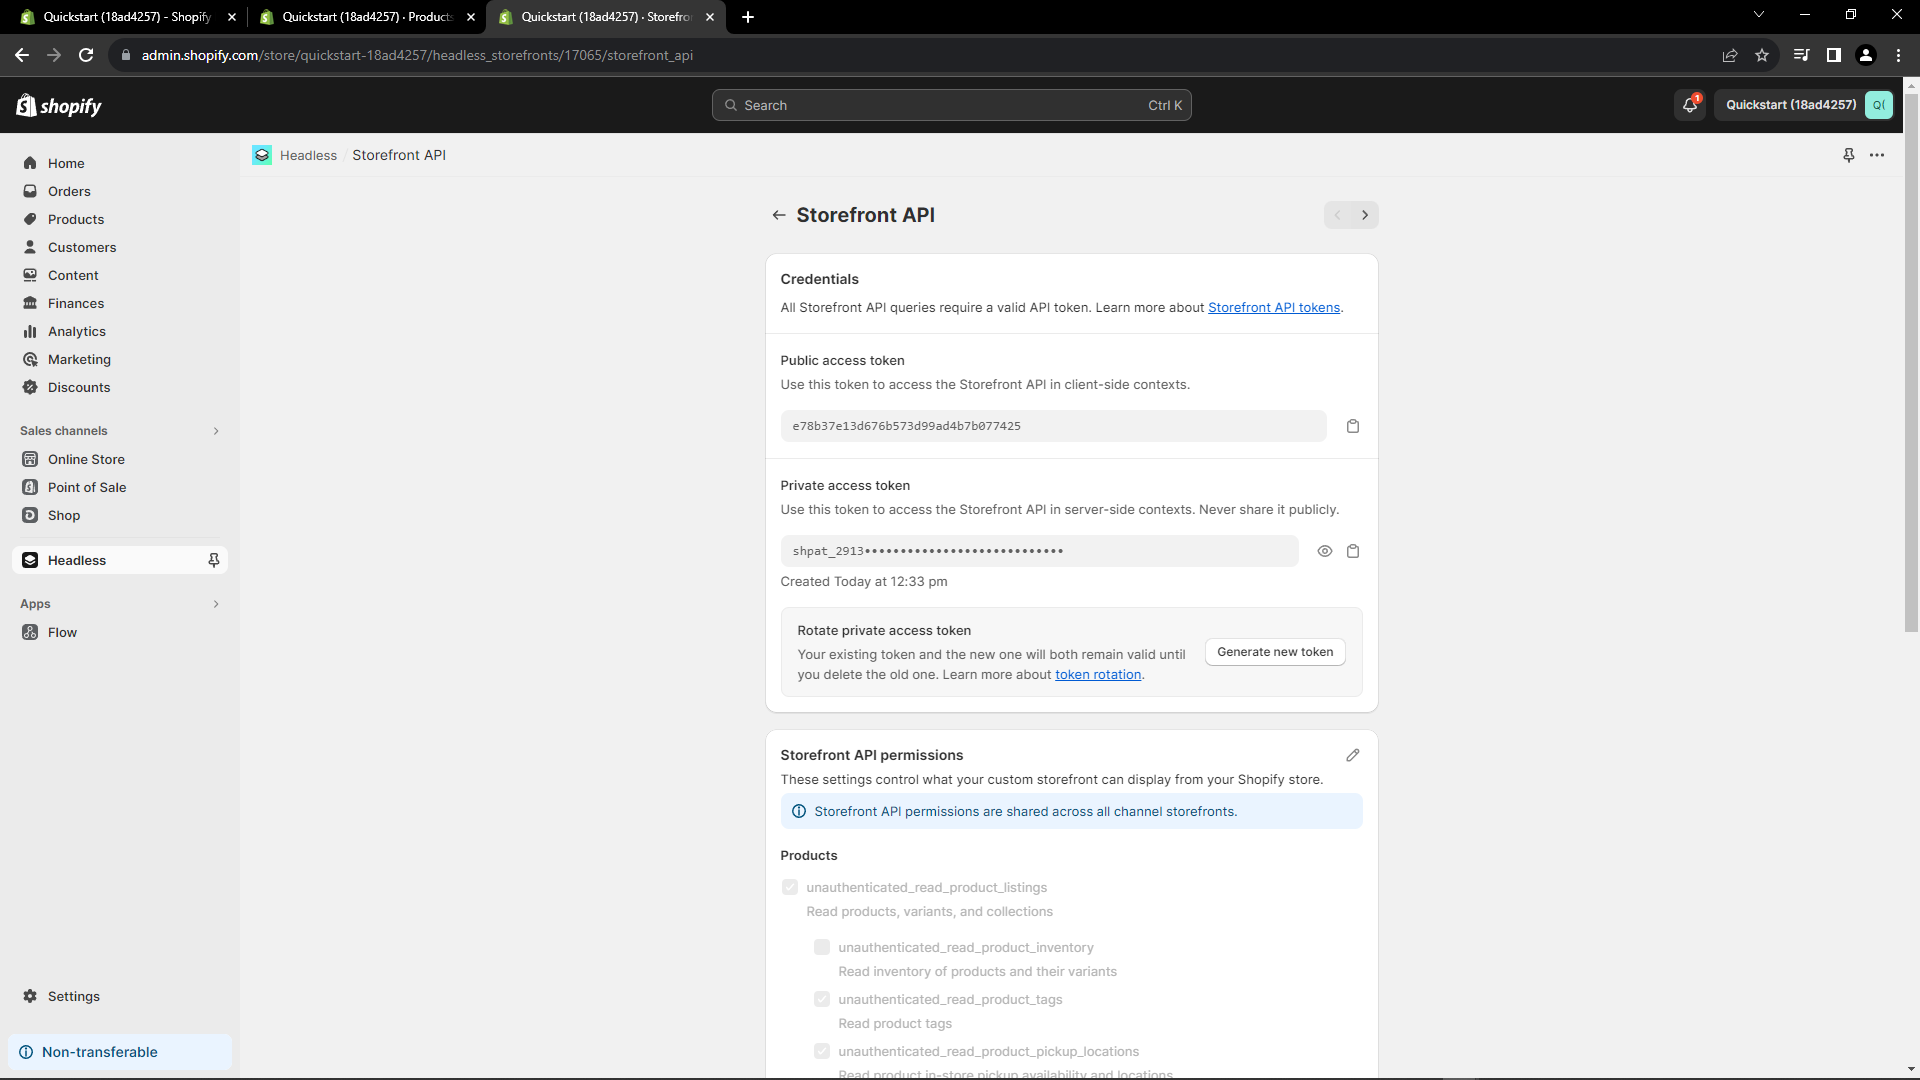
Save the “Private access token” in a safe place. You’ll need this to associate your OKO space with your store.
Make sure to copy the store URL, as this is also required.
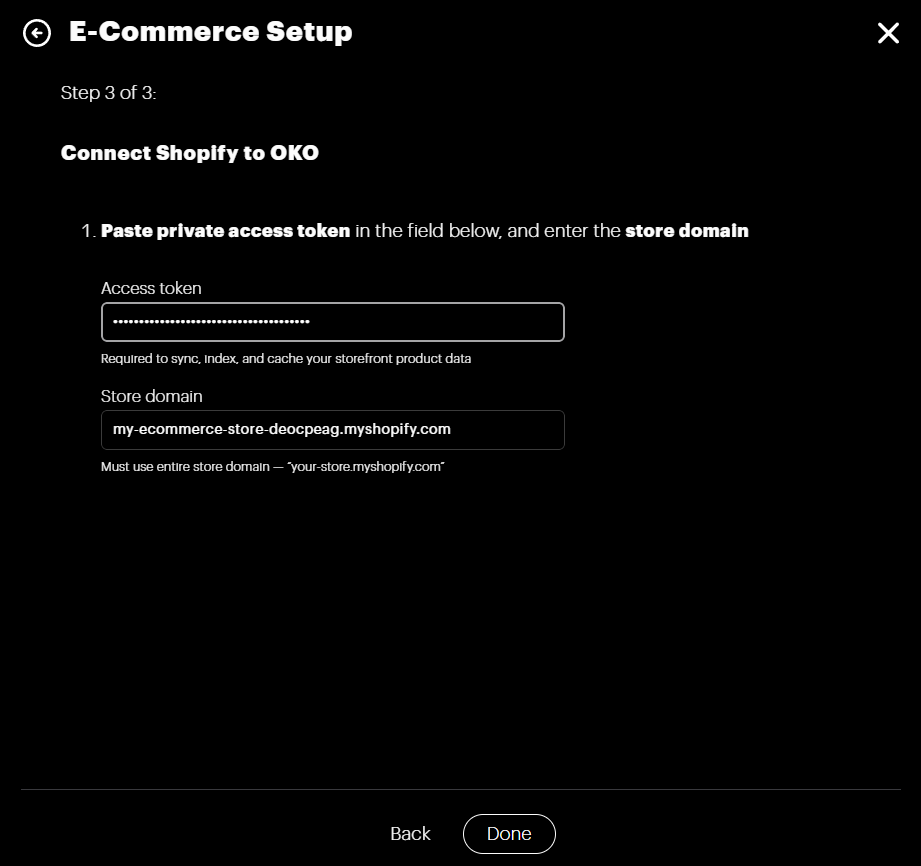
Next, back in OKO, proceed to Step 3 of the E-Commerce Setup flow.
Enter the information you gathered in Shopify.

You should see that e-commerce is now connected in the settings page.
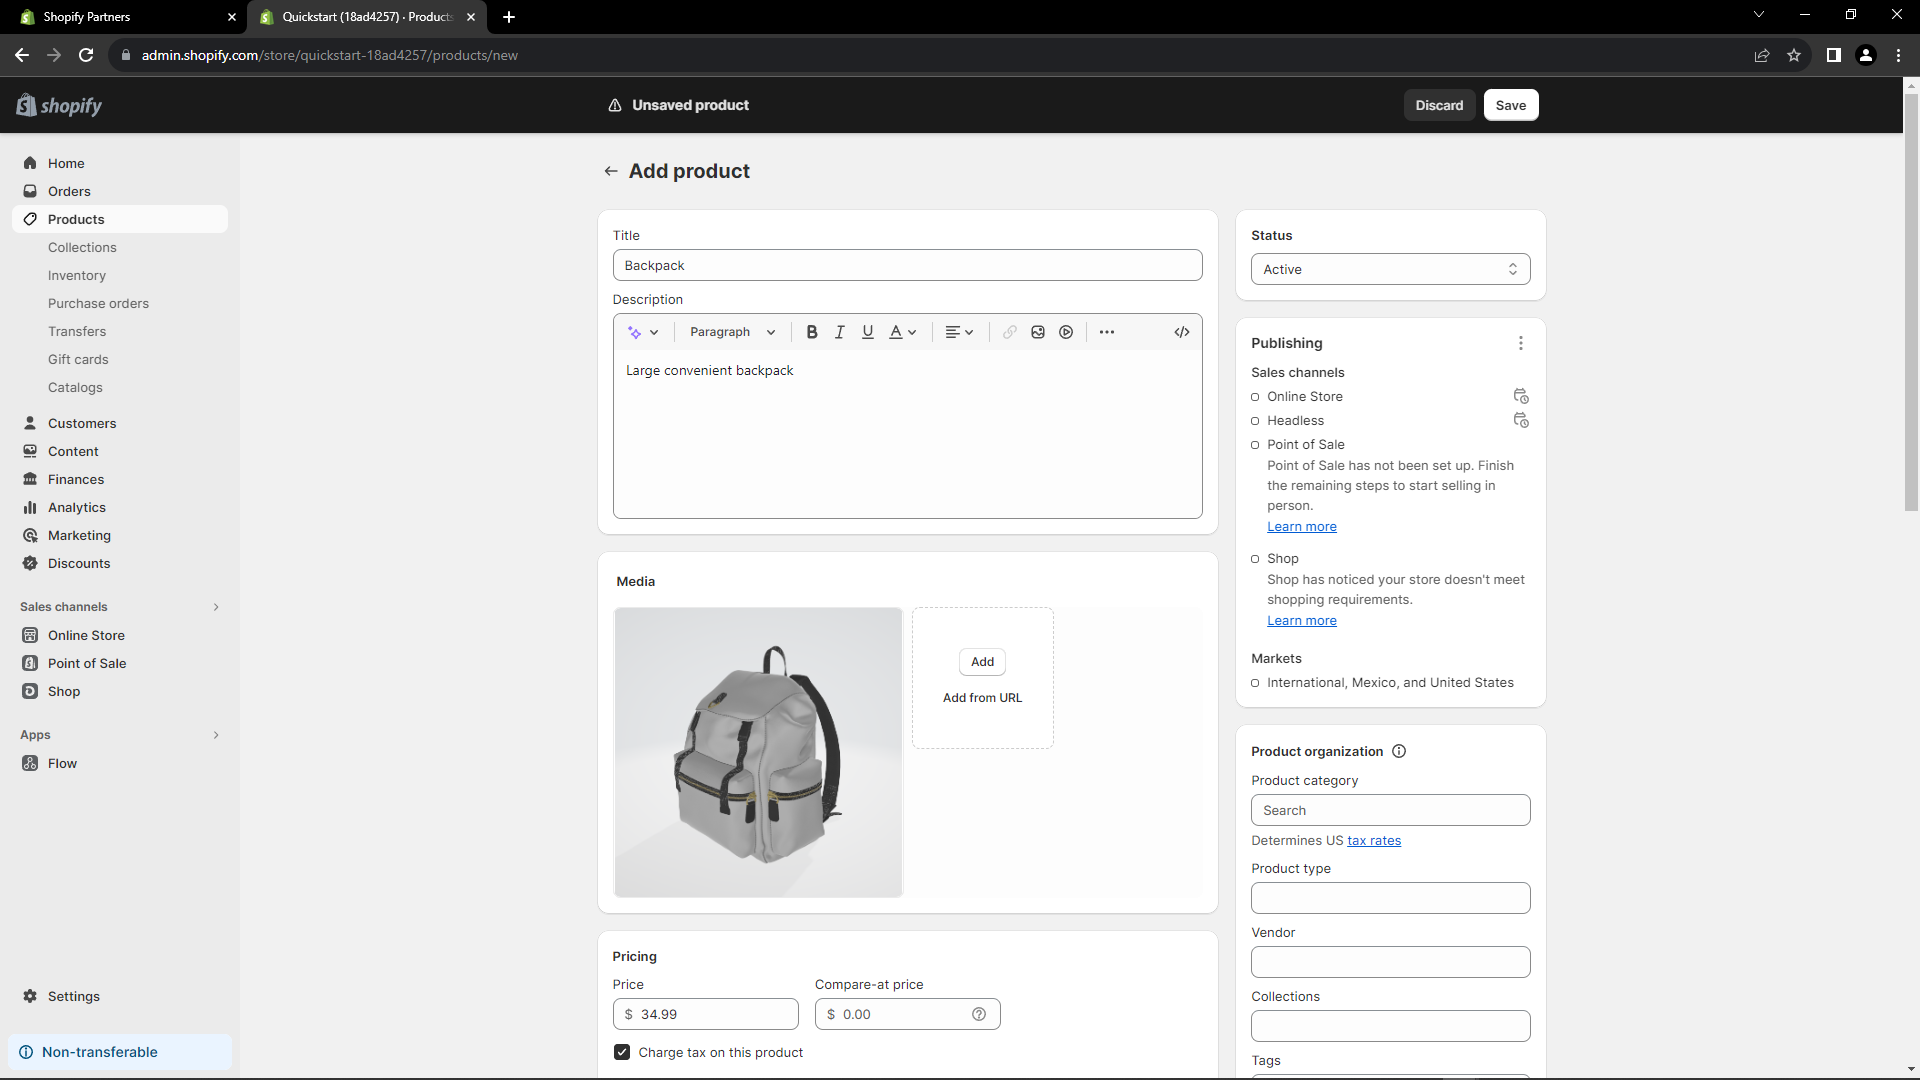
Now, go back to your store on the Shopify website. Delete any starter example products you don’t need and add your products to your store. Here’s a backpack as an example.
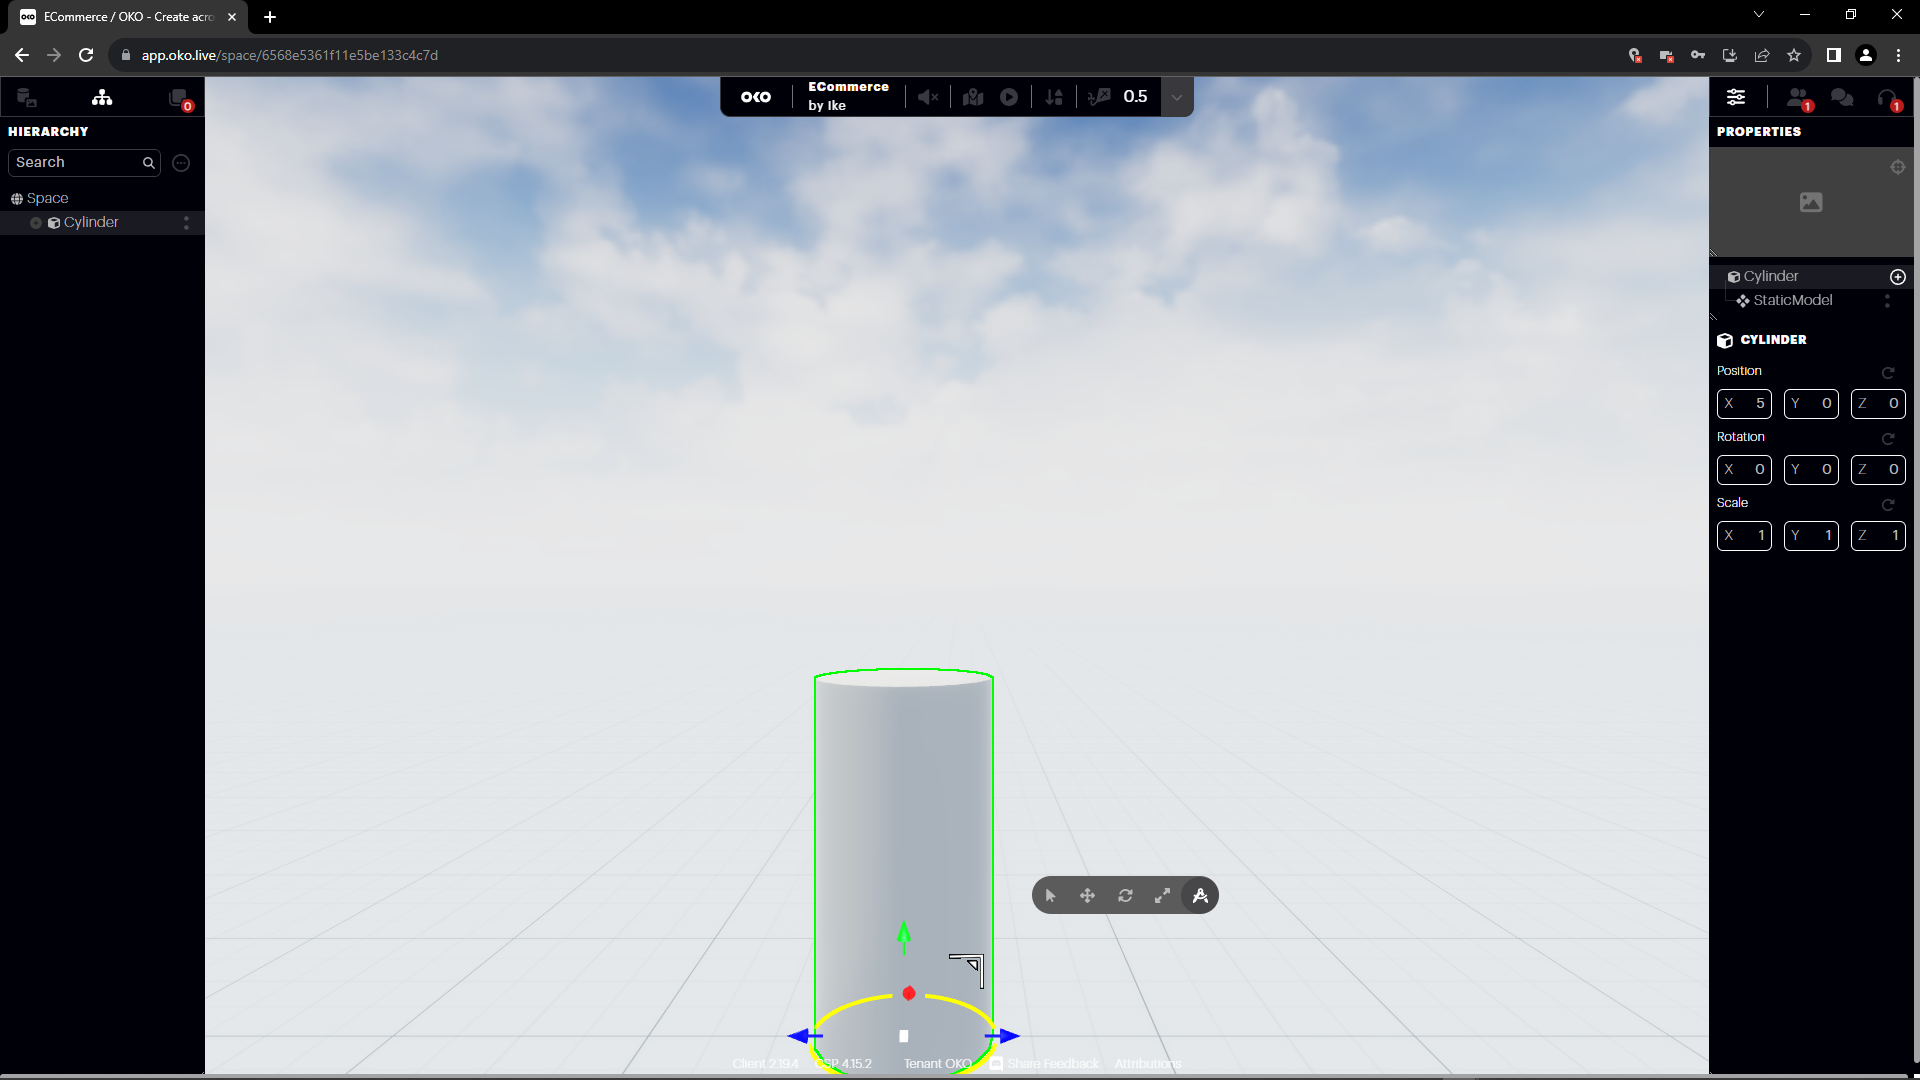
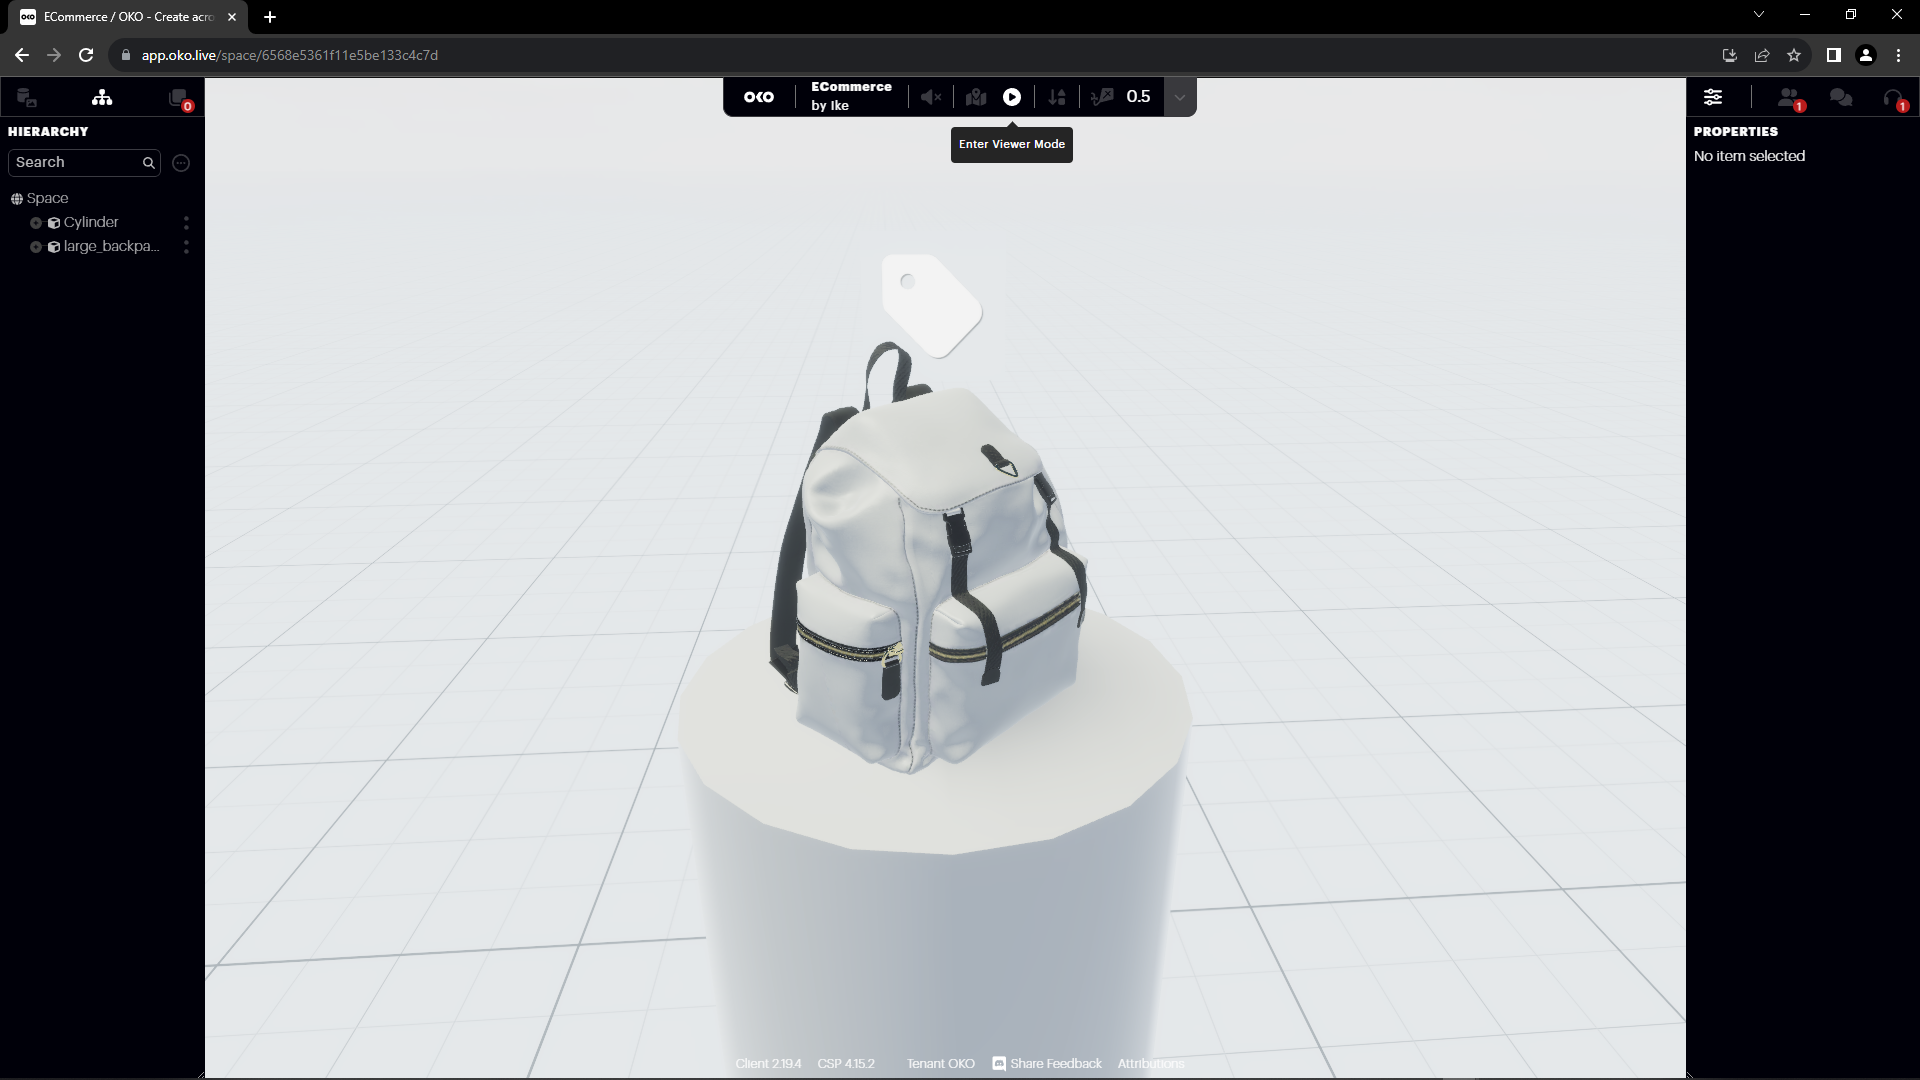
Go back to OKO and enter your e-commerce space. In this example, we’ve added a cylinder mesh to our space to act as a pedestal for our product.
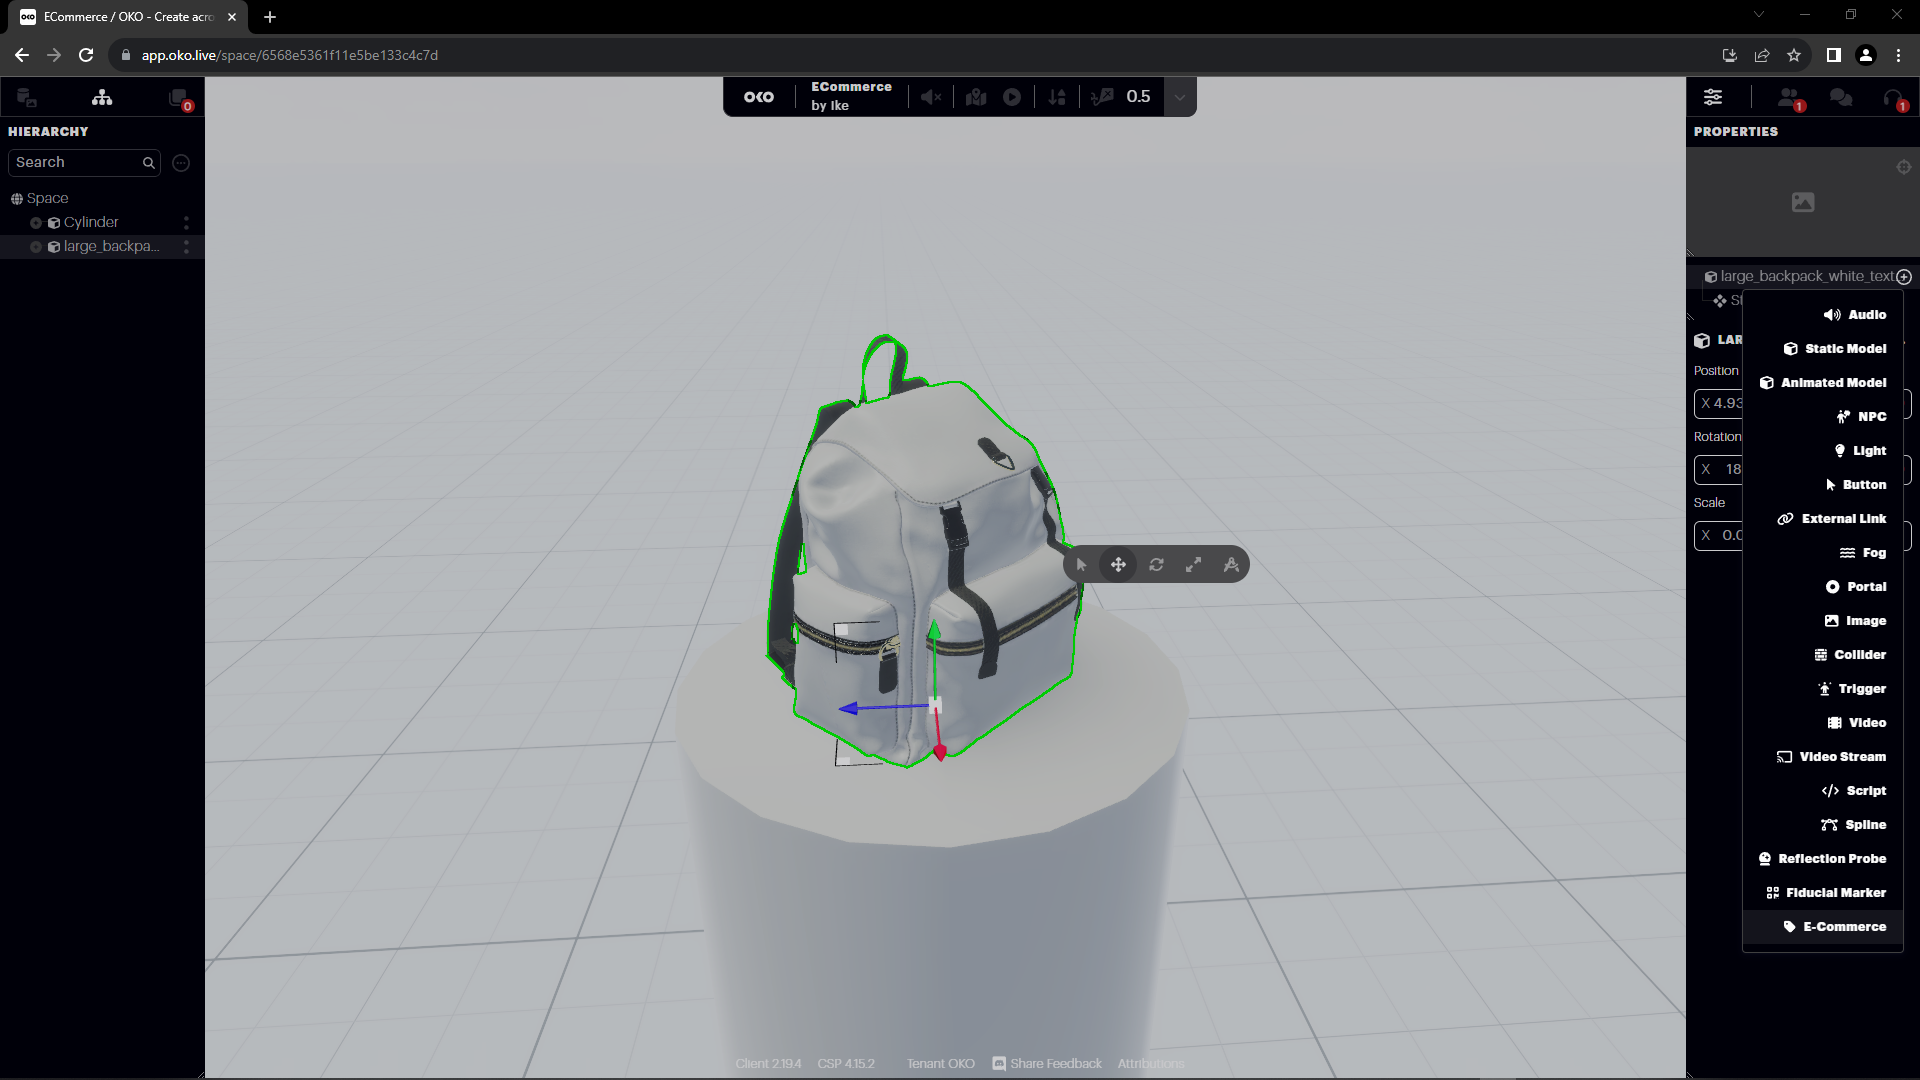
Next, let’s add a backpack asset to the space and place it on the pedestal.
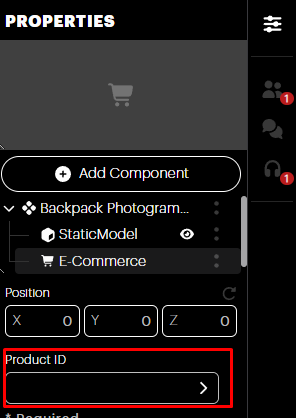
Add an e-commerce component to the backpack and enter the product ID.
Testing your ECommerce Space
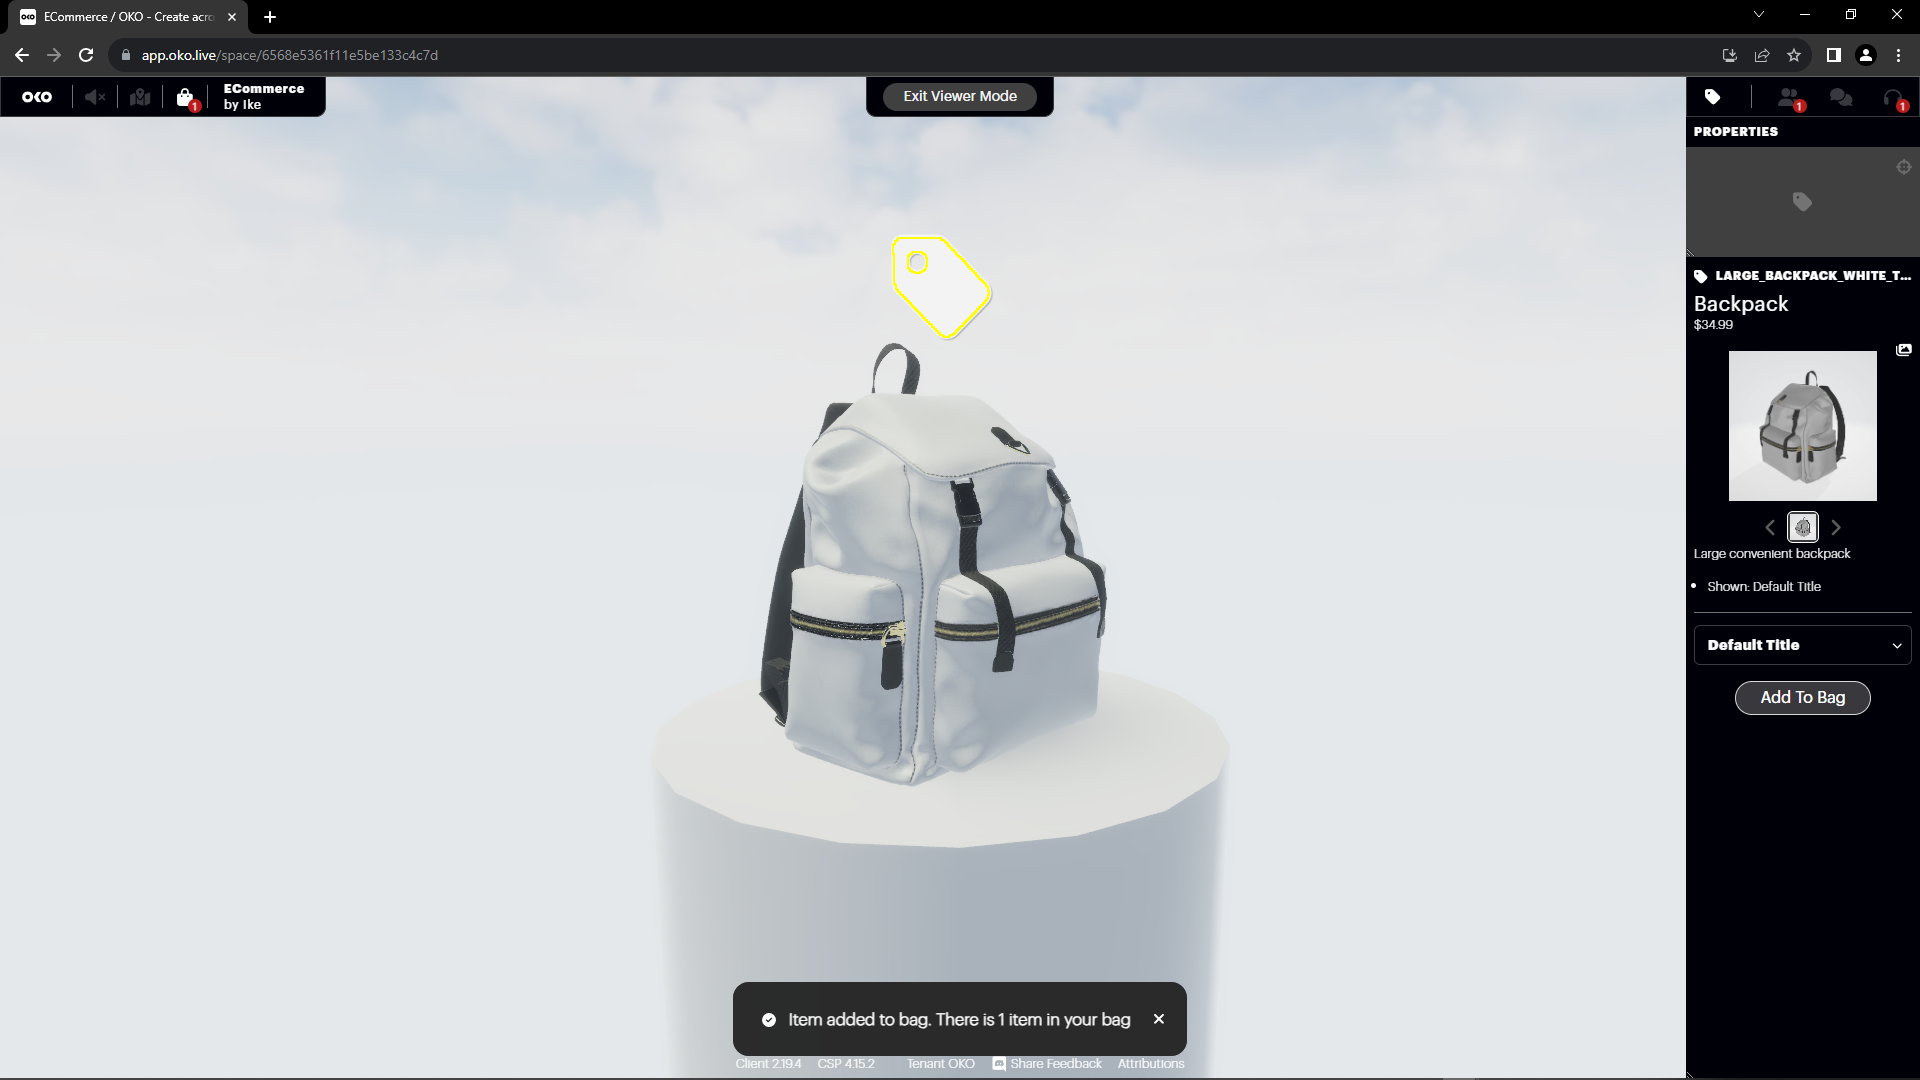
Enter Viewer Mode to test the e-commerce component you just added.
Select the e-commerce tag in Viewer Mode.
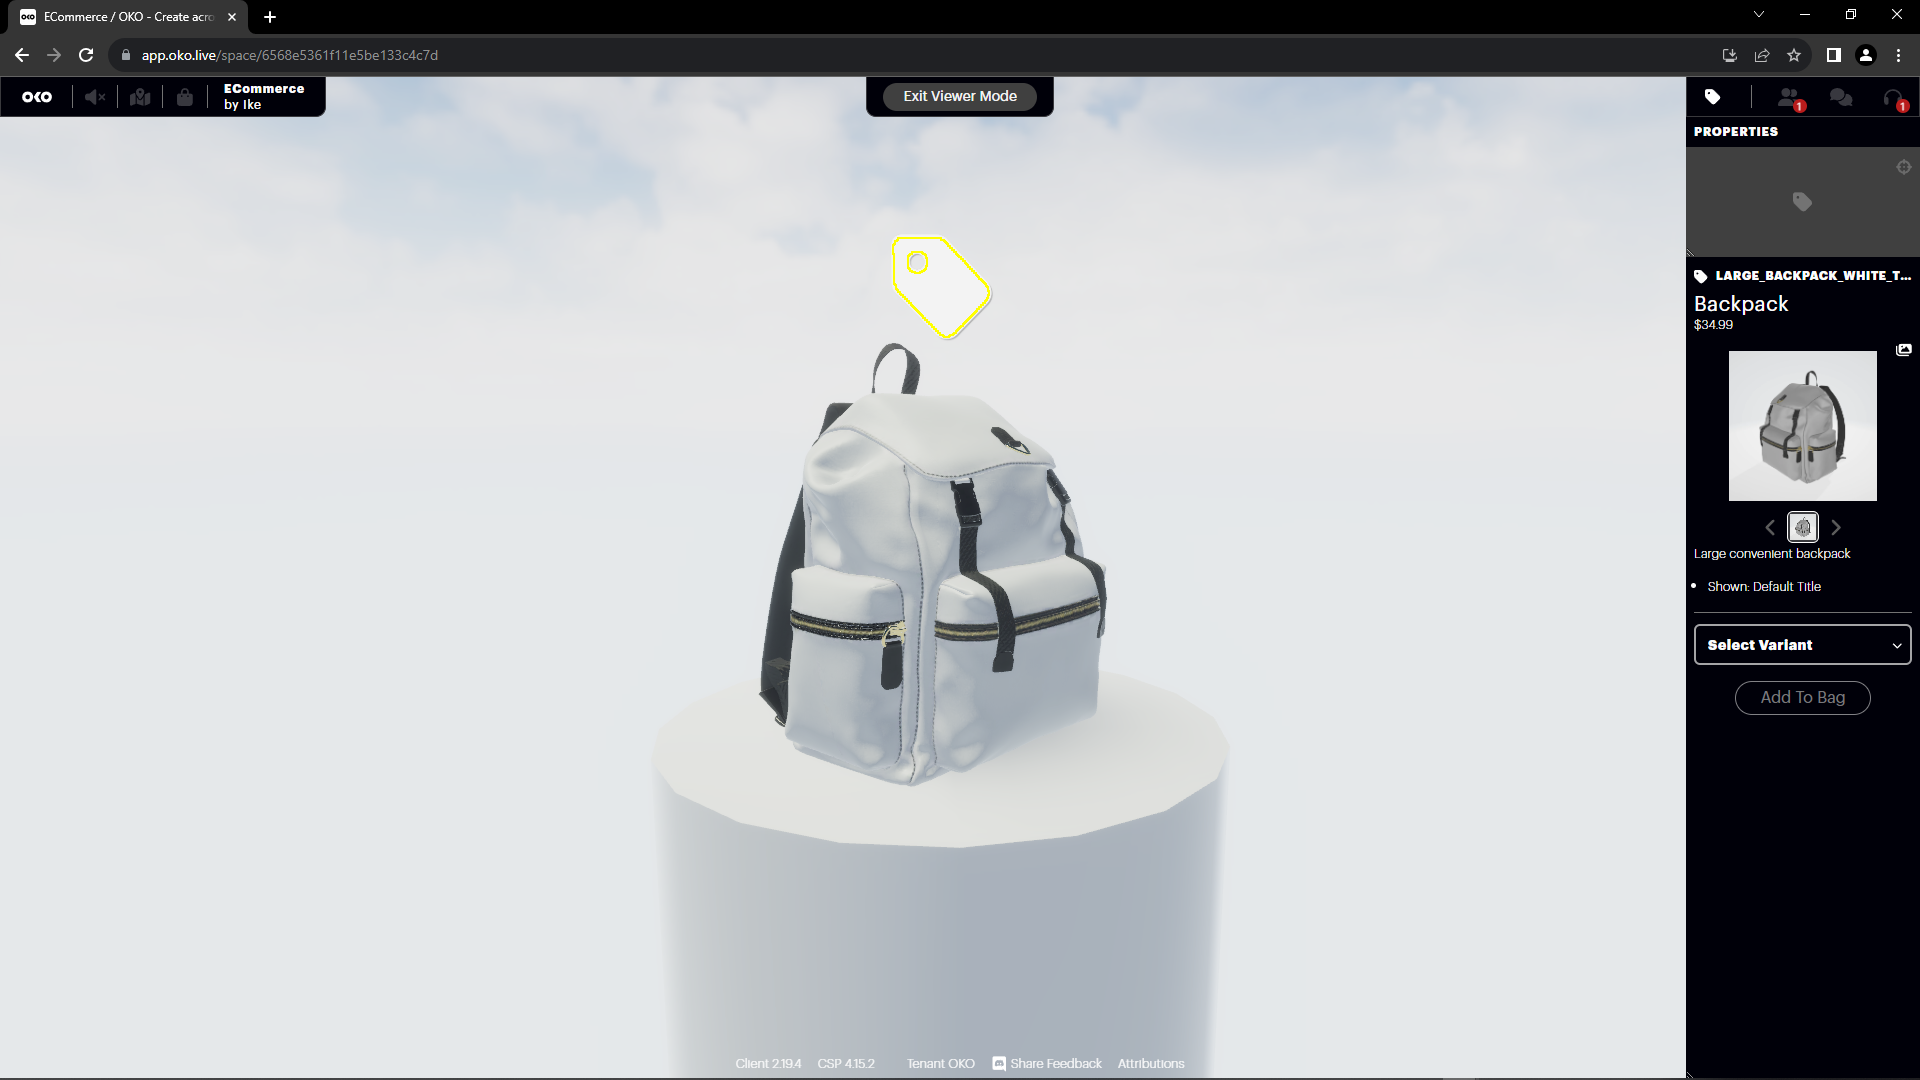
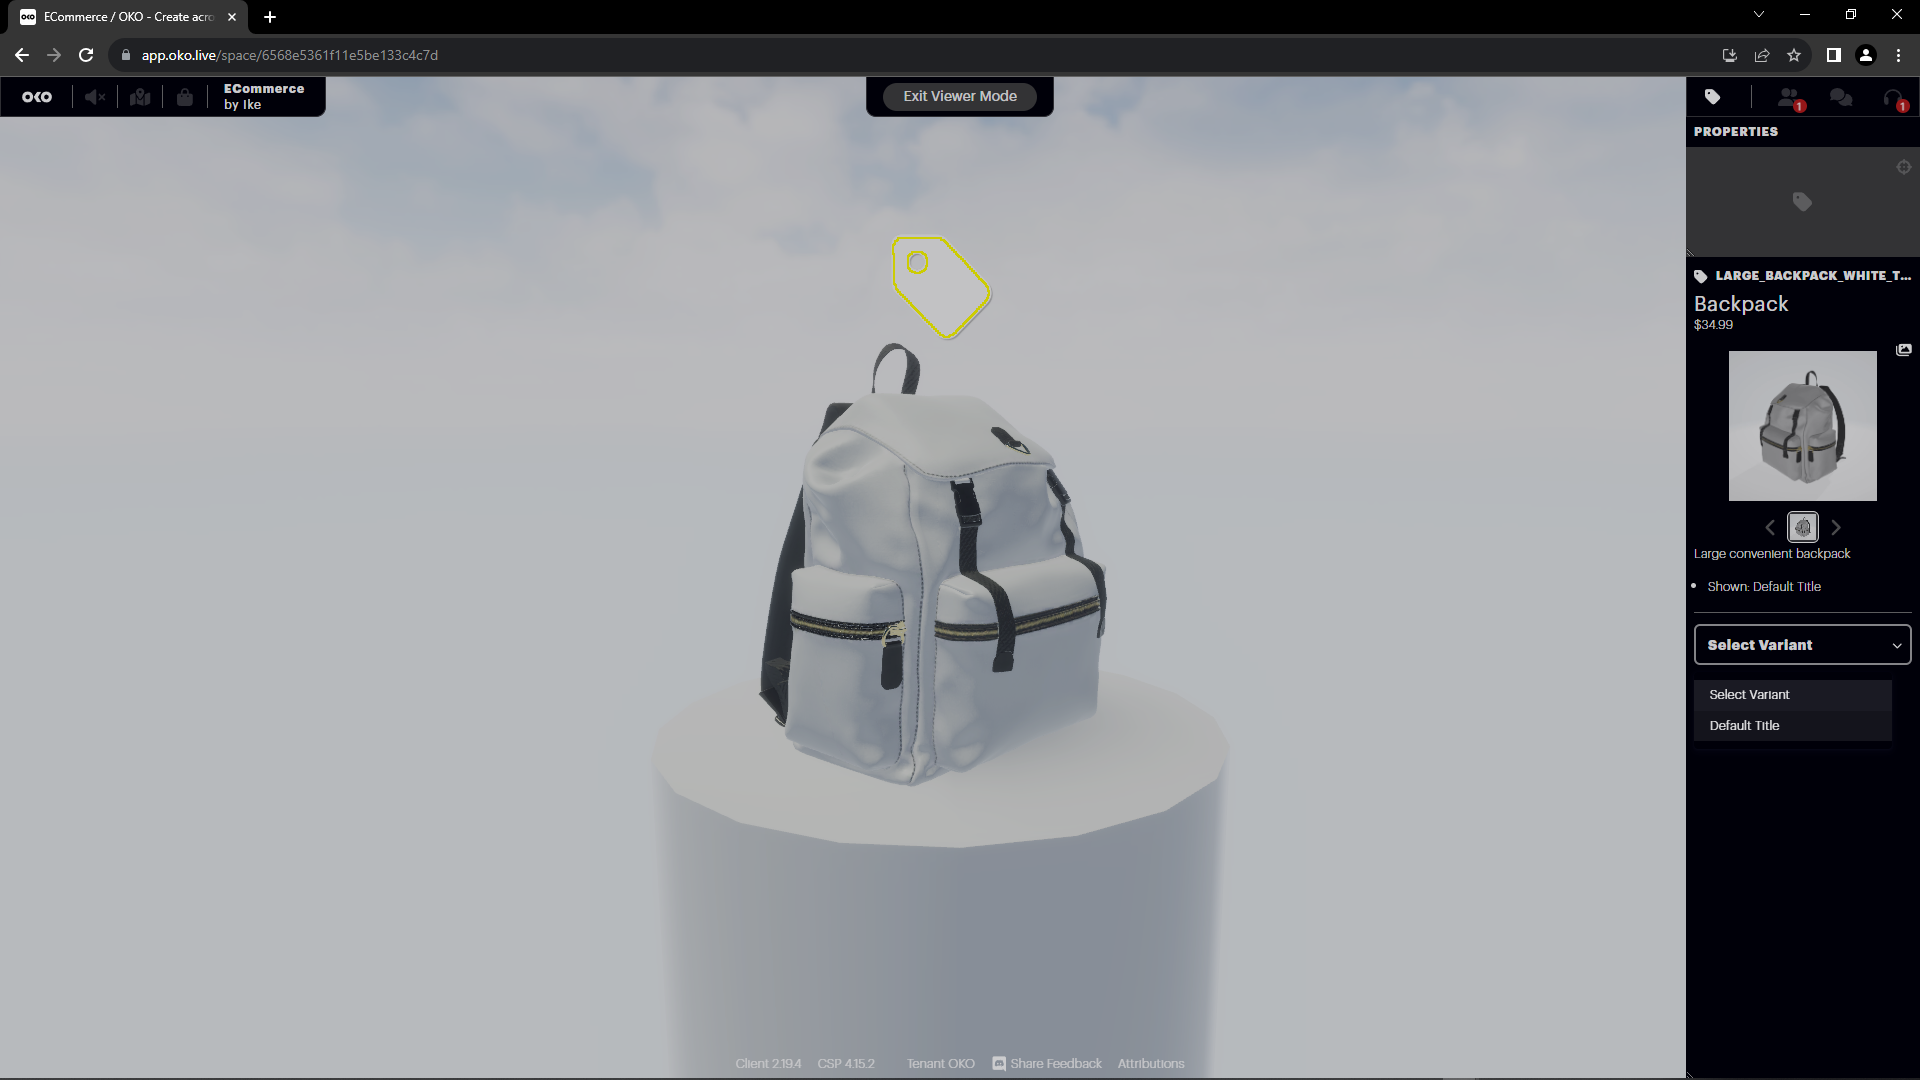
Select the “Default Title” in the Variant to prepare for purchase (this will be simplified in a future release).
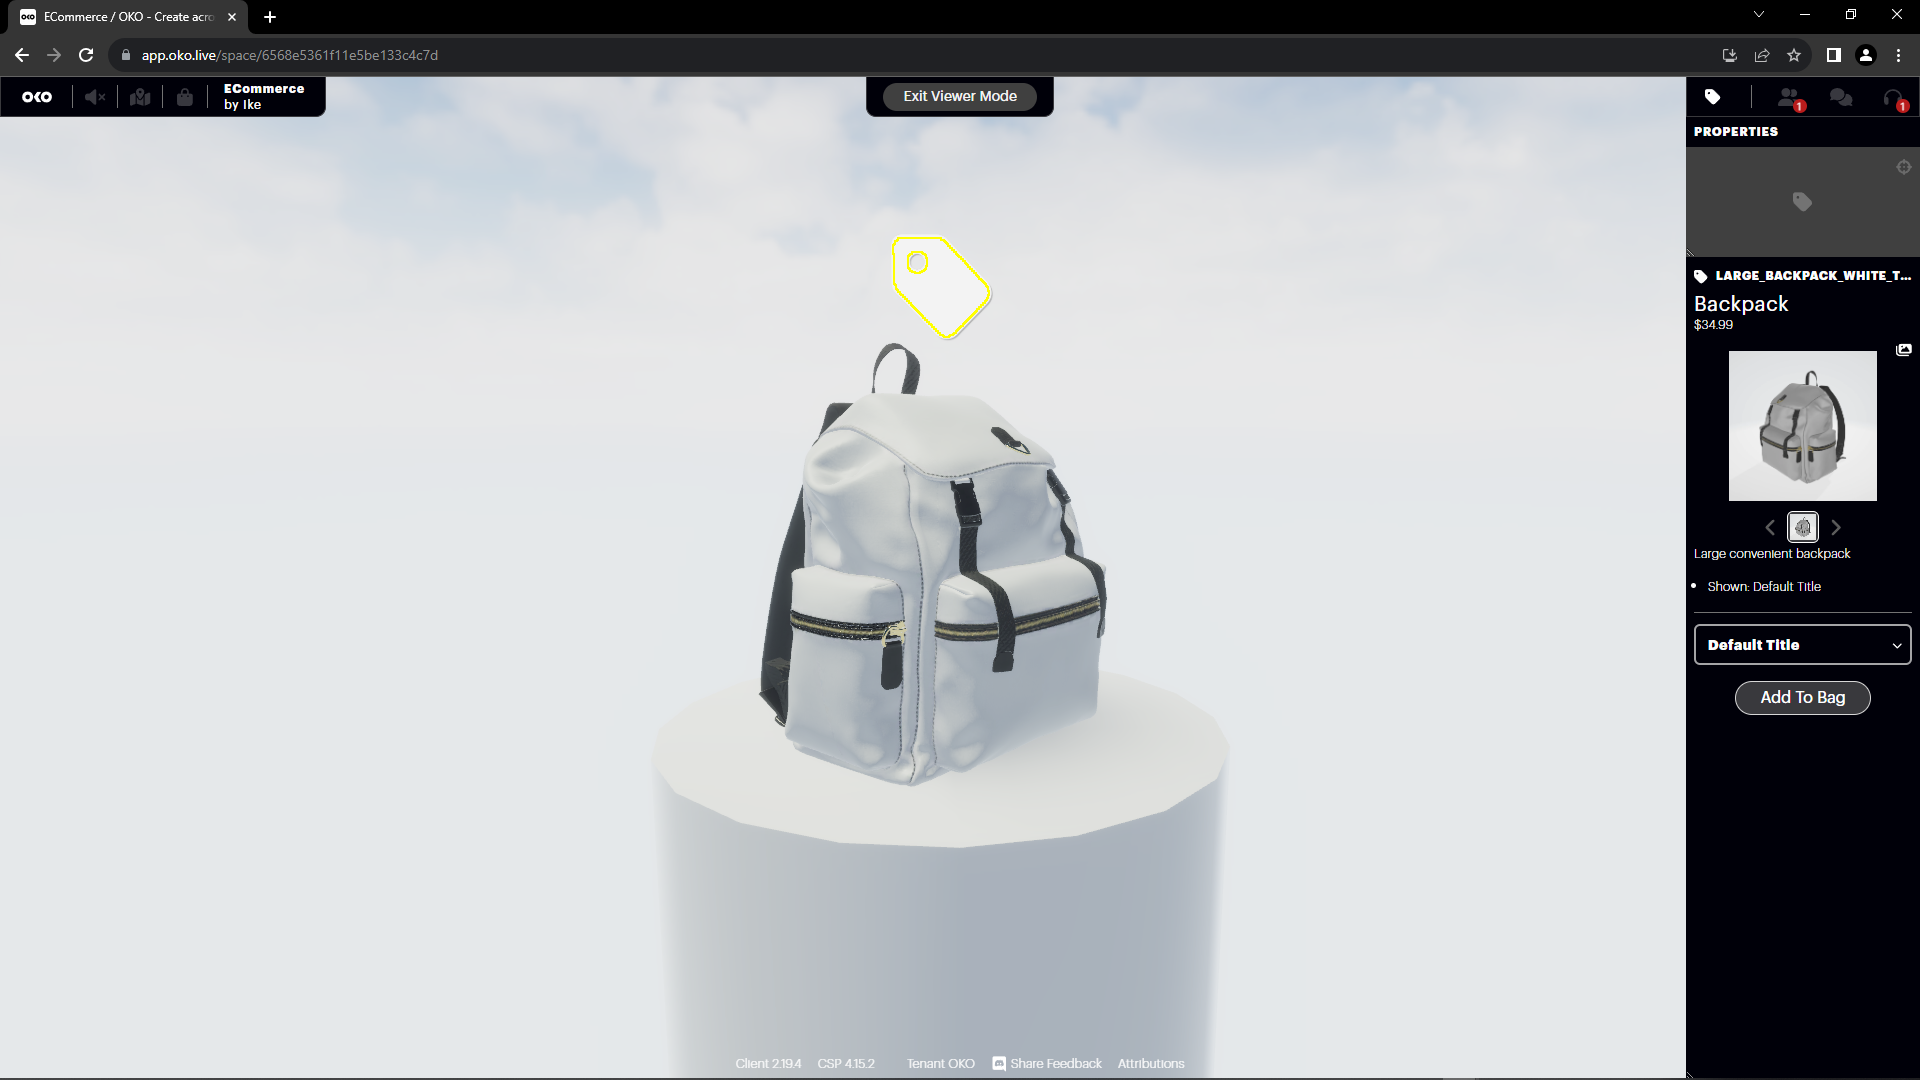
With the “Default Title” selected, add the item to your bag.
Note that the item has been added to your bag.
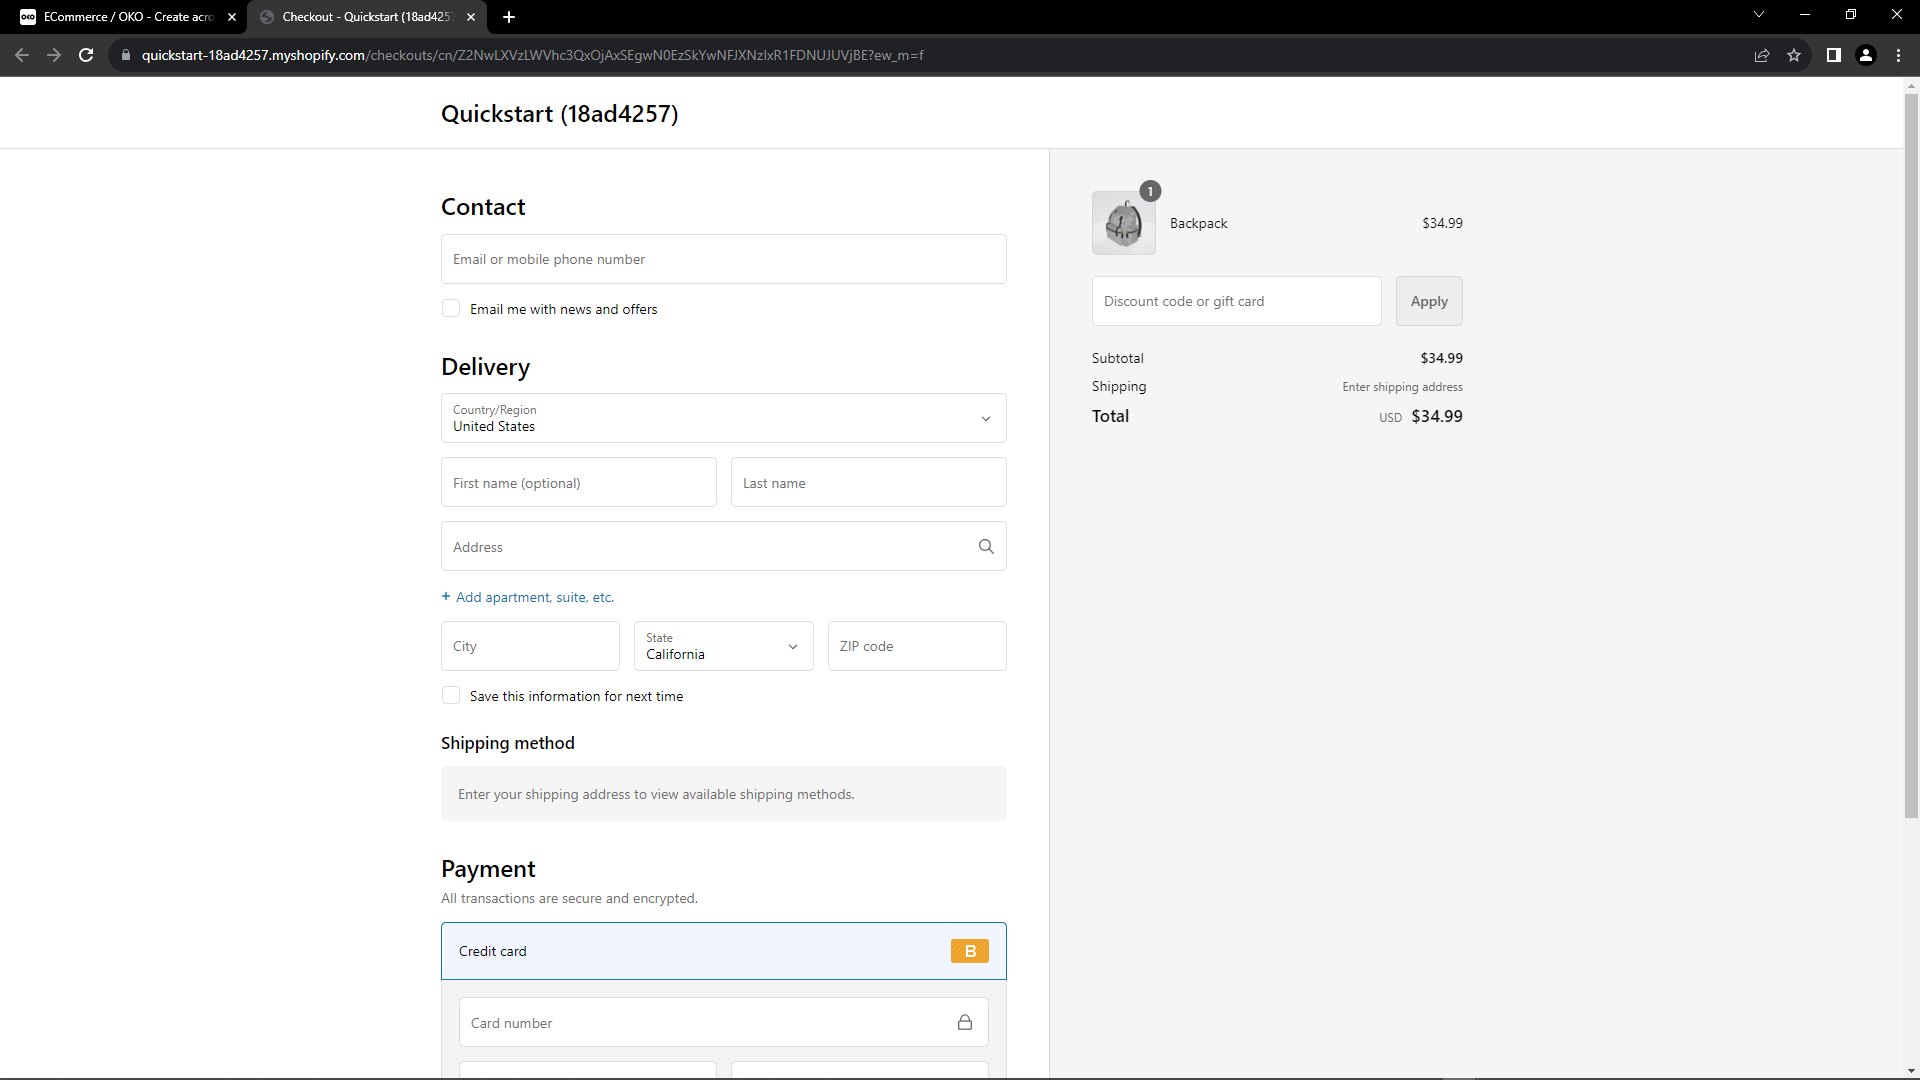
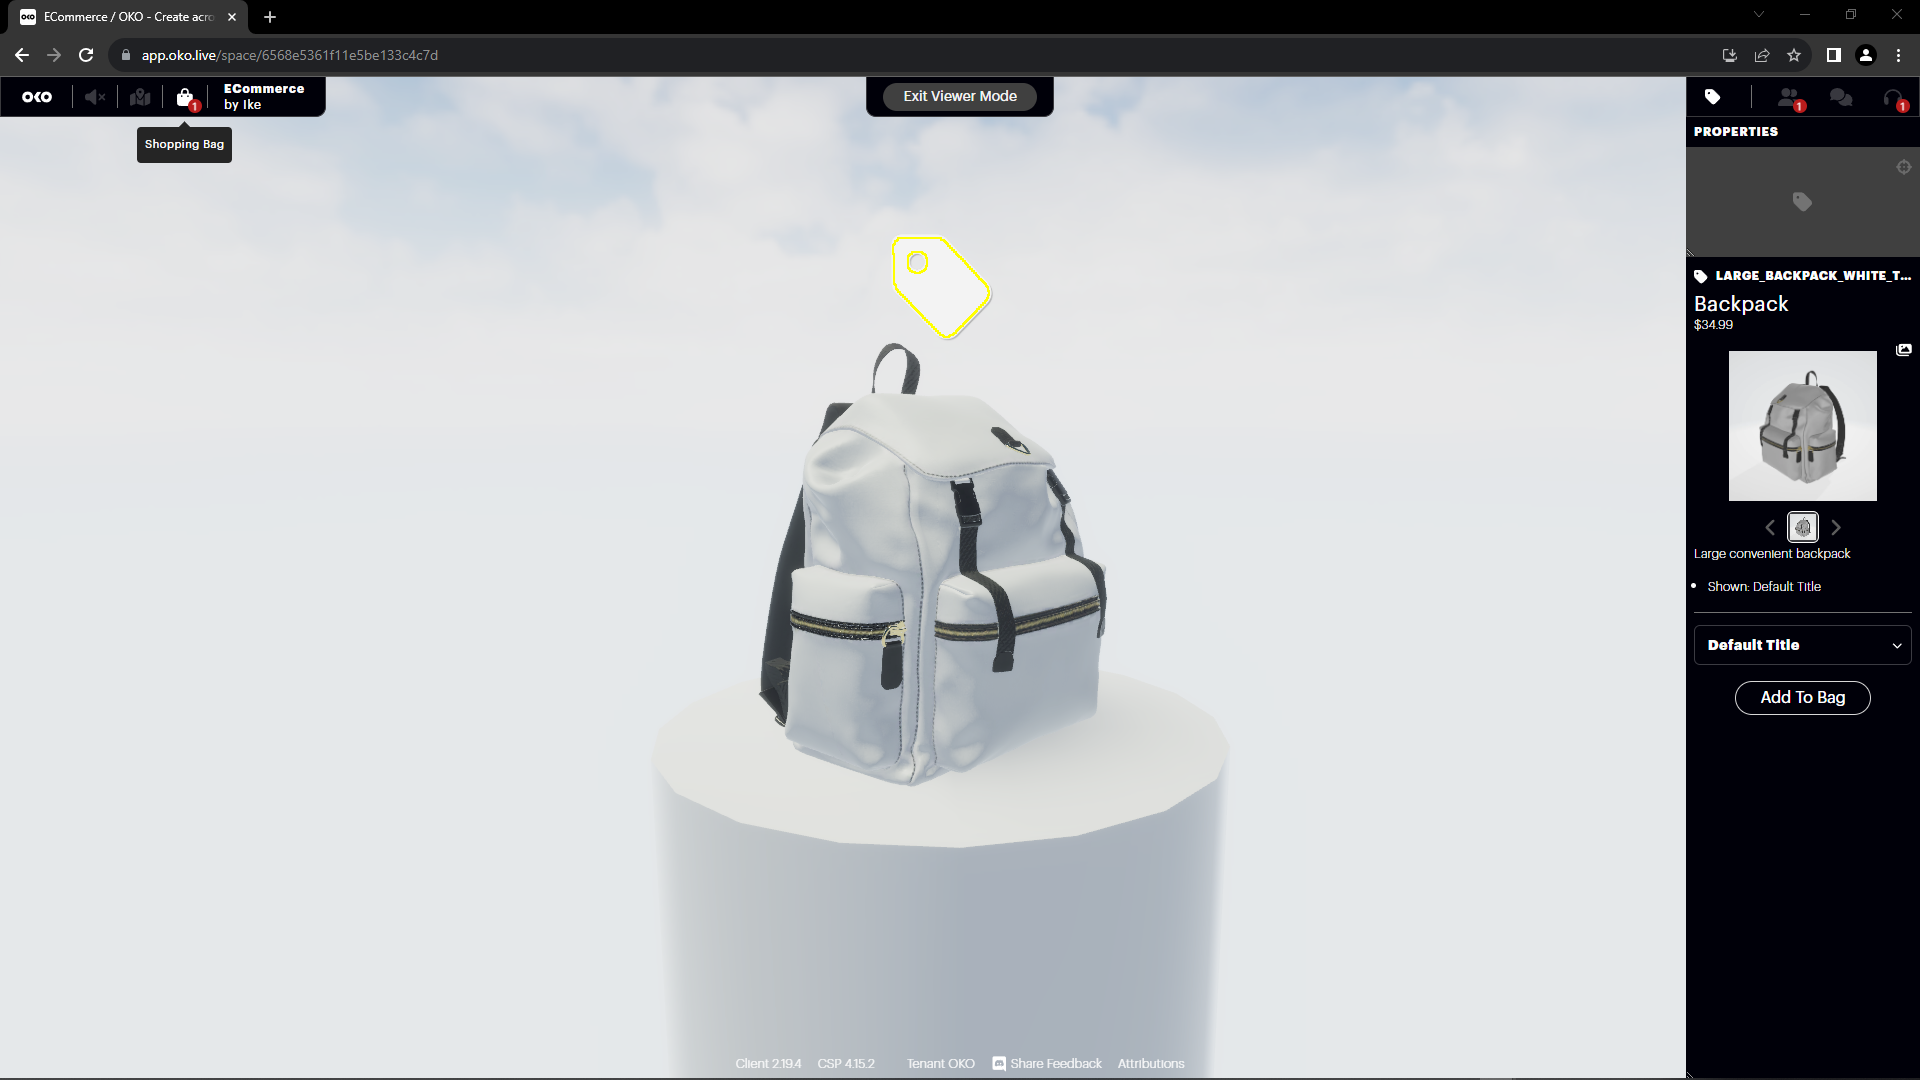
Click on the Shopping Bag icon to go to checkout.
The item is ready to be purchased.