
Creating and using instanced spaces
OKO Web client 2.60.1 CSP 5.20.0
This guide will cover how to create instanced (private) spaces in OKO Web.
Instructions
First, please see the 'Creating and managing spaces' page for detailed information on how to set up an OKO space.
Go to the “Settings Tab” and look for the section titled “Visitor Settings”. Selecting “on” will set up your space as instanced for any non-owner or non-creator visitors.
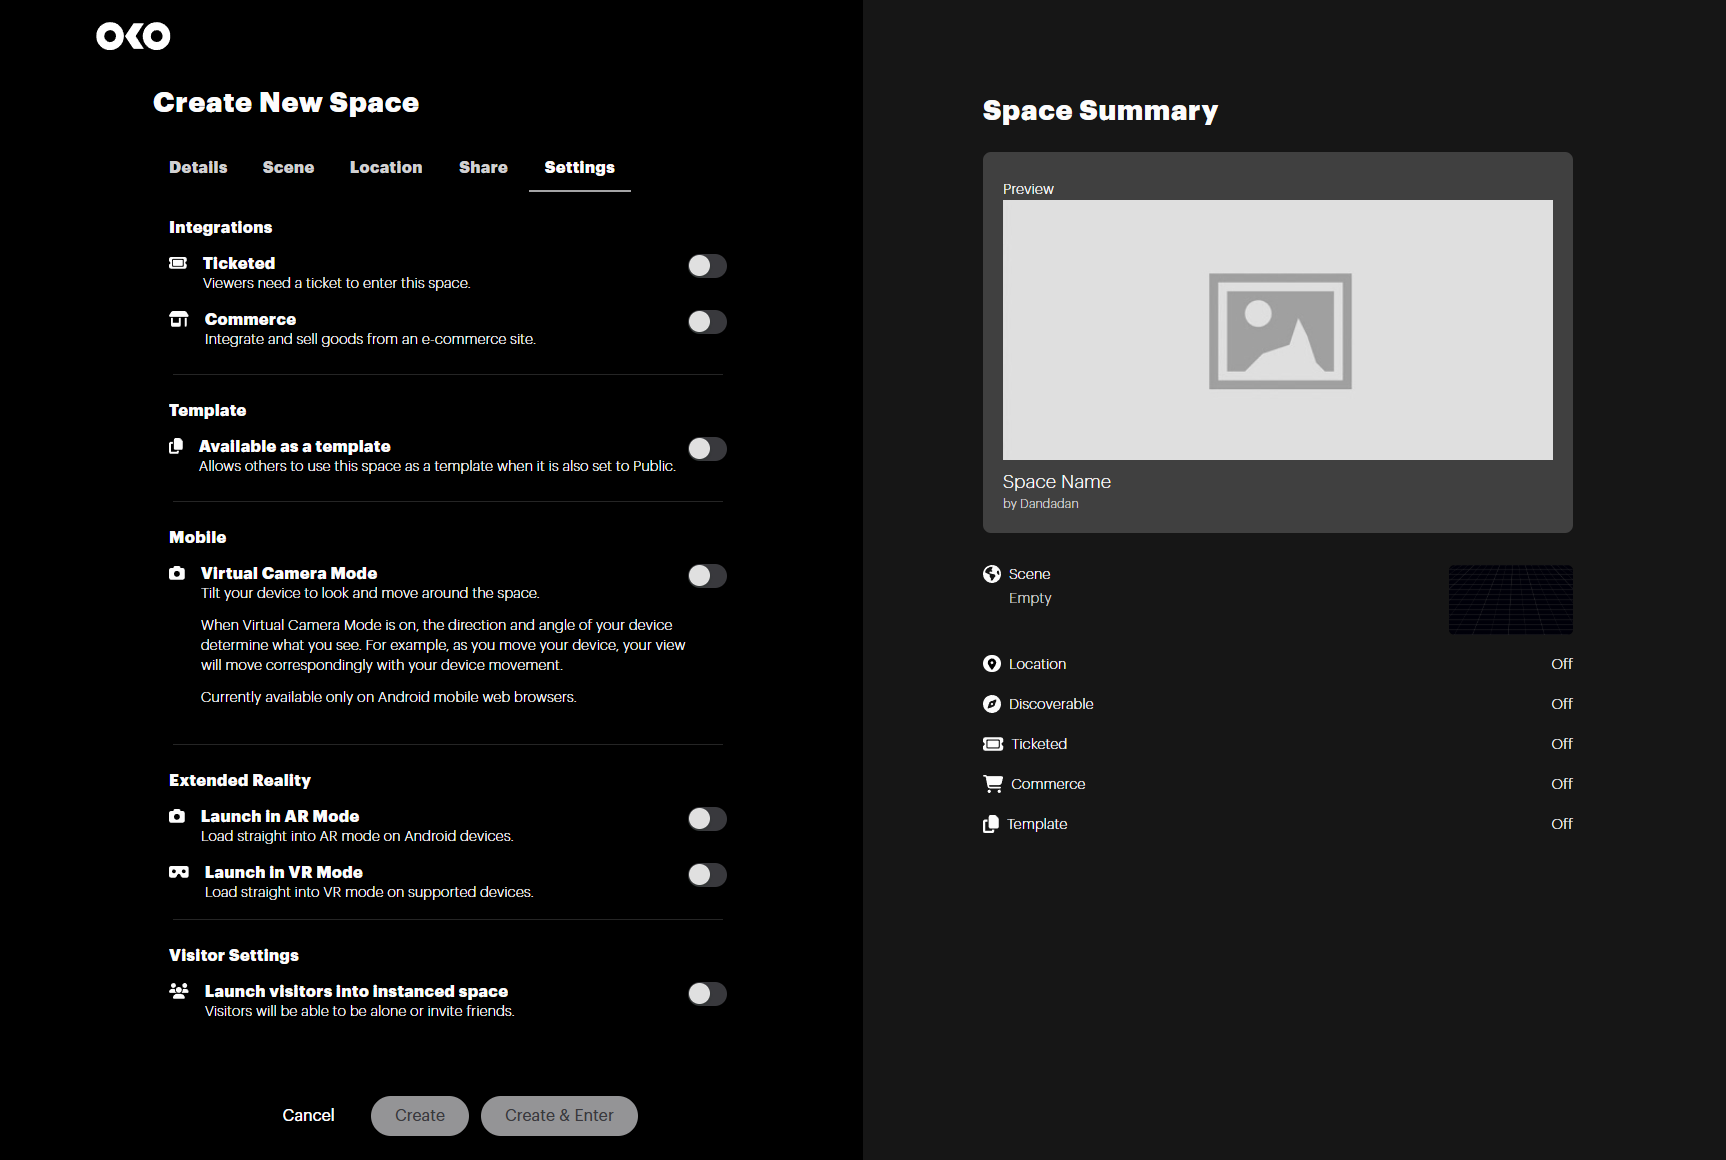
Be sure to click “Create” or “Create & Enter” to finish setting up your space.
Editing a space
You can also change this setting when editing a space that has already been created.
Open the details view for your space and go into “Edit” mode.
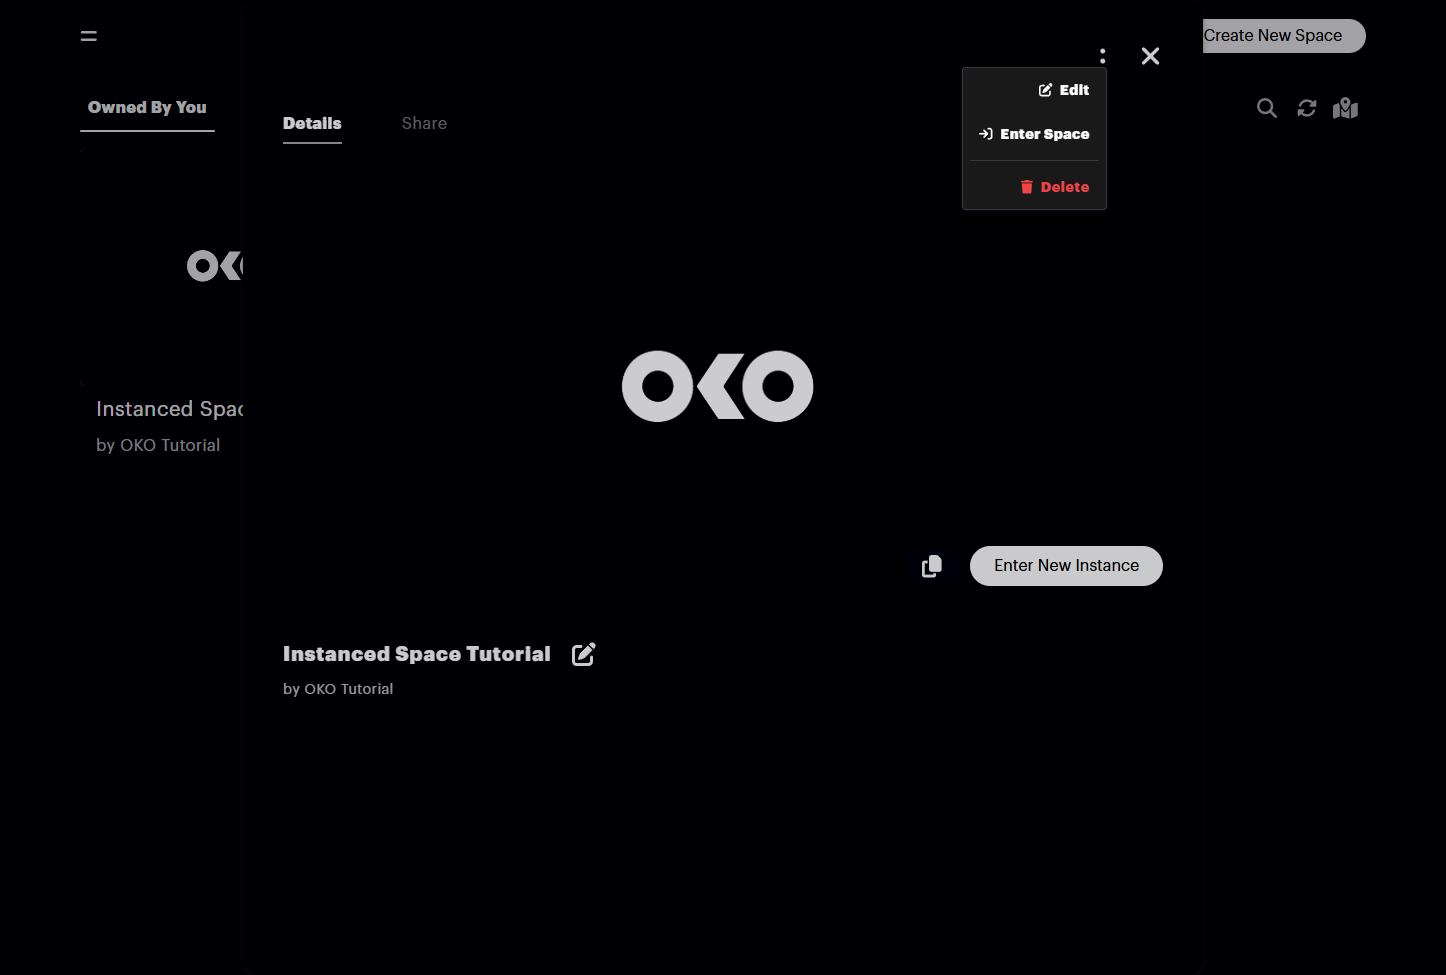
From here, select “Settings”.
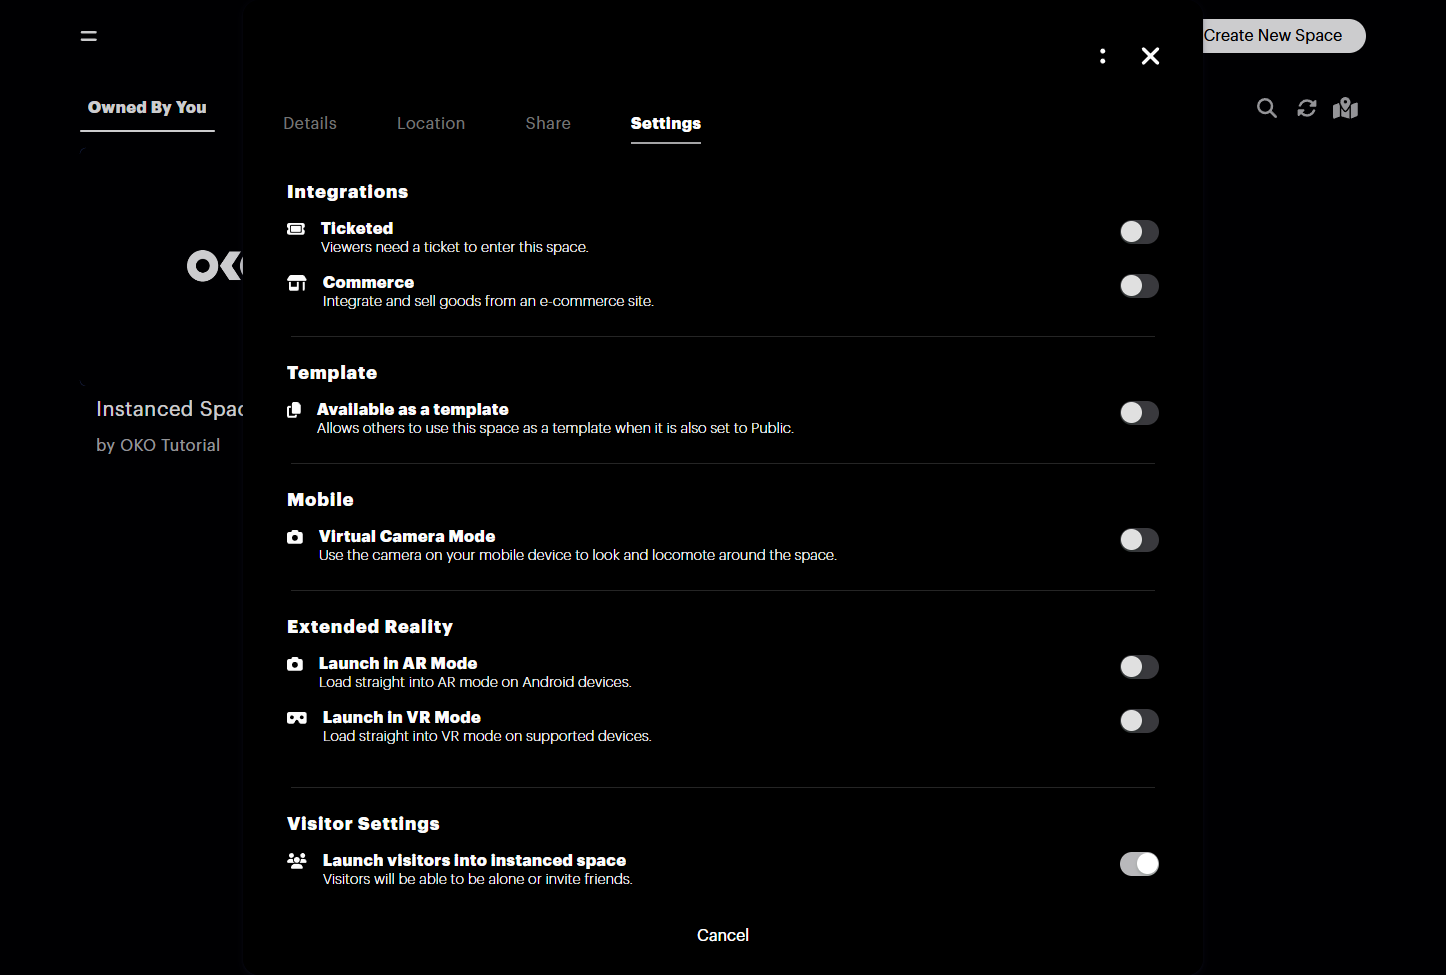
You can now turn “Visitor Settings” on or off. Don’t forget to save your changes!
Tips & notes
Enabling this setting will mean that by default, every uninvited visitor to the space will get an individual instance. They’ll join alone and won’t see other visitors.
This doesn’t mean that they can’t be joined by friends; the user will just need to share the link to their instanced version directly.