Cinematic Cameras
Camera Mode
Camera Mode allows creators to set up and use Cinematic Cameras within a space for professional-quality screenshots, framed shots, and animated camera sequences. Cinematic Cameras provide real-world camera controls, including sensor size, focal length, and aspect ratio, giving you precise control over framing.
While Camera Mode is active, the view switches from the standard player navigation (first or third person) to the perspective of the selected Cinematic Camera, with on-screen overlays showing framing guides and camera information.
Camera Mode supports the following capabilities:
Camera switching: Switch between any Cinematic Camera placed in the space.
Live feedback: Adjust aspect ratio, sensor size, and focal length with live field-of-view feedback.
Clip planes: Control near and far clipping to manage your view distance.
Avatar controls: Toggle avatar visibility and avatar name labels within the camera frame.
High-res capture: Take high-resolution screenshots up to 8 K resolution.
Stylised rendering: Generate stylised renders using the built-in Nodey tool.
Instructions
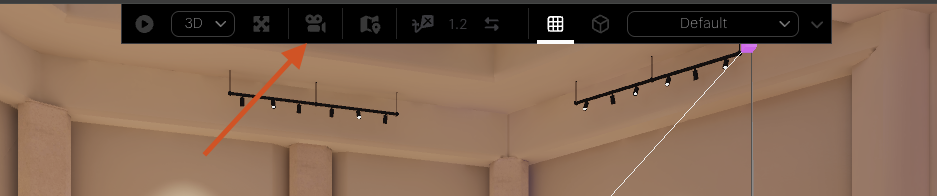
Camera Mode is accessed through the centre toolbar at the top of the space view. The toggle is identified by the movie camera icon.
Entering Camera Mode
To enter Camera Mode, click the Camera Mode icon in the centre toolbar. If one or more Cinematic Cameras exist in the space, the first available camera becomes active, and the view switches to its perspective.
If no Cinematic Cameras exist in the space, a dialog will appear prompting you to create one. Confirming the dialog adds a new Cinematic Camera entity at the current view position with sensible defaults (16:9 aspect, 35mm focal length, f/4, ISO 400).
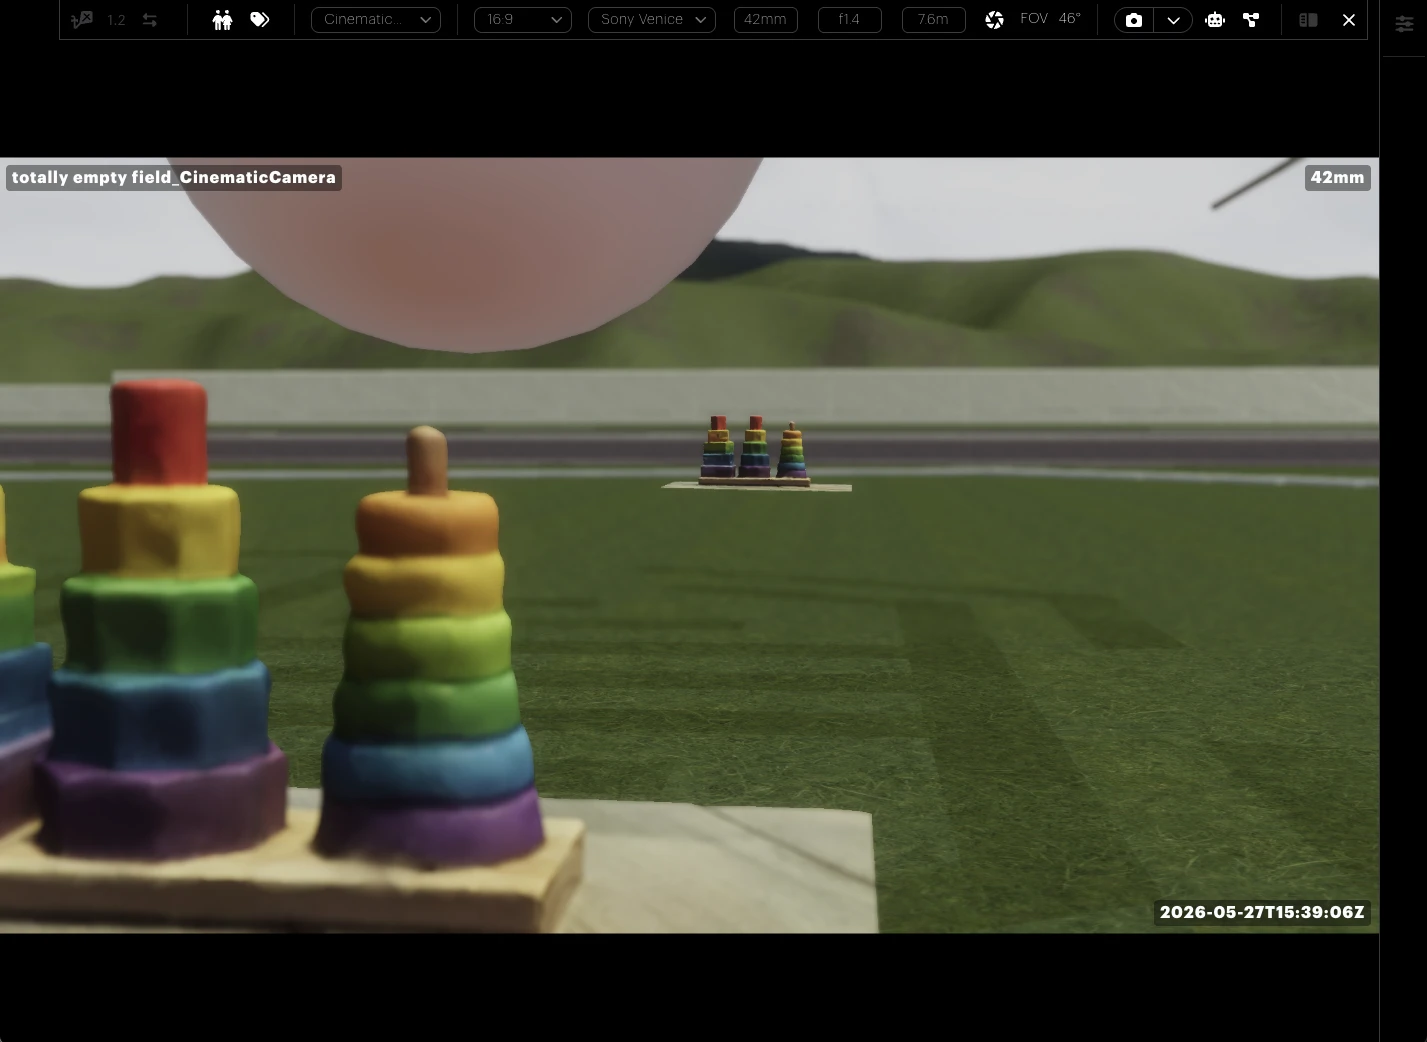
Once Camera Mode is active, the Camera Mode panel appears, exposing all controls for the active camera.
Selecting an active camera
If multiple Cinematic Cameras exist in the space, use the camera selector dropdown at the top of the Camera Mode panel to switch between them. The view updates immediately to the selected camera's perspective.
.webp?inst-v=ba8752e4-2bac-4988-af92-05f1ebc5fe74)
Adjusting camera properties
Property | Range / Options |
|---|---|
Aspect ratio | 16:9, 4:3, 21:9 |
Sensor size | Sony Venice, Red Komodo, ARRI Alexa LF |
Focal length | 14mm – 200mm (live FOV readout) |
Changes are applied to the active camera entity in real time and are visible in the space view immediately.
.webp?inst-v=ba8752e4-2bac-4988-af92-05f1ebc5fe74)
Avatar visibility
Two toggles within the Camera Mode panel control avatar rendering inside the camera frame:
Show avatars: Hides or shows all avatars in the captured view.
Show avatar names: Hides or shows the floating name labels above avatars.
These settings are stored per camera, so different cameras in the same space can have different avatar visibility settings.
.webp?inst-v=ba8752e4-2bac-4988-af92-05f1ebc5fe74)
Capturing screenshots
The Camera Mode panel includes a screenshot capture function. Select the desired resolution (from 1080p up to 8K) and click the capture button. The resulting image uses the exact framing, aspect ratio, and depth of field of the active camera.
The chosen resolution is remembered per camera between sessions.
.webp?inst-v=ba8752e4-2bac-4988-af92-05f1ebc5fe74)
Fly Mode
For steady framing, enable Fly Mode from the centre toolbar before composing your shot. This disables player movement input, preventing accidental key presses from nudging the camera.
Nodey
The Camera Mode panel includes a Nodey button, which opens the node graph editor preloaded with a camera-animation template. Nodey graphs allow you to drive camera position, rotation, and properties over time using a visual node-based interface, enabling cinematic dolly, crane, and orbit moves without scripting.
Click on the expand button at the top right to open the nodey graph in a new window.
.webp?inst-v=ba8752e4-2bac-4988-af92-05f1ebc5fe74)
In addition, you can click the Robot icon to get a pre-made graph, ready for AI restyling the camera output via Nodey.
Exiting Camera Mode
To exit Camera Mode and return to standard player navigation, click the Camera Mode icon in the centre toolbar again. The view returns to the player's first-person or third-person camera as configured in the Navigation Settings panel.
Tips & notes
Full entity status: Cinematic Cameras are full entities in the space and appear in the Hierarchy View. They can be parented, locked, and animated like any other entity.
Entity locking: Use this feature on finished Cinematic Cameras to prevent accidental movement or property changes once a shot has been framed.
Independent preferences: Each Cinematic Camera retains its own avatar visibility and screenshot resolution preferences, so you can prepare multiple cameras for different shot types in the same space and switch between them as needed.
Live field-of-view (FOV) readout: The display updates as you change focal length and sensor size, which is useful for matching real-world camera setups when planning shots that will be composited with live-action footage.