
AI chatbot component
OKO Web Client 4.7.1 - CSP 6.36.0
The AI chatbot component allows you to add conversational AI to your spaces that users interact with via voice. You can customize its behavior to follow your instructions, adding a new layer of interactivity.
The AI chatbot component is only available in spaces owned by pro-tier users.
The AI chatbot is powered by AI; it may make factual mistakes.
Instructions
Setting the API Key
The AI chatbot component uses the Google Gemini API. To use AI chatbots, you must first set a Gemini API key in the OKO integrations settings.
This is done via the in-space settings panel. First, click the Settings icon in the left-hand toolbar and then select the Integrations section. Paste your API key in the Gemini API Key text box. You're now ready to start using the AI chatbot component!
You only need to set the API key once per browser.
.webp?inst-v=ba8752e4-2bac-4988-af92-05f1ebc5fe74)
Creating and configuring an AI chatbot component
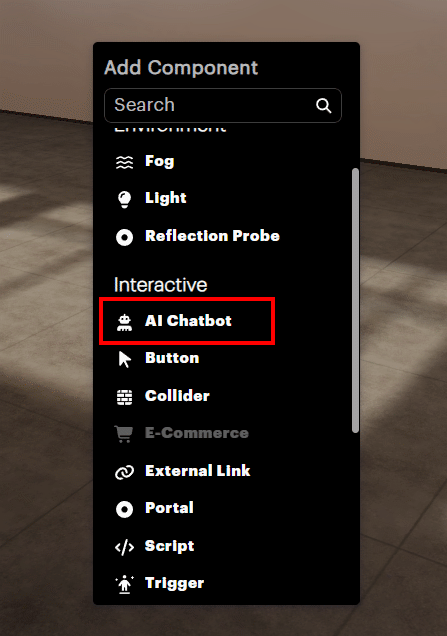
AI chatbot components can be added to the space in the same way you would add any other component in Creator mode. The simplest method is to right-click somewhere in the space and select the chatbot component in the menu. The AI chatbot component is listed in the Interactive section.
If you don’t see the AI chatbot component in the list of available components, this means the space owner is not on the Pro tier.
When the chatbot component is added to the space, you will see a white orb at the component’s location.
.webp?inst-v=ba8752e4-2bac-4988-af92-05f1ebc5fe74)
If you select the chatbot component, you will see the configuration options in the Properties panel on the right-hand side.
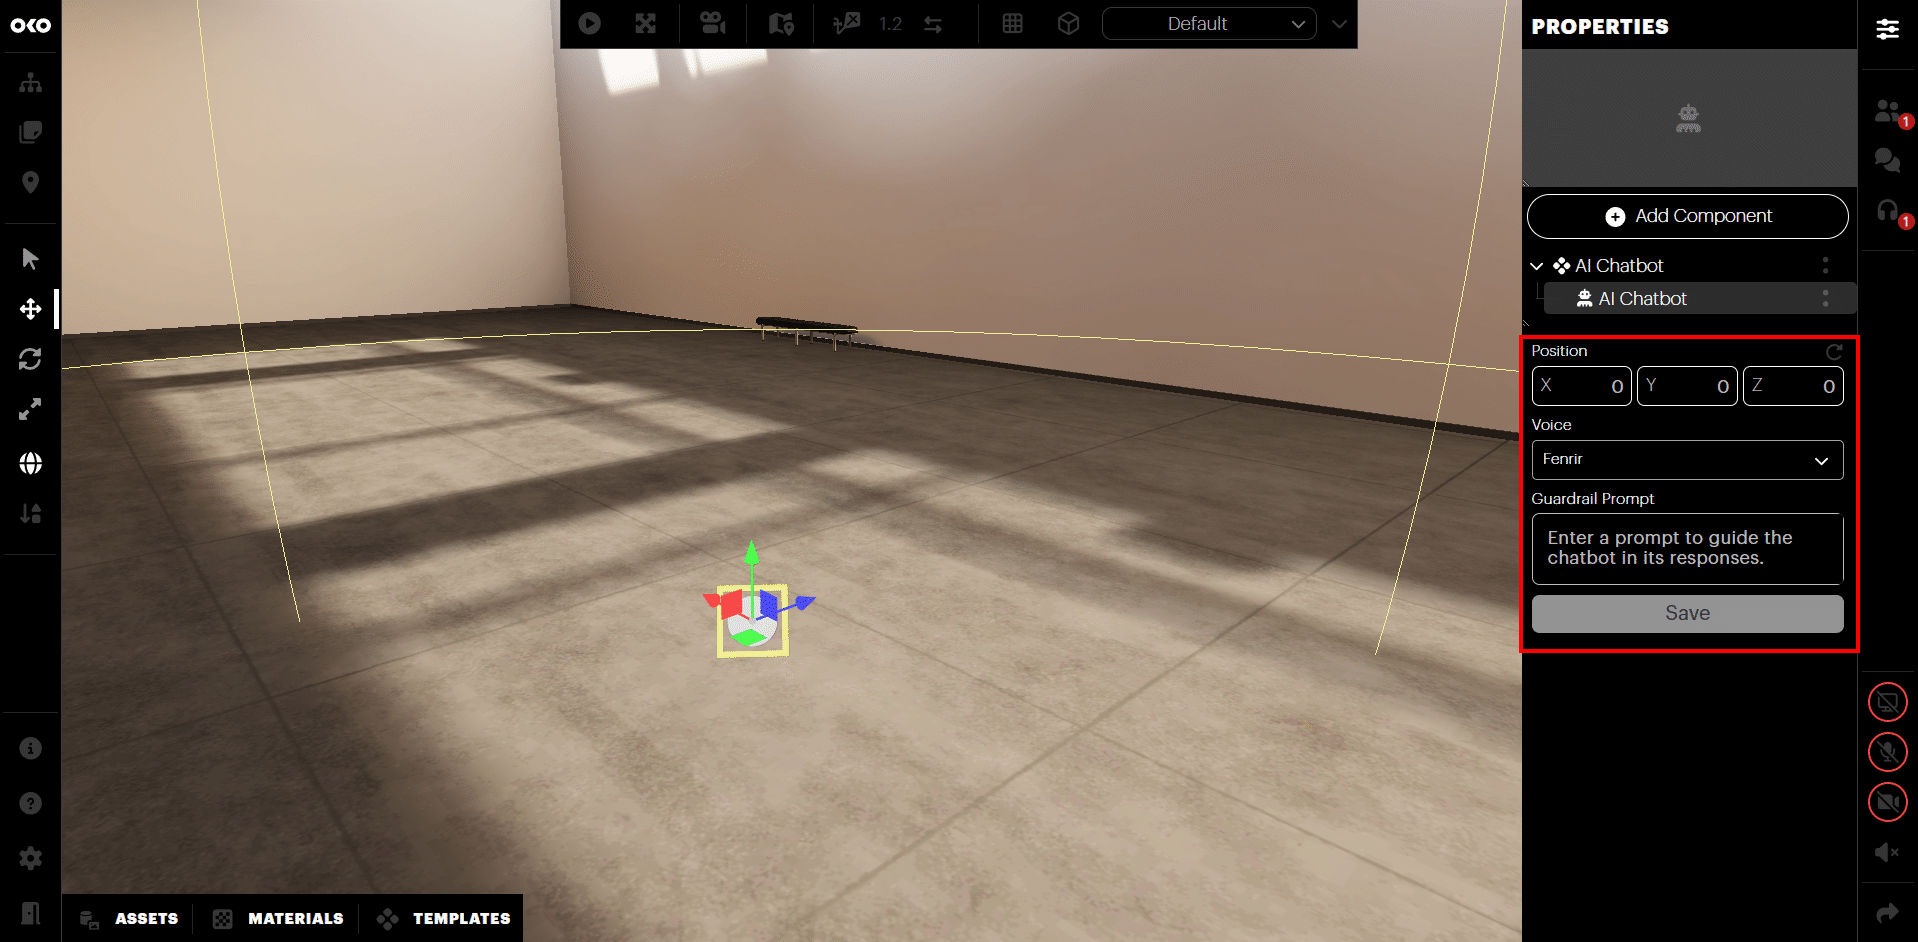
The Voice drop-down allows you to choose from the built-in voice options. Select an option and interact with the chatbot to try it out.
.webp?inst-v=ba8752e4-2bac-4988-af92-05f1ebc5fe74)
The Guardrail Prompt text box allows you to enter a prompt that the AI chatbot will follow. You can give specific instructions to customize the behaviour of the chatbot when users interact with it. Every subsequent interaction will be governed by the instructions in the prompt.
Providing a strong guardrail prompt is essential for the chatbot to perform its role in your space and to give it personality.
Once you have entered or updated your guardrail prompt, be sure to press the Save button. The prompt will take effect on the next interaction with the chatbot.
.webp?inst-v=ba8752e4-2bac-4988-af92-05f1ebc5fe74)
Finally, when you select a chatbot component, you will see a sphere visualization showing its activation radius. This radius is 5M (16ft) in all directions around the component. When users enter the radius, they’ll be able to interact with the chatbot.
.webp?inst-v=ba8752e4-2bac-4988-af92-05f1ebc5fe74)
Interacting with an AI chatbot component
When users in the space (either viewers or creators) get close enough and enter the component’s activation radius, they’ll be able to converse with the chatbot.
Make sure you’ve enabled your microphone via the in-space controls before trying to interact with the AI chatbot. If it's not enabled, a notification will be displayed when you enter the component’s activation radius.
.webp?inst-v=ba8752e4-2bac-4988-af92-05f1ebc5fe74)
As you enter the activation radius, you will see the chatbot representation move up to indicate it's listening and ready for you to speak.
.webp?inst-v=ba8752e4-2bac-4988-af92-05f1ebc5fe74)
When you have spoken to the chatbot, its animation will change to indicate it's processing your input.
.webp?inst-v=ba8752e4-2bac-4988-af92-05f1ebc5fe74)
Once the chatbot has a response, it will speak back to you. The animation will change again to indicate it’s talking.
.webp?inst-v=ba8752e4-2bac-4988-af92-05f1ebc5fe74)
All users within the chatbot’s radius will be able to hear your conversation with it.